Autonomous Reservation Flow of Individual Courses for Corporate Students
It is possible to enable the Autonomous Booking Flow for Corporate Orders so that the Student can book their course schedule independently with the possibility of acceptance by the Secretariat.
The flow is structured on the basis of these 6 steps main ones:
- Creation of Corporate Courses
- Enabling Student Web Accounts
- Welcome Email (Optional)
- Independent Course Planning
- Confirmation of time reservation by the Secretariat
- Sending Confirmation Communication to Students (Optional)
Here is a complete outline on the process:
Click the image to enlarge it.
![]() Setting automatically performed by ScuolaSemplice
Setting automatically performed by ScuolaSemplice
![]() Automatism to be manually configured on ScuolaSemplice
Automatism to be manually configured on ScuolaSemplice
Note: The configuration of automations for communications will be addressed at the end of the article.
-
Enabling Autonomous Student Reservation.
Navigate to Configuration → Settings → Settings related to Tutors and Students and activate the checkmark Allow users to schedule their own individual lessons:

-
Assignment of Teachers to the Company and their hourly availabilities
Navigate to Master Data → Client Companies and click on the Company of interest. From the Company tab under Assigned Teachers enter the Teacher who will be available to book Courses and click on the + icon:

Repeat the operation for all Teachers desired:

To set the hourly availability of Teachers simply click on customize schedule:
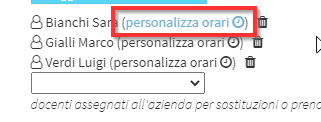
The screen that opens is as follows:

To indicate the availability of the Lecturer you can click the green/red buttons next to the day or the time slot of interest or click and hold down with the left mouse button and drag to indicate availability:

Note: This availability does not replace the general availability set in the Teacher's master data.. It is necessary to first edit the latter and then set the Corporate one that can match the one in the master data.
-
Creation of the Corporate Order
Note: To create the Company order you must first create a company.
In Anagrafications → Client Companies, click the Name of the Company of interest on which you want to create the Company order and Courses.
From here navigate to the tab Purchase Orders and then Enter purchase order:

The screen of the order creation is as follows:

It is necessary to enter the number of individual Students you wish to enroll and the Subject of reference. Finally, click on the green button Enter Purchase Order.:

-
Uploading Pre-registrations
Now navigate to Education → Pre-enrollment and select the Company of reference e the purchase order just created:

From the following screen you can Pre-enroll Students who are already associated with the Company:
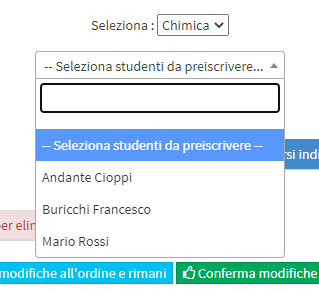
Or upload a list of Students from Excel File via the Upload List of Students button e Download Blank Template:
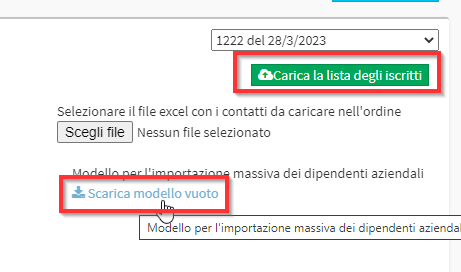
Once you have compiled the File you will need to reload it by clicking on Choose File:
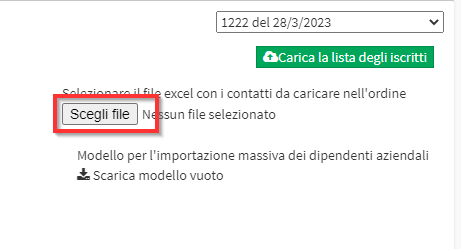
The following should be chosen the Students to be pre-enrolled and then clicked the button Confirm changes in the order:

Now by selecting the Company you will be able to Massively start individual courses by setting their characteristics:

In the notice that appears indicate that you want to select all courses:
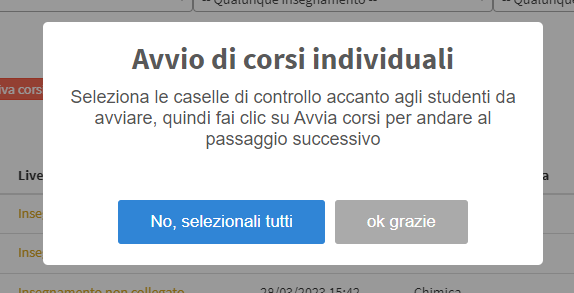
Selecting all Students via the corresponding checkboxes will configure all individual courses together:

The items to be completed (which will affect all selected courses) are as follows:
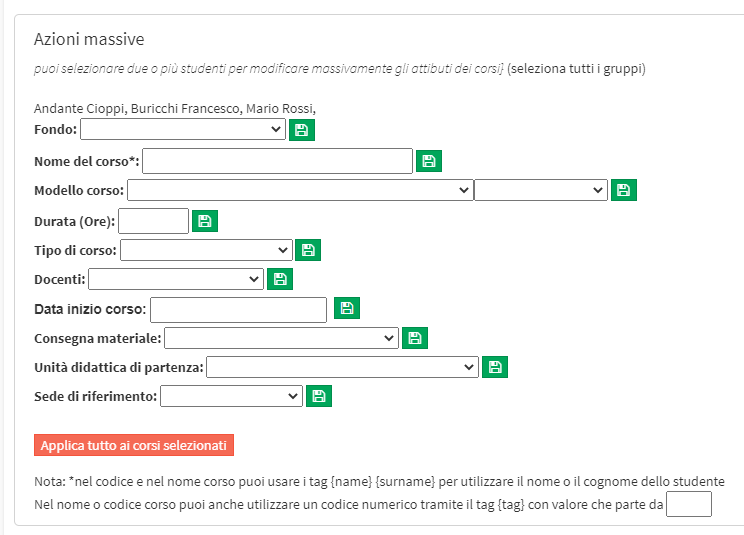
CAUTION: To save the changes correctly, you must fill in a field and immediately click the green disk-shaped button to save the configuration ![]()
CAUTION 2: You do not need to click in the "Apply All to Selected Courses" button since the course information has already been entered by clicking in the green disc-shaped button
- Fund: For funded courses select the Fund (here is the complete guide to the Funds)
- Nome del corso*: Il nome del corso. E’ possibile usare anche le variabili {name} e {surname} – (Campo Obbligatorio)
- Course Template*: The course template set as an Enterprise course - (Required Field)
- Duration (Hours): The duration in hours of the course.
- Course type: Indicate the type of course
- Lecturers: Leave blank, the first available Lecturer will be used
- Course Start Date*: Indicate course start date - (Required Field)
- Material delivery: Leave blank
- Beginning teaching unit: Setting up a teaching unit starting point
- Venue of reference*: The venue - (Required Field)
Compilation example:
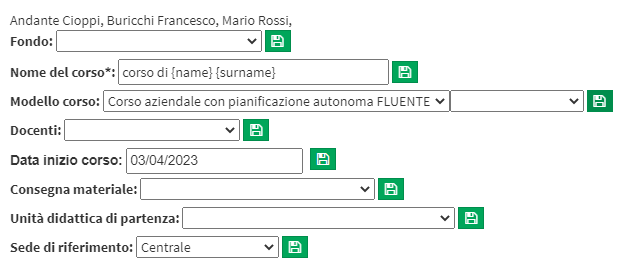
When the process is finished, you can verify the completeness of the data by clicking the red button Verify completeness of information:
![]()
If the insertion has been done correctly will appear this message:
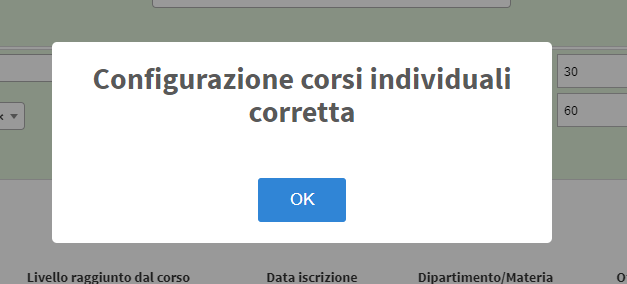
All that remains is to. Complete the activation of the courses:
![]()
Confirming the procedure the courses will be created:
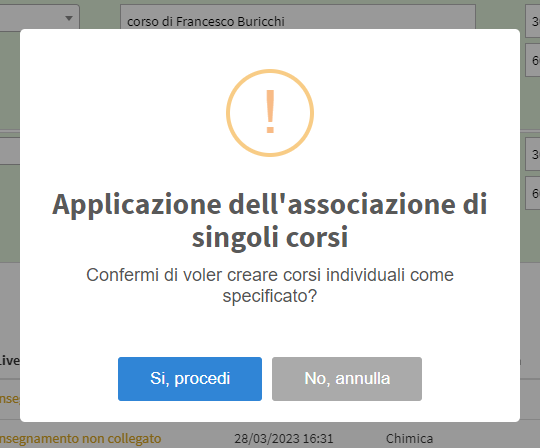
-
Independent Student Reservation
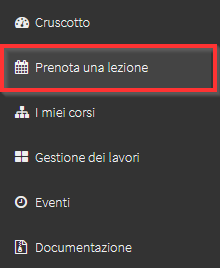
The enrolled Student, from his Web account (currently from App this operation cannot be done), can navigate to the section Book a Lesson:
Where he can view the weekly calendar and decide when to hold classes, he can do so by holding down the left mouse button (or double-clicking) and dragging the class to the time he prefers:
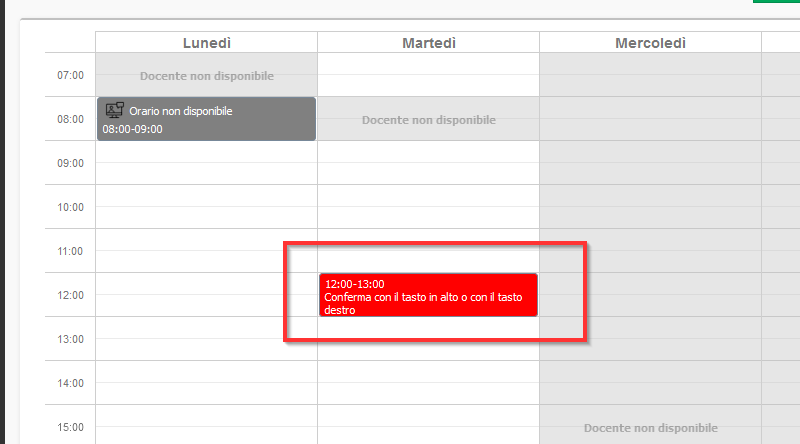
To confirm your choice, simply click in the green button Confirm the schedule:

Note: The first available Teacher in the selected time slot will be selected.
When the reservation is completed, a message reminding the Student that it will be the Secretariat to confirm the time:
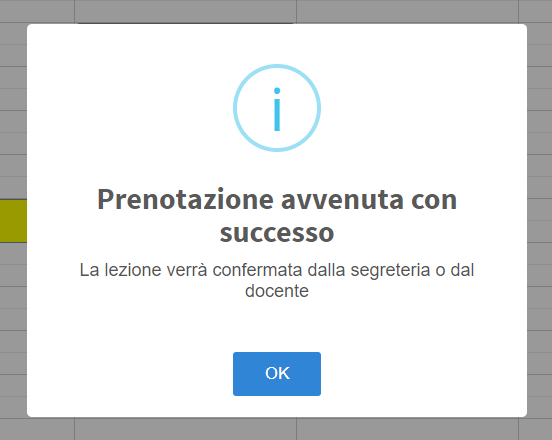
ATTENZIONE! Le lezioni verranno pianificate nelle aule in base alla sede assegnata nella preiscrizione, se la sede è esterna, sarà essa stessa l’aula di svolgimento altrimenti il sistema verificherà tutte le aule della sede con il flag “Prenotabile per lezioni” e verificando eventuali schedulazioni future nella fascia oraria richiesta dallo studente, andrà a selezionare la prima che sarà libera
-
Confirmation of the Secretariat
To confirm the Course, the Secretariat will simply navigate to Didactics → Individual Courses and in the Course sheet of interest click the green tick Activate and make visible:
From this point on, the Course is ready
-
Automation management
To make the process smoother and clearer for enrolled Students, it is possible to create automations automations so that communications are sent to Students based on the progress of the process.
Two automations in particular are recommended:
- Welcome email and invitation to course programming
- Sending notification of confirmation of scheduled time
To create an automation navigate to Settings → Automations and click the green button in the upper right corner Add:

Welcome email and invitation to course programming
La Welcome email will need to be so created:
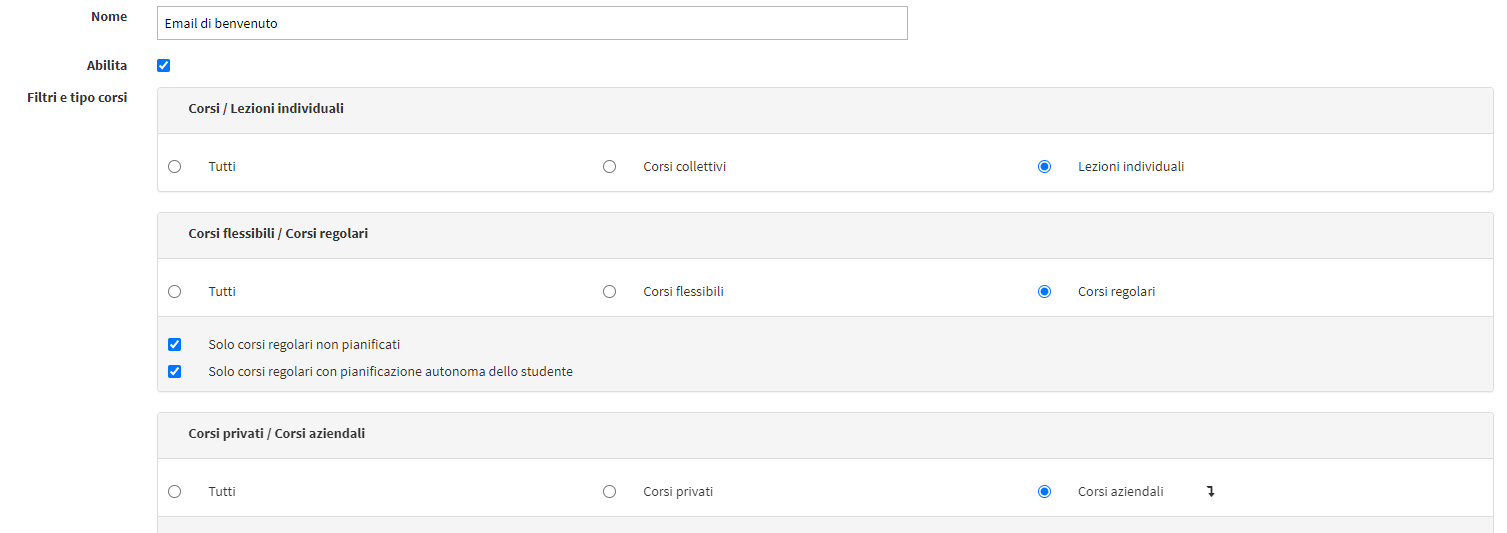
- Courses: Individual Lessons
- Flexible courses/regular courses: Regular courses
- Only unplanned courses: To be checked
- Only regular courses with student independent planning: To be checked
- Private courses / Corporate courses: Corporate courses (select the company or companies involved in automation)
Note: This automation will be sent ONLY to those who have not yet planned their course.
In the part on the Recipients it will be possible to select the figures involved in automation, in this case the Students:
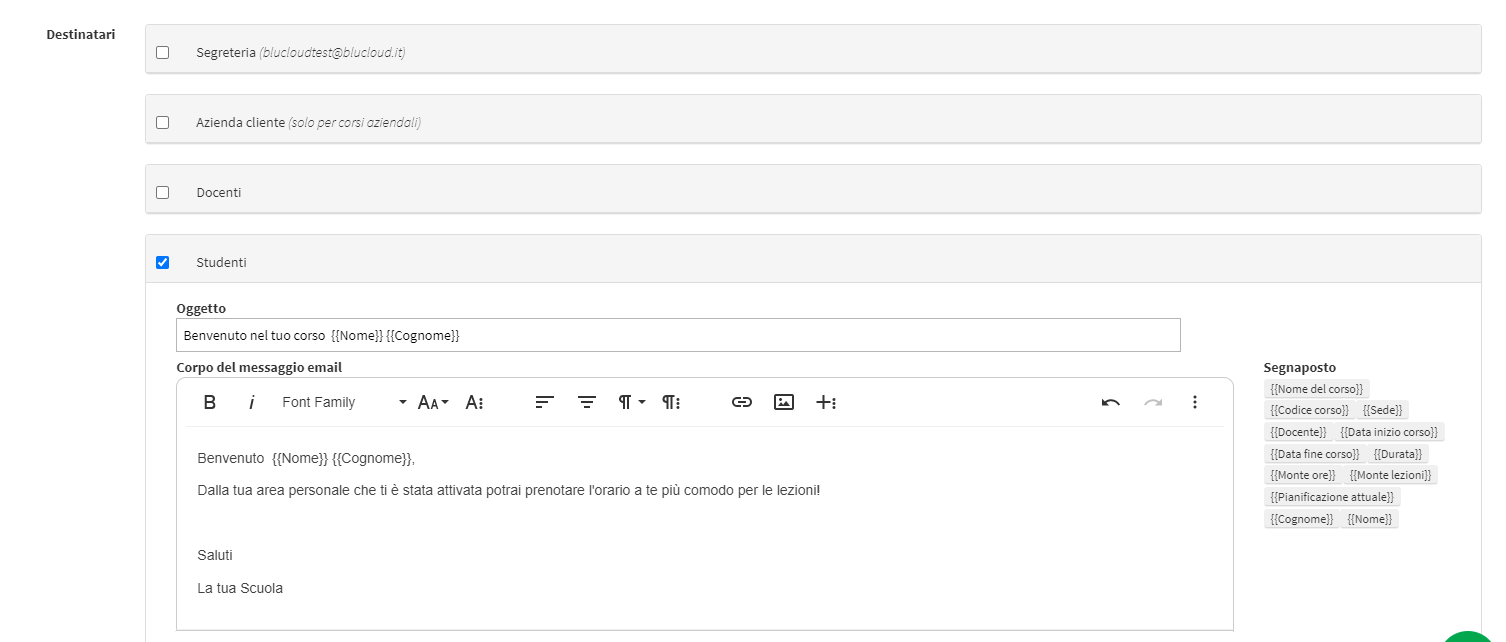
In the area Scheduled notification sending day decide how many days before of the start of the Course remind Students to book their classes:

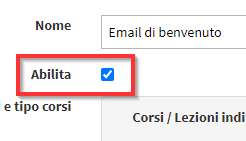
Once configuration is complete, check to enable automation at the top of the page:
And then Confirm its creation:

Sending Email confirmation of scheduled time
The email confirming the time scheduled can be created like this:
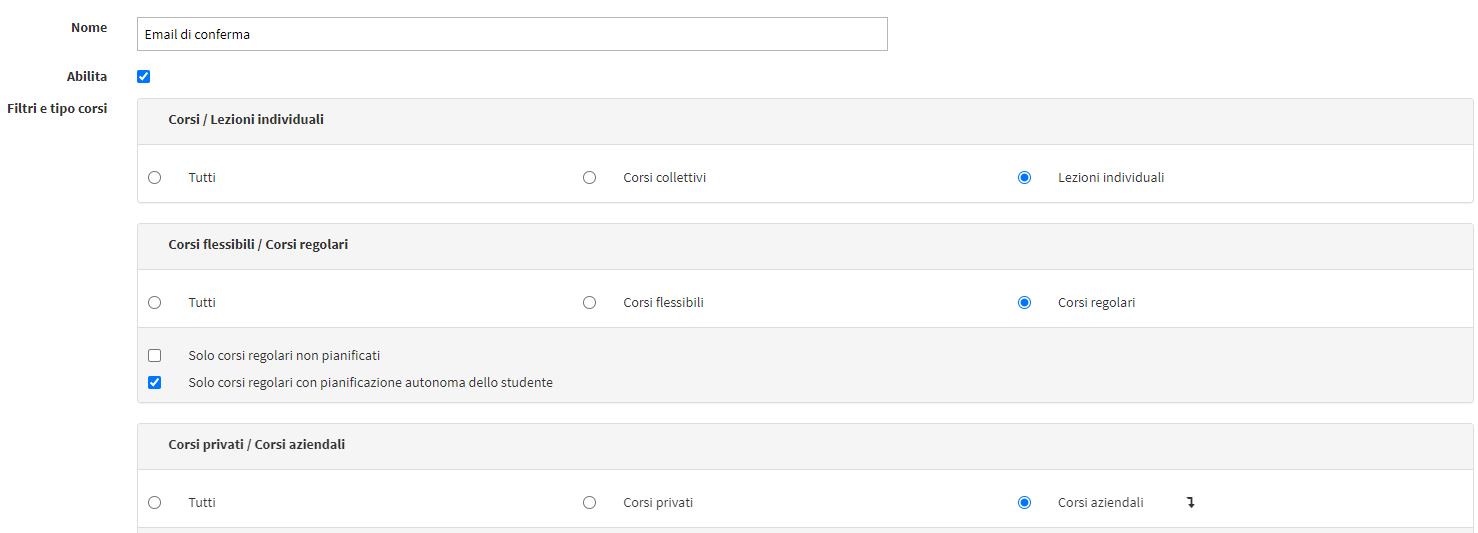
- Courses: Individual Lessons
- Flexible courses/regular courses: Regular courses
- Only unplanned courses: Do not check
- Only regular courses with student independent planning: To be checked
- Private courses / Corporate courses: Corporate courses (select the company or companies involved in automation)
Note: This automation will be sent ONLY to those who have planned their own course.
In the part on the Recipients it will be possible to select the figures involved in automation, in this case the Students:
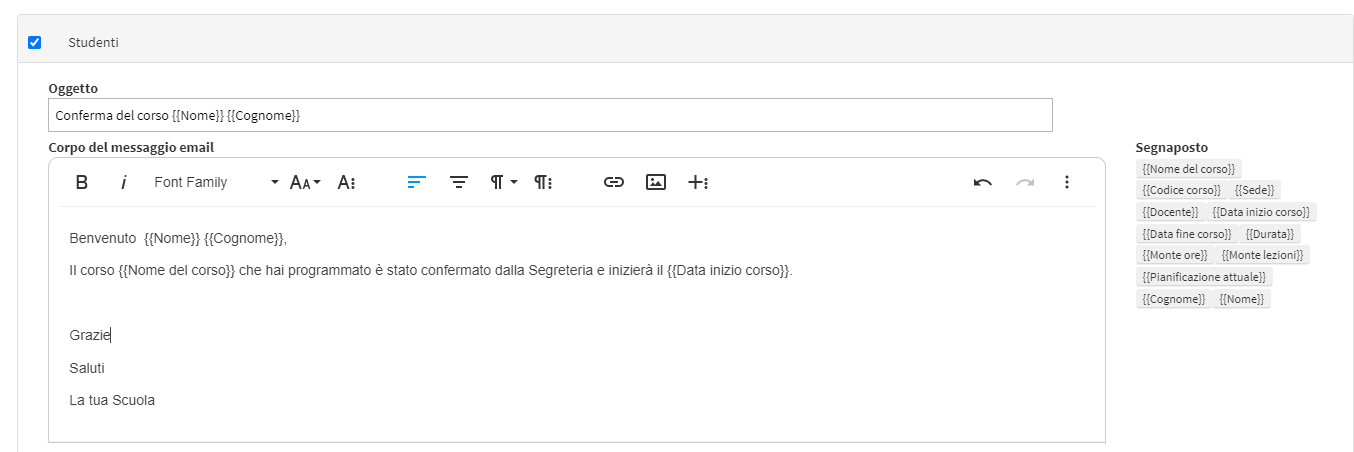
In the area Scheduled notification sending day decide how many days before of the start of the Course to send confirmation of their course:

Once configuration is complete, check to enable automation at the top of the page:

And then Confirm its creation:

