Configuring predefined installment plans for cumulative bidding
If you wish to link one or more predefined installment plans to the cumulative offer, which would go into splitting the annual cost of the offer, thus with installment amounts and maturity dates always the same for all students who will purchase the offer, you will first need to create the cost of the offer through the goods/services, which will then be linked later to the offer you create.
Navigate to the Configuration → Goods and Services section and click the button at the top right "Add item for sale".
At this point it will be sufficient to fill in the following fields:
- Item Name*: enter the name of the cost related to the cumulative offer (e.g., "Individual Instrument + Collective Cost")
- Price (gross)*: Indicate the total price of the cumulative offer, which will then be divided into installments. Then indicate the standard price net of any surcharges due to installments
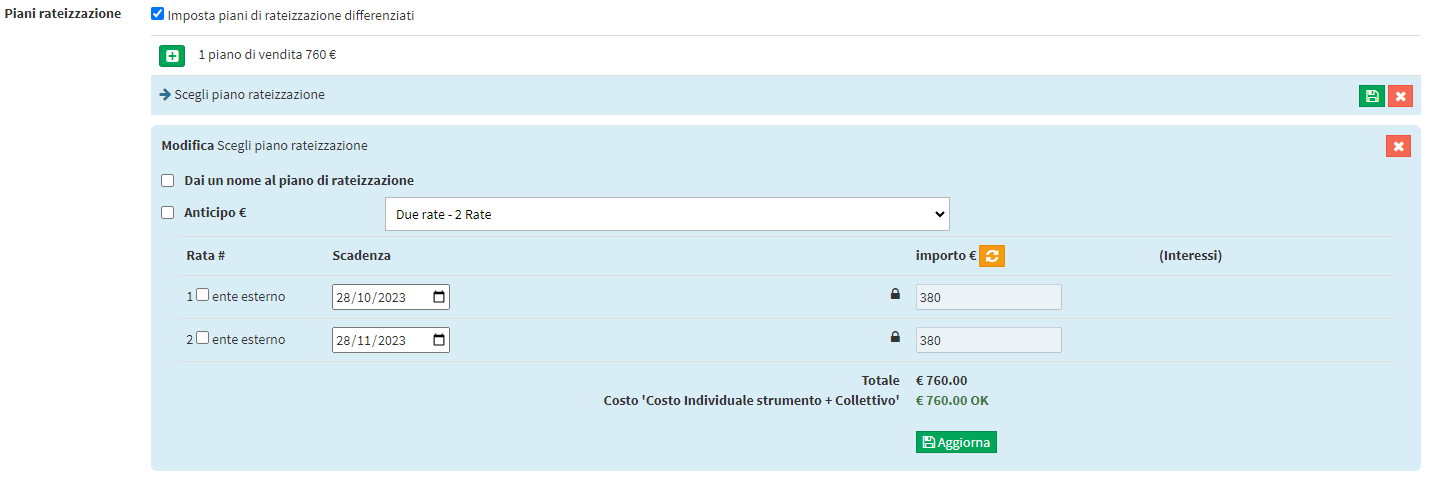
- Installment plans: tick to activate the association of one or more installment plans
Once ticked, click the green + button to associate an installment plan and specify from the light blue box below:- Name the installment plan: optionally indicate an installment plan name to serve as an alias instead of the one entered when creating the installment plan from system settings
- Advance: tick if you want to specify a fixed amount to be paid as an advance, outside of what will later be accrued
- dropdown menu: choose the installment plan you wish to associate with the course (the installment plans present, can be changed by navigating to Configuration → Settings → Accruals)
After choosing the specific plan, the system will automatically divide the amount indicated in the price field equally among the various installments of the chosen plan, net of the amount of any activated advance.
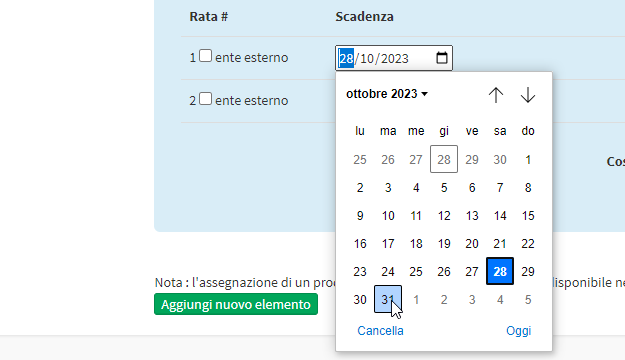
 At this point it will be possible:- Change due dates choices automatically the system, choosing other specific dates that will then be automatically applied to all entries future, either by typing the date directly with the keyboard or by using the little calendar next to each due date.

- Change the amounts, in case they should not remain as divided by the system automatically, just click on the padlock next to each amount to make it editable.
N.B. If you intend to enter installment amounts whose total sum is greater than the standard indicated price (in the field Price (gross)*), you will simply open all the locks next to all the installment amounts and it will then become possible to edit them without the lock that will "force" you to comply with the previously indicated price.
The system in this case will indicate the calculation of any interest (not visible to the user, but only to the secretary) due to the surcharge.

Now click the green button Update To save the installment plan association.If you want to associate other installment plans, click the green + button again and repeat the same procedure as above.

Click the Add New Item button to save the operation.
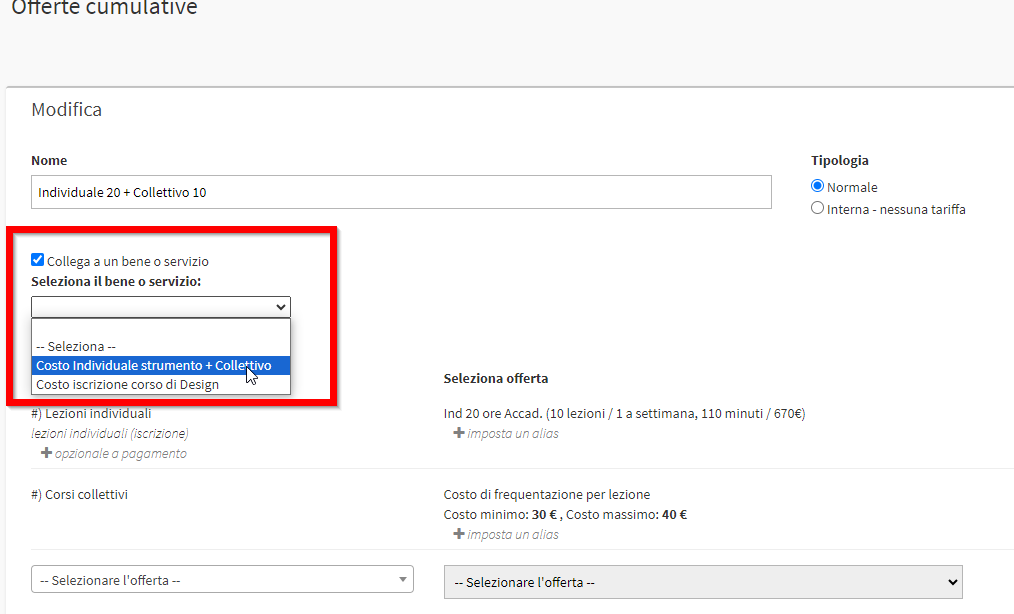
Now, to finish the procedure, navigate to the section Configuration → Cumulative Offers and enter edit the cumulative offer to which to link the good/service that has been created as the cost of the offer with the associated installment plans (or directly, if it has not yet been entered, create the cumulative offer to which to link the cost, the procedure is the same).
Between the fields for the offer name and the cost name, enter the check mark "Link to a good or service" and choose the one created specifically for this offer so that the system automatically links the cost and associated custom installment plans.

Click the green button Edit to save the operation.
In this way, when in student enrollment (either online or offline by the secretary's office) that cumulative offer is chosen, it will be possible to choose only one of the linked installment plans, which will be automatically set up to split the cost to be paid.