Configuring email sending service with Google SMTP Server
In case you want to use ScuolaSemplice as your outgoing mail client using your gmail, to send various communications directly from the management system to your users, you will need to perform a few steps to configure your email address.
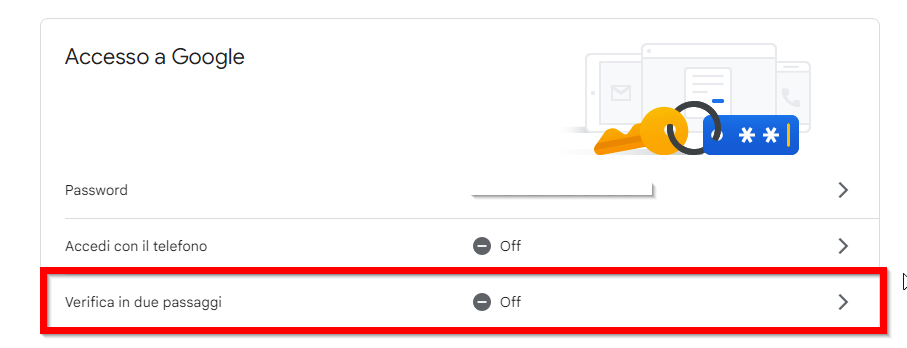
Step 1 - Activate two-step verification of your Google account.
Navigate to https://myaccount.google.com/security and scroll to the "Google Login" and if set to OFF click the "Two-step verification":
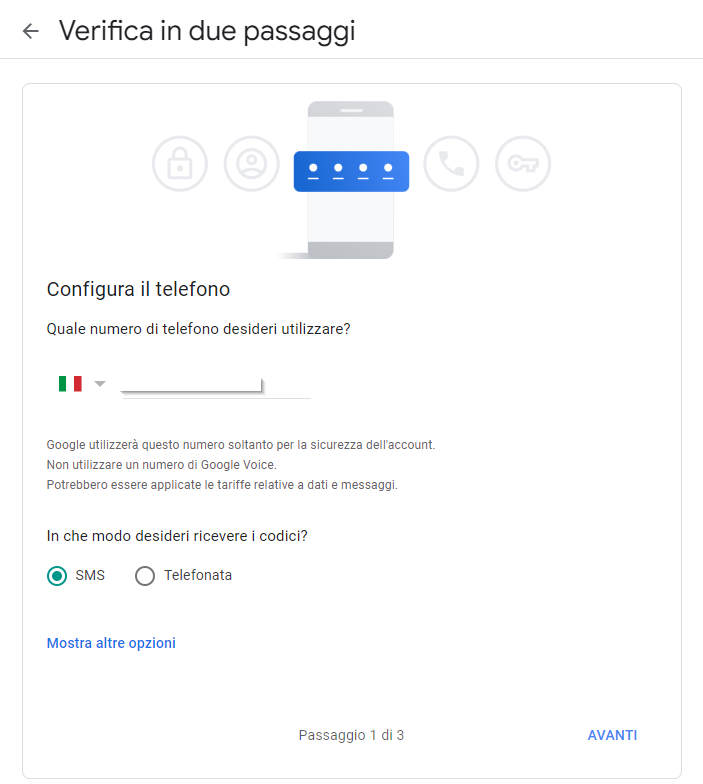
From the next page click the button "Start" and enter the login password for your gmail account below to complete the first step; then click the "Next" to continue.
From the next page Google will ask for your smartphone mobile number, which you will need for the second verification step, enter your number and Click the "Next":
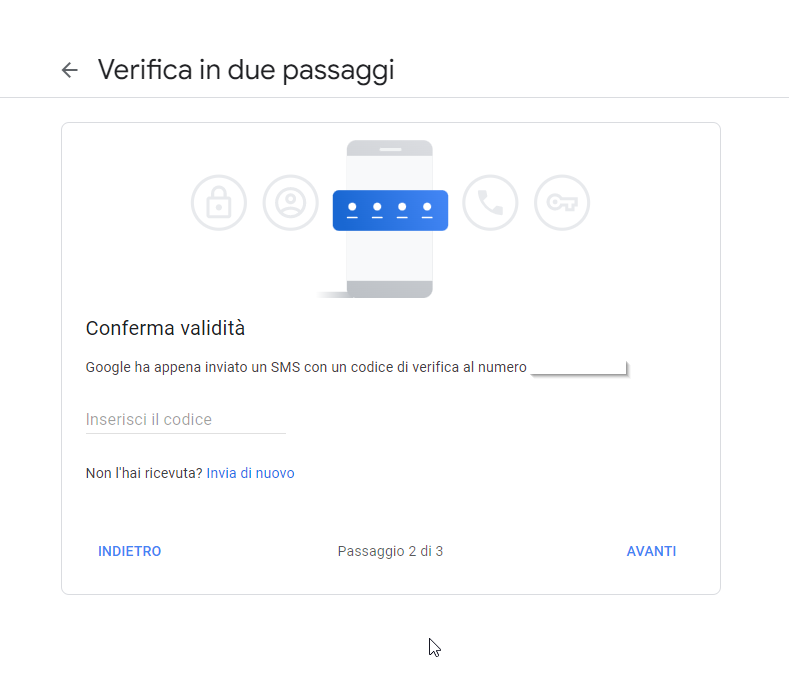
You will receive a message from Google to enter on the next screen, enter it and click "Next":
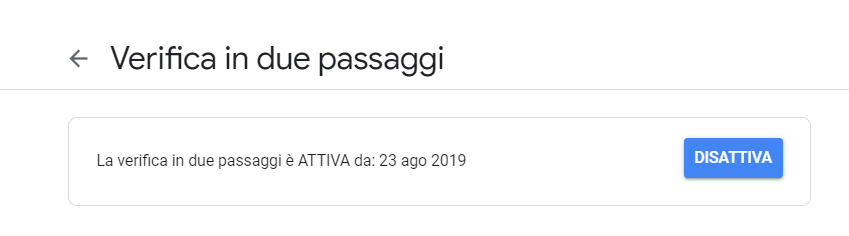
From the next screen click the "Activate":
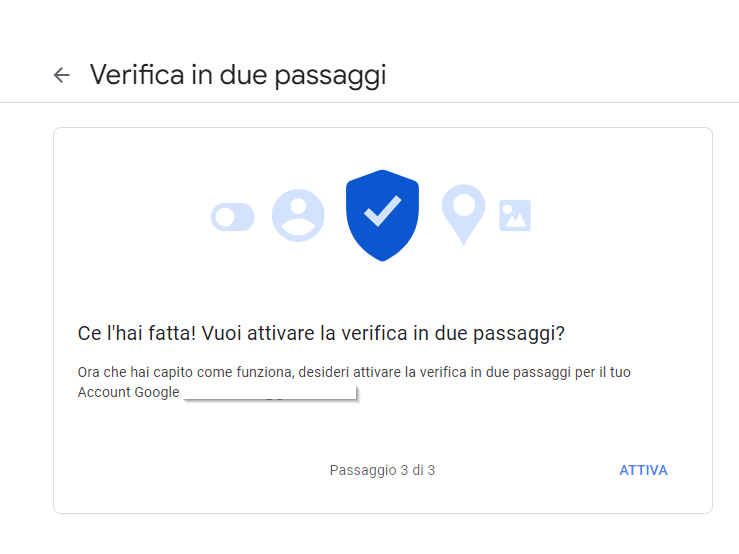
Following activation you will receive a confirmation email from Google that two-step verification has been activated.
Confirmation will also be given at the top of the same web page, showing the date when the two-step verification was activated.
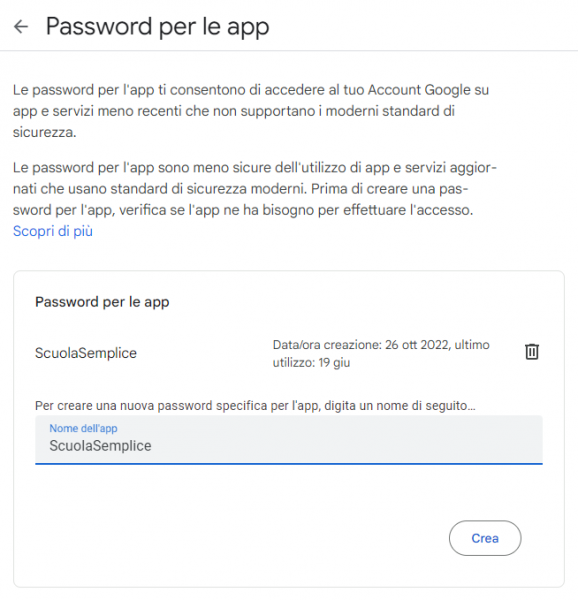
Step 2 – Generazione App password
Navigare all’indirizzo https://security.google.com/settings/security/apppasswords ed inserire la password di accesso al proprio account di gmail.
Nella prossima schermata si dovrà inserire il Nome dell’APP per la quale si vuole generare la Password, per esempio “ss” o “ScuolaSemplice”.
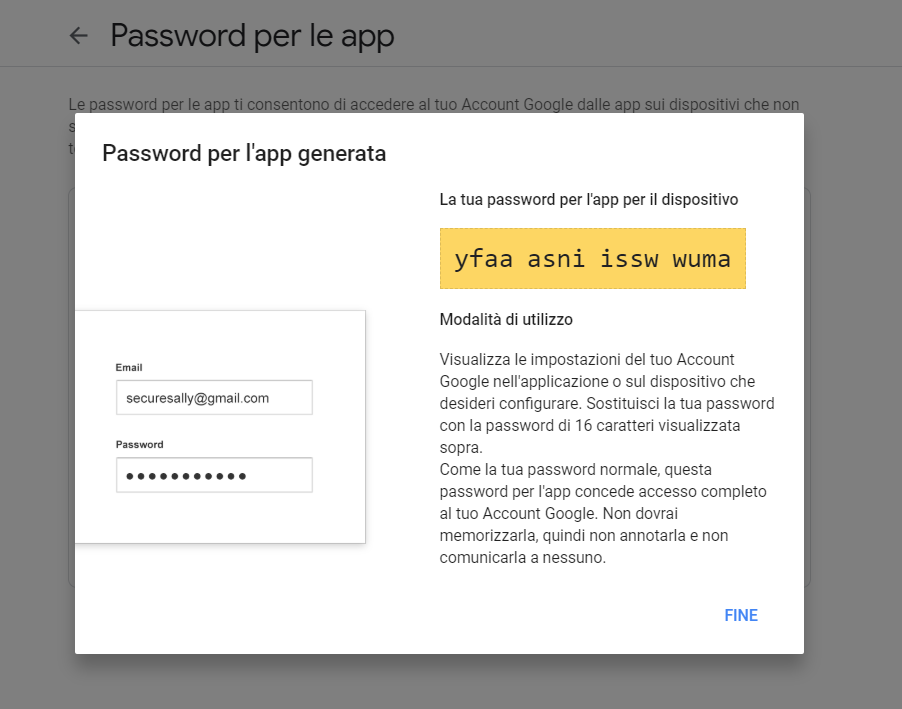
Then click the button Generate and save the password that will be created, as it will need to be used in the outgoing mail configuration at ScuolaSemplice.
Step 3 – Configurazione della posta in uscita su ScuolaSemplice
Dal menù principale di ScuolaSemplice navigare su Comunicazioni → Configurazione email. Scorrere verso il basso alla sezione Impostazioni email, scegliere l’opzione Server SMTP dal menù a tendina Servizio di invio email e compilare di seguito i seguenti campi:
- SMTP Server: smtp.gmail.com
- SMTP Port: 587
- SMTP User Name: the email address that is intended to be used for outgoing mail
- SMTP Password: the password that was generated in step 3
- SMTP TLS/SSL: TLS
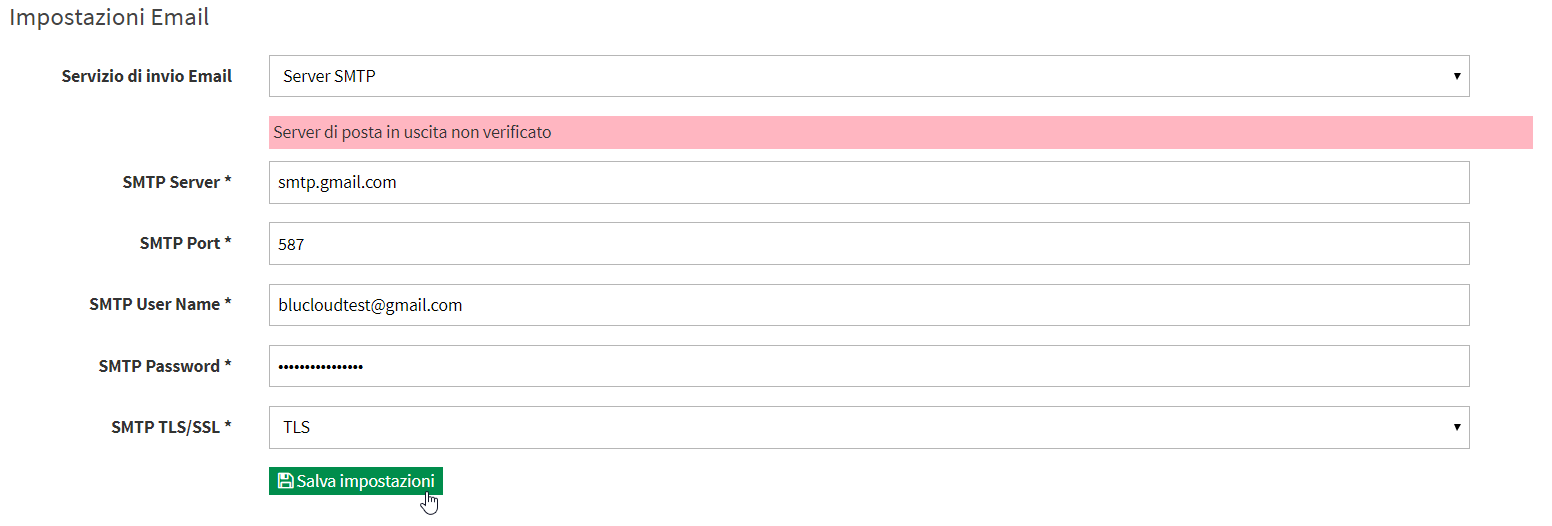
WARNING. The email entered in the SMTP USER NAME field must OBVIOUSLY be the same as that found in Administration→ General Settings→ System Email
After filling in the fields correctly, click the Save Settings button.
Now enter another email address (choose an email that can be consulted nimbly) , to verify that the service is working properly, and click the Send test email.

Now to finish the configuration, enter the 6-digit code received at the previously entered email address and click the Check Verification Code button.

Now the outgoing mail server is correctly configured and will be highlighted in green, as from the image below.

CAUTION: If you decide to use Gmail's SMTP server, you will be able to send no more than about 100 emails per day and no more than about 3000 emails per month