Enrollment management through the Age Bands.
This guide will explain how to enable and use Age Bands for course enrollment management.
First you will need to enable the use of this feature, to do this you will need to go to Configuration→ Settings→ Course-related settings:
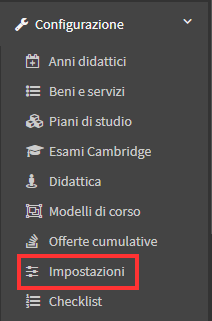
Once here you will have to open the Age Groups tab:

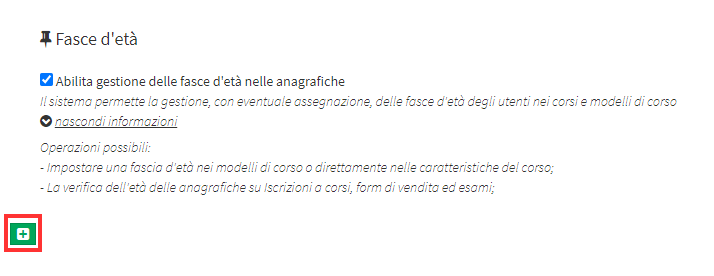
Then by placing a check mark on "Enable age band management in master records," it will be possible to link a band to each course or course model:

Once enabled, a brief description of the operations possible through this function and the (+) button will be shown:
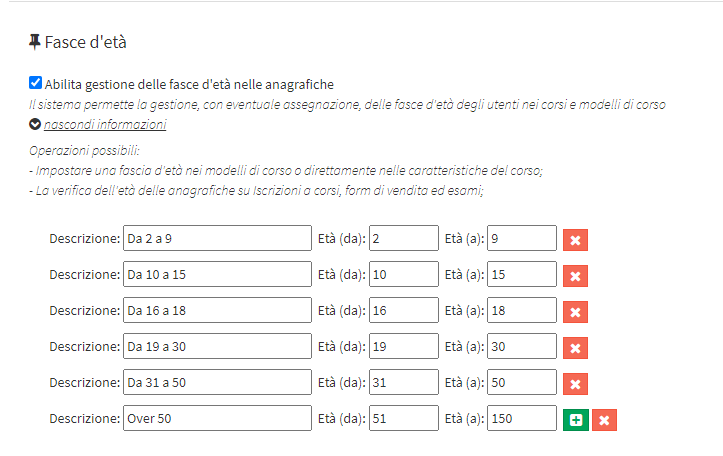
Clicking on it will allow you to enter the age groups you would like to use:

Then click on the green (+) button to add the various bands needed:
Once the use of Age Bands is enabled, by going to the various Master Data sections, you will be able to view the Age field for all users in the system:

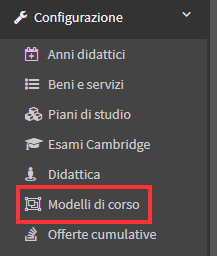
Then going to Configuration→ Course Templates:
You will be able to view the appropriate field to enter the control on age groups:

Clicking on the field will show a drop-down menu containing the various bands that have been previously created and of which only one can be selected per model:

After setting the age range in the course template or in a course, going to Student Enrollment, after entering the student's call sign and selected the user's age will be shown:

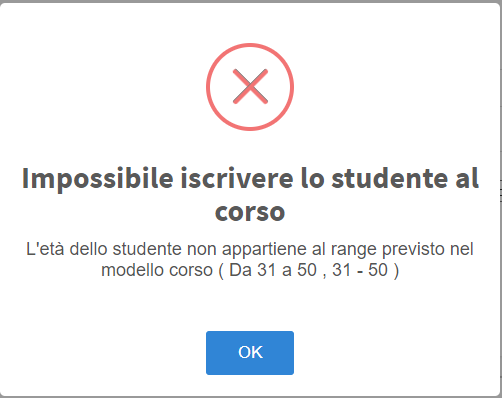
If you will try to enroll a student in a course with the Age Bands check active, in case he/she is not in the bracket the following error message will be shown and you will not be able to proceed for enrollment:
This check is also applicable for course registrations via Online Form and Exams