Automation system to automatically send communications based on course status
Automations make it possible to automate certain communications according to criteria that are defined by the school.
An indefinite number of automations can be created, each of which will allow:
- filter which courses are affected by automation;
- Define whether the communication should be sent to the secretariat, to the client company, to the teacher or to the students;
- Define when the communication should be sent by being able to choose the day with respect to thebeginning of the course, at the end of the course or to the percentage of progress.
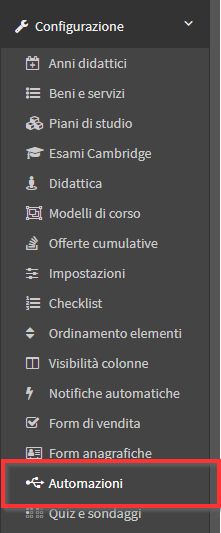
To create an automation navigate to Configuration → Automations:
Then click the "Add" at the top right of the screen to add a new automation:
![]()
The following screen will appear with the relevant fields to be filled in:
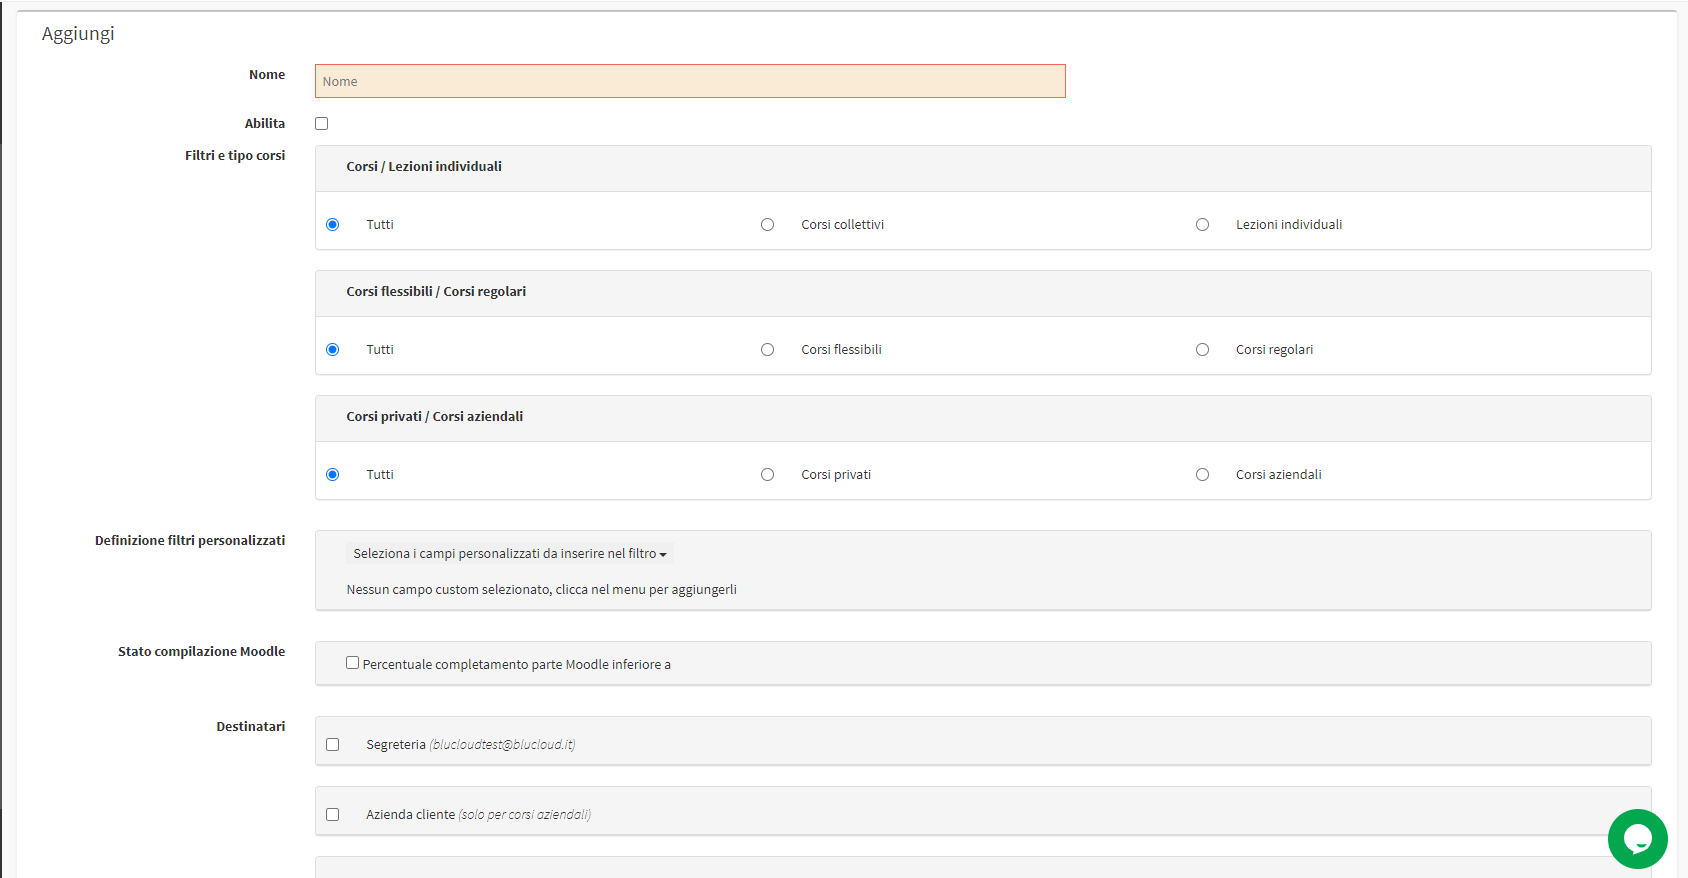
- Name: the name of the automation (e.g., "In 2 lessons the course will end," "Survey rating index," etc.)
- Enable: enter the flag to enable automation
- Filters and course type: establish for which types of courses you intend to configure automation, being able to specify:
- Courses / Individual Lessons
- All
- Group courses
- Individual lessons
- Flexible courses / Regular courses
- All
- Flexible courses
- Regular course
- Private courses / Corporate courses
- All
- Private courses
- Company courses: by entering the following flag it will be possible below to select all companies or only some of those in the system
- Courses / Individual Lessons
- Custom filter definition: It is possible to add conditions based on the status of custom course-type fields that will be an additional check when sending the automation.
-
- Target audience: specify the recipient of automation by being able to choose from:
- Secretariat: by entering the following flag, the secretary will be the recipient of automation emails; the email address in the general settings will be used by default as the system email, or you can specify a different one by checking the "use different email"
- Client company: inserting the following flag will choose client companies as recipients of automation, either all those with active courses or only those selected just above
- Teachers: inserting the following flag will select as recipients of automation all teachers who have active courses
- Students: entering the following flag will select all students who have active courses as recipients of automation
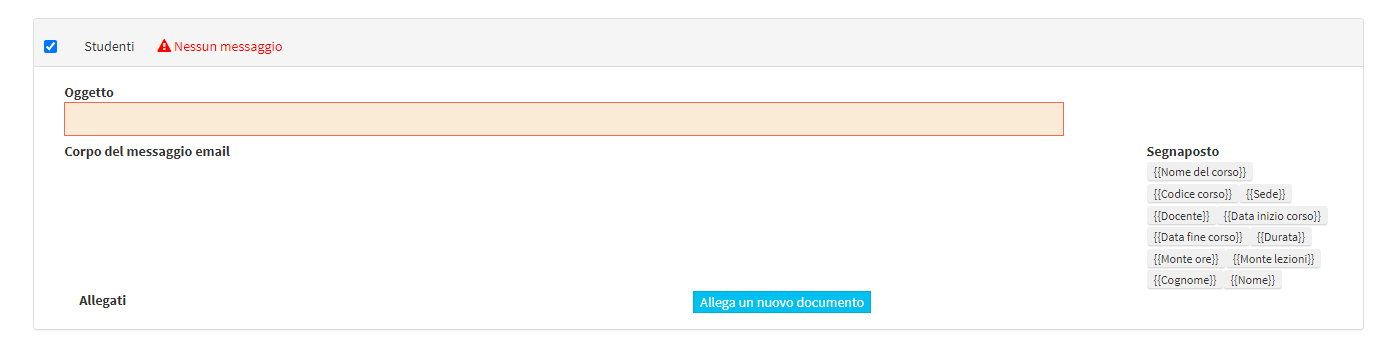
After choosing the type of automation recipient, fill in the following fields:
-
- Subject: the subject line of the automation email
- Body of the email message: the body of the email for which you will be able to use the following placeholders:
- {{Nome del corso}}: il nome del corso
- {{Codice corso}}: il codice del corso
- {{Sede}}: la sede di svolgimento del corso
- {{Docente}}: il docente del corso
- {{Data inizio corso}}: la data di inizio del corso
- {{Data fine corso}}: la data di fine corso
- {{Durata}}: la durata del corso
- {{Monte ore}}: totale ore del corso
- {{Monte lezioni}}: totale lezioni del corso
- {{Cognome}}: il cognome del docente o dello studente in base a quale tipo di destinatario è stato scelto
- {{Nome}}: il nome del docente o dello studente in base a quale tipo di destinatario è stato scelto(I segnaposto elencati sono visualizzabili a lato della mail)
- Day of sending scheduled notifications: specify at which point in the course the system should automatically send the notification email
- Type of activation
- Before
- After
- Percentage performed
- Day
- Course start date
- End date of course
- days: specify the number of days before or after the start or end of the course the system should send the automation email (this field is not present if you choose the option of the percentage carried out of the course
- Type of activation
Click the "Confirm" to save the operation:
N.B. After creating the automation it will be possible to edit it to attach one or more documents.
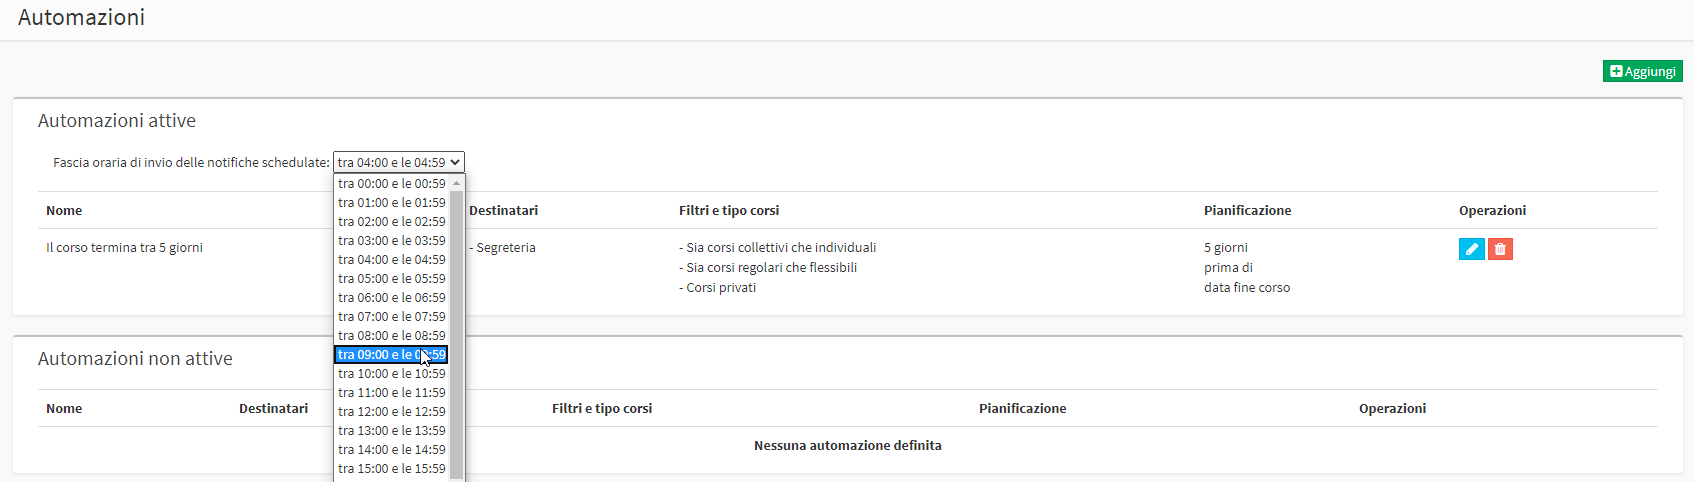
After you have finished defining one or more automations, from the list of automations, you will be able to decide in which time slot you want the system to send automatic messages.
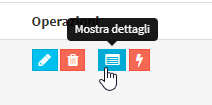
It is possible to see which were the last emails sent for the individual automation by clicking on the blue shaped icon Show Details next to the automation of interest:

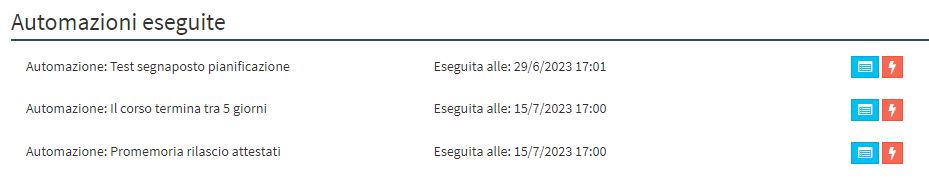
Also also within the Course tab will be visible all the Automations that have been performed for the Course displayed:
Instead, theicon with the Lightning executes automation manually by checking immediately all the courses that meet the criteria of the automation itself without waiting for the set time slot:
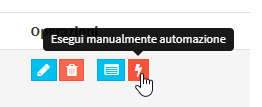
NOTE: Running an automation manually will not force emails to be sent to courses that do not meet the criteria within the automation itself.