Configuring Study Plans
Study Plans are used in the management of multi-year educational pathways.
Each year will be divided into several Subjects/Courses to be attended by each student. The cost will be associated with each individual year.
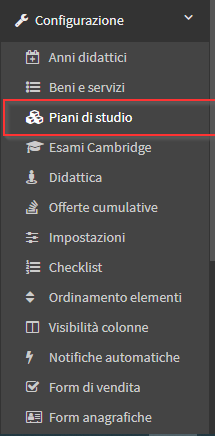
The two Macro Areas of interest are found in Education → Study Plans, where active Plans will be present, and Configuration → Study Plans where new Study Plans can be created and configured.
1 - Configuration of Study Plans
As a first step you will need to navigate right to Configuration → Study Plans to bring the pathway to life:
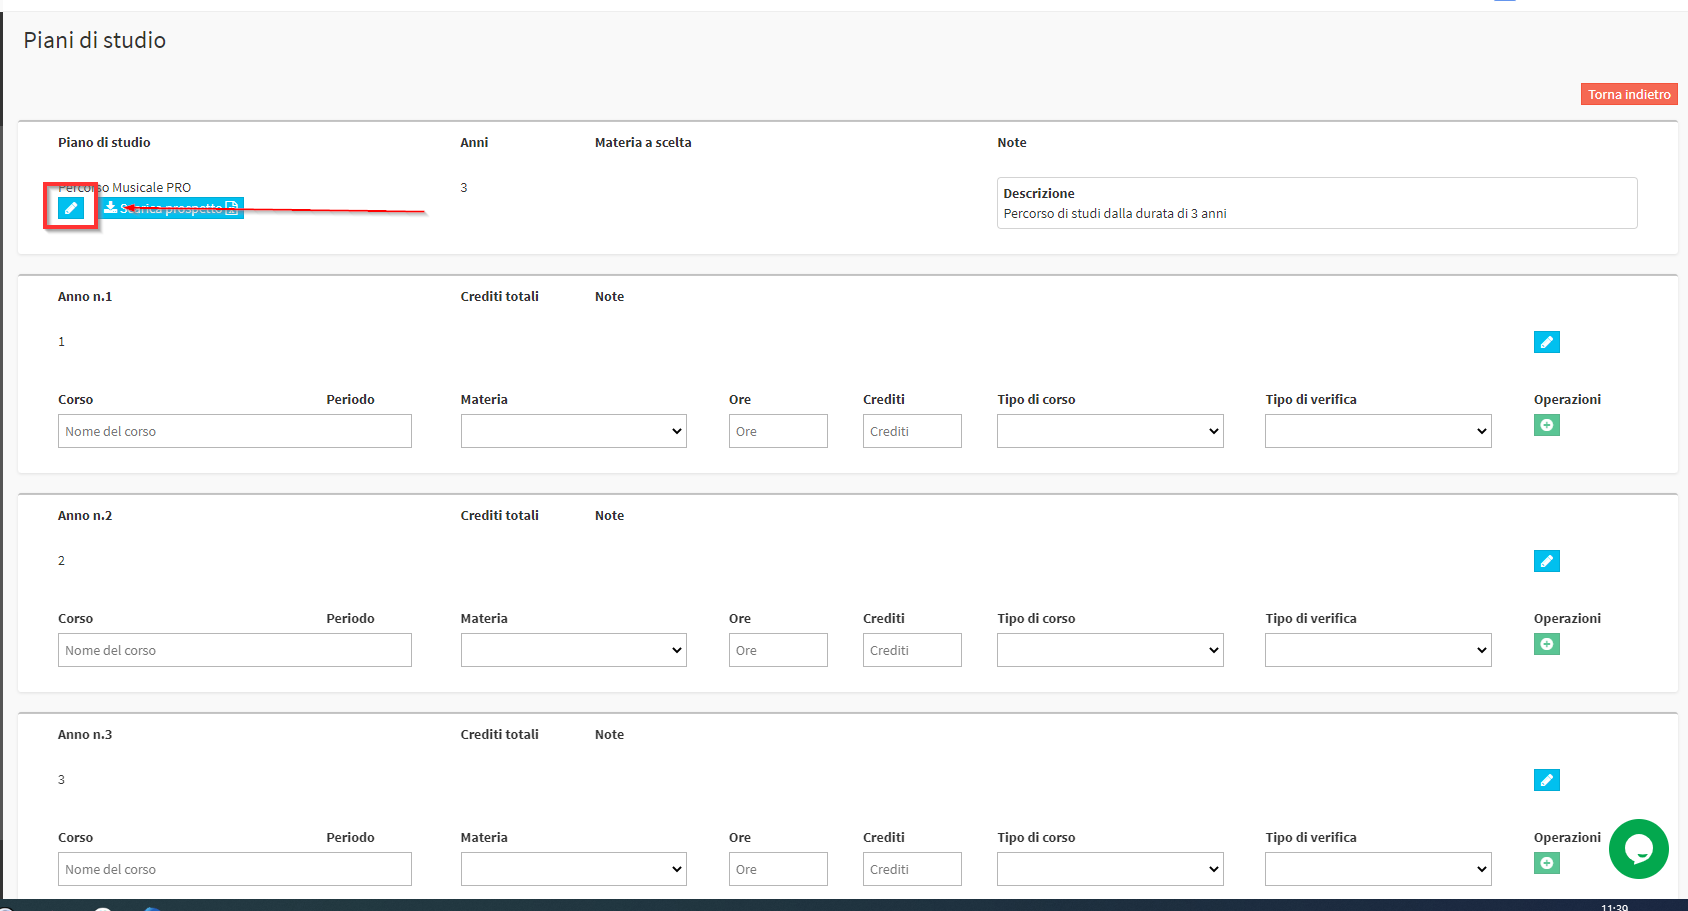
In this section we will need to create the Study Plan by entering the Name of the plan, the Code, the duration in Years and any Notes. By clicking on the green "+" we will conclude the creation of the Study Plan:

The management system will immediately take us inside the Year Management, first, however, it will be necessary to click on the Edit in the shape of a pencil present at the top of the page:
The Edit Study Plan screen will open, where you can customize the Plan according to your School's needs:
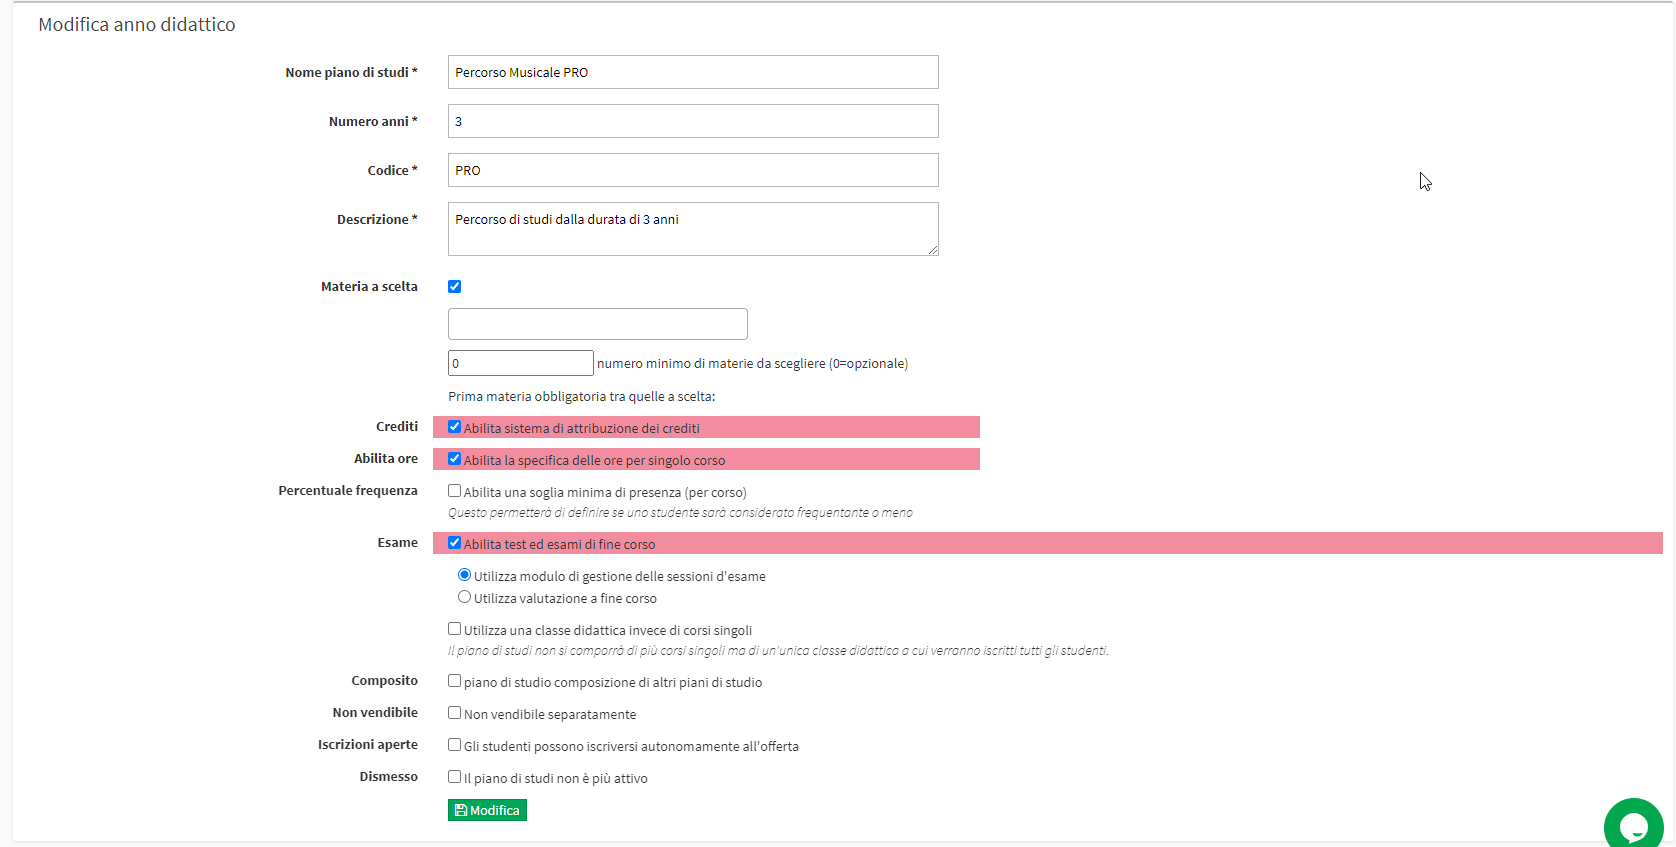
The featured voices will be:
- Study Plan Name: The Public Name of Study Plan.
- Number Years: Number of Years that makes up the Study Plan.
- Code: The internal Code of the Plan
- Description: Private Description
- Choice Subject: Check this item if there will be one or more Courses in the Plan that provide for the choice of the Subject to be taken. If checked, the Subjects that the Student will be able to choose for his or her course should be selected (Click here for the Guide to Study Plans with Choice Subjects.).
- Credits: Check if you want to enable Credits for each Subject that makes up the Study Plan.
- Enable Hours: If checked we will be able to allocate a predetermined Mount Hours to each subject.
- Percentage Attendance: Indicates whether the Pathway provides a minimum percentage of attendance for each Subject. If checked, it should indicate what the minimum percentage of attendance is for each Subject.
- Examination: Check if the Pathway provides for Exams. Allows you to choose what type of Exams management to enable.
- Use exam session management module: This will use the Exam Sessions flow (click here for the Complete Guide).
- Use end-of-course assessment: Each Subject will present a single End-of-Course Examination with insertable assessment within the Course itself.
- Use teaching class instead of individual courses: If checked, the Plan of Study will present only one Course per year. The course will be of type Didactic Class and will contain all subjects for the year. (Here is the guide to scheduling an Didactic Class Course.).
- Composite: Indicates that the following Plan of Study is composed of other Plans of Study (Guide on Composite Plans of Study here.).
- Not marketable: Check if the Following Plan of Study is part of a Composite Plan of Study.
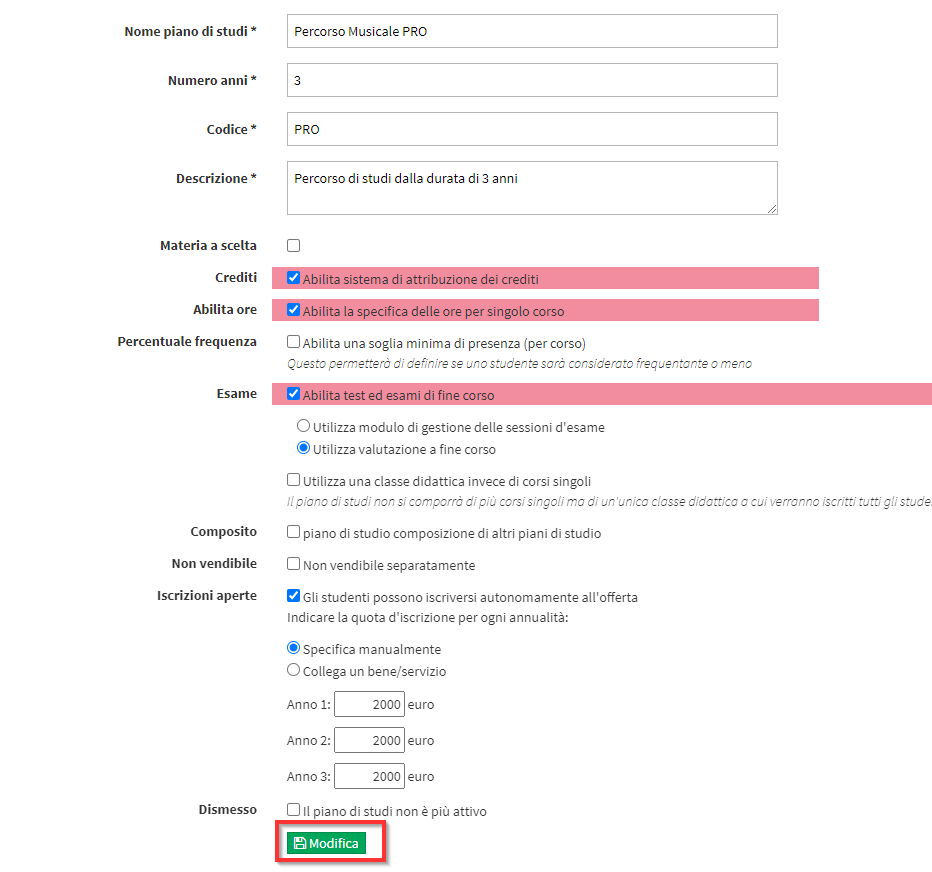
- Open enrollment: Check if the Study Plan is open to Enrollment
- Specify Manually: Select this checkmark to enter a fixed Cost for each Year that makes up the Study Plan (Full guide to the cost of Study Plans here.).
- Link a Good/Service: Linking a Good/Service as an Enrollment cost allows you to use a customized Accrual Plan (Guide to Customized Accrual Plans here.).
- Decommissioned: If checked, the Study Plan is no longer used and therefore no longer marketable to Students.
Click on the Green button Edit to save the operation. Below is an Example of a Study Plan Configuration:
We will be taken back to Configuration → Study Plans, where our modified Plan will be. Click on the blue button Manage Years of Study to complete the Configuration:

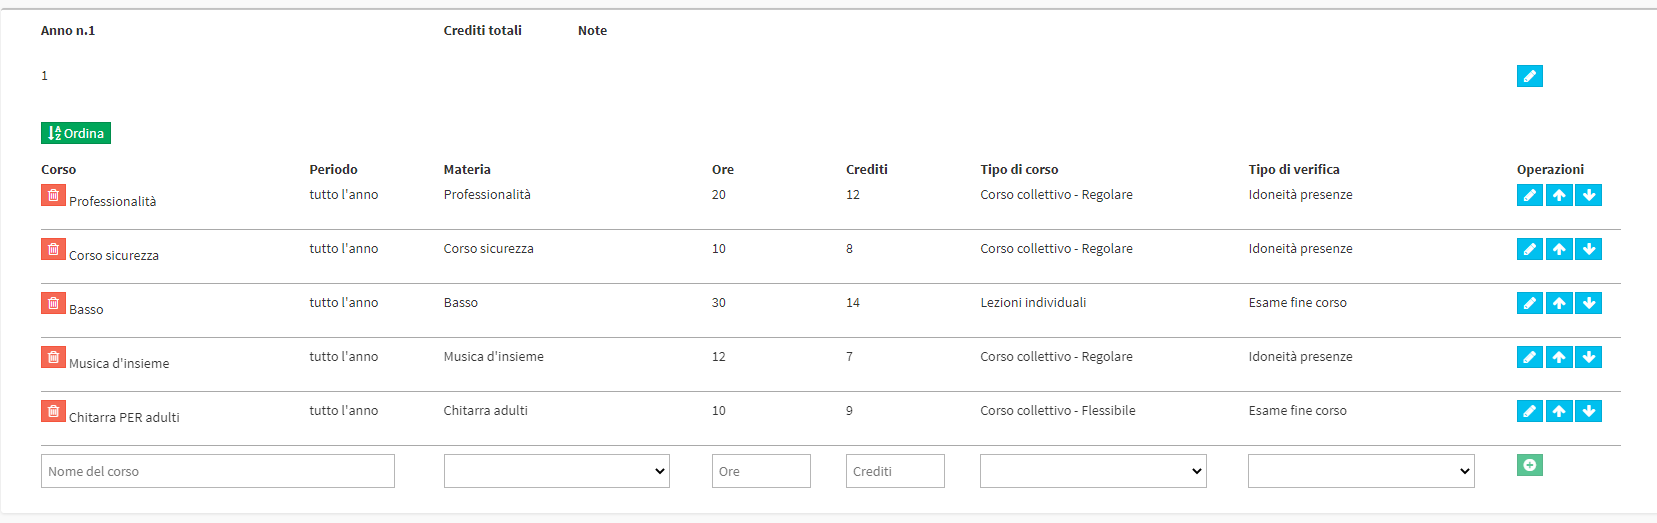
The screen will be divided by Year. In each of these the Subjects that comprise it and its Course Name will have to be selected, along with other settings:

- Course: Course Name (if left blank it will be automatically filled with the Subject Name).
- Subject: Subject taught in the Course.
- Hours: Course Duration in Hours.
- Credits: Credits earned at the end of the Course.
- Course type: Specify what type of Course it is
- Regular Collective Course: Group Course with Regular Scheduling.
- Flexible Collective Course: Group Course with Flexible Scheduling.
- Individual Lessons: Regular Individual Course (with the option to change it to Flexible).
- Final Thesis
- Internship
- Type of verification: Indicate the type of verification active for that specific Subject.
- End-of-Course Examination: The Course includes a Final Examination with possible Assessment (Click here for the guide of Study Plans with End of Course Examination.).
- Assessment during the course: The Course does not include an Examination but an in-progress evaluation by the Lecturer (Click here for the guide on assessments).
- Eligibility Attendance: If checked, the course provides only Minimum Student Attendance percentage.
Click on the green icon "+" to save the changes. Continue for all subjects within the Year. Here is an example of Configuring a Year of a Study Plan:
Continue the Configuration for other Years as well.
2 - Activation of Study Plans
Once you have finished the Configuration, navigate to Education → Study Plans:
This screen will show all Plans of Study. Activated, initially it will be completely blank:

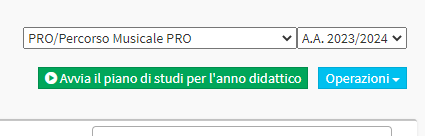
In the upper right-hand corner select the Study Plan just created and theEducational Year in which you want to activate the pathway (click here for the guide on Didactic Years) and click on Start the curriculum for the educational year:
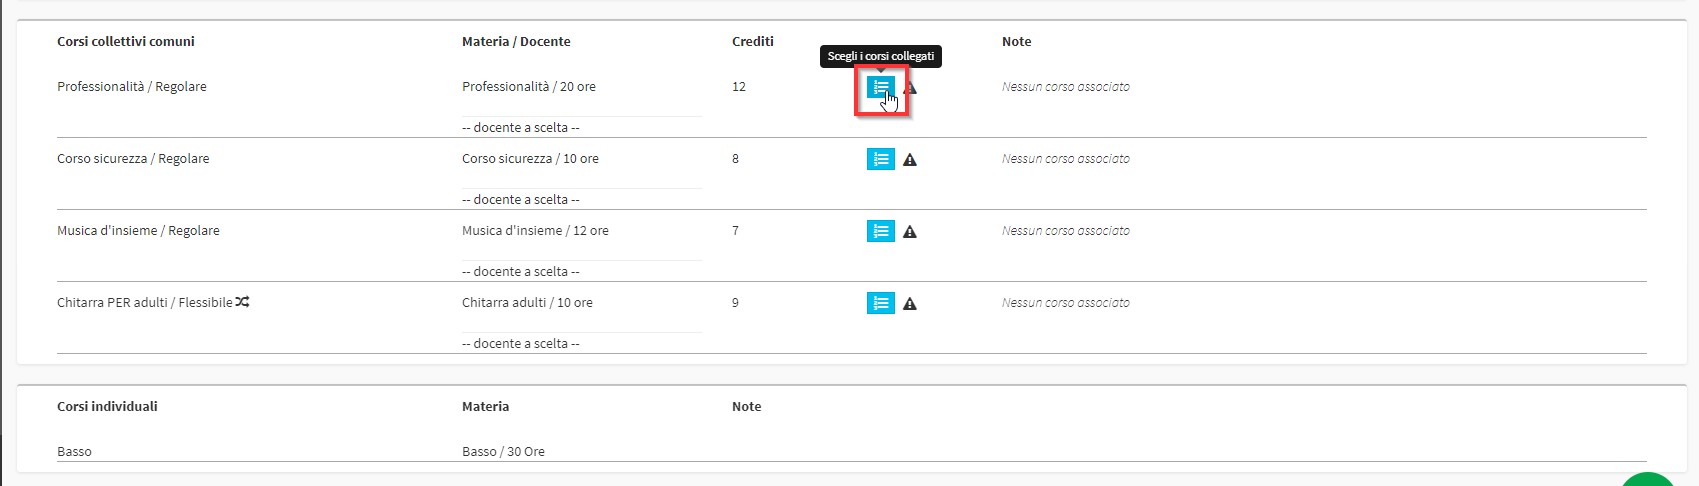
The system will load the annuals configured in the Plan, you will need to click under the column Course Management the blue button Configure Course Associations:

This will open the page for Create o Connect the Course to the subject. Click on the blue button Choose the linked courses:
If there is no Course in the system that reflects those characteristics (Name and Subject equal to the Configured one) the following will appear:

If linkable Courses had been present they would appear in the first section indicated, giving the possibility of linking them to the Study Plan Subject we are editing.
Note: If the Course to Connect does not appear. Copy and Paste exactly the Course Name in Configuration → Study Plans.
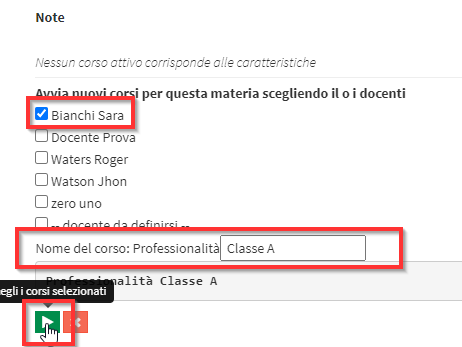
In the case of the image it will be necessary to Create a Course directly from this screen by indicating the Lecturer to whom the Course is assigned, entering the Course Name and pressing the Green Play button:
In this way in Didactics → Collective Courses the Collective Course correctly linked to the Study Plan will have been created:

Note: It is not necessary to create Individual Courses by hand. These will be created automatically when the Student enrolls.
It will be necessary to repeat the operation for all Collective Courses present in the Reference Year. The correctly completed screen will look like this:
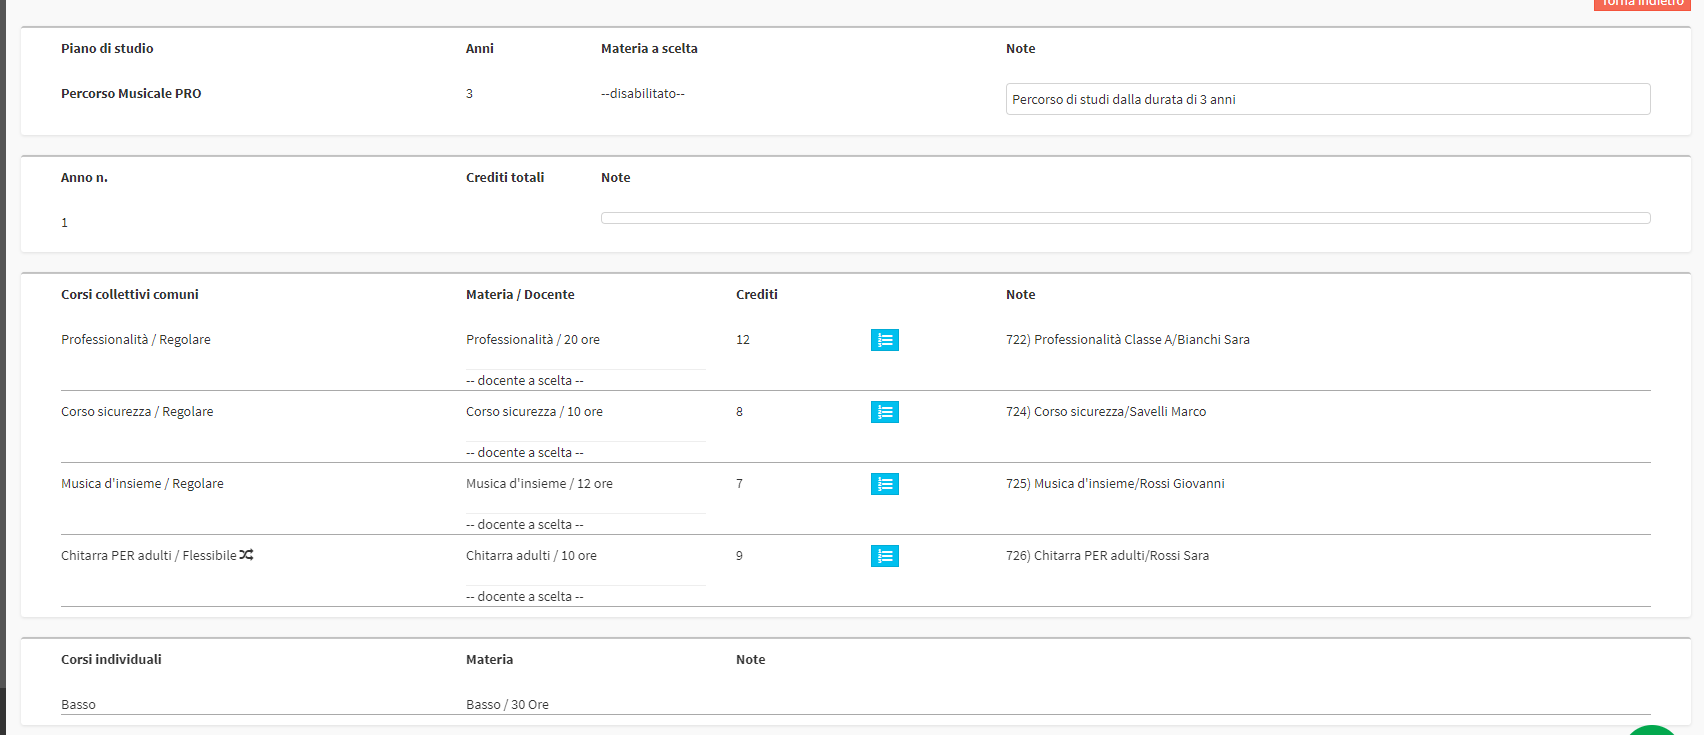
The following shall not be present no Warning Signs next to the Name of the Courses.
Same in Didactics → Study Plans, there should be no Attention Icons in the shape of a triangle:

In case the icon is present, this will stand for indicating that the Reference Year does not have all the Courses correctly associated.
3 - Student Enrollment
Once the activation procedure is finished, all that remains is to Enroll Students by choosing the Study Plan and the Year to which the student is to be enrolled.
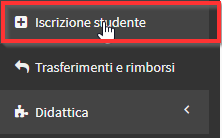
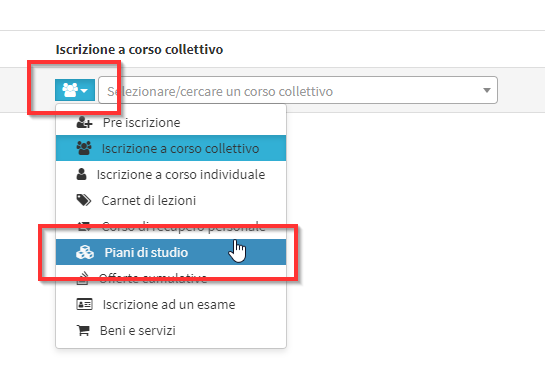
Navigate to the left menu and open the panel Student Enrollment:
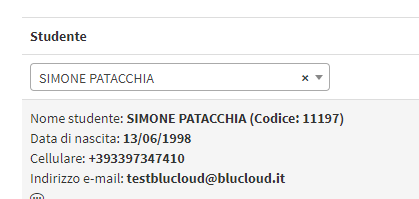
Select the Student of interest in the Box on the left:
In the Box on the right click the Blue icon and select Study Plan:
Now select the activated Study Plan, indicate the'Educational Year of interest and theYear of participation of the Plan:
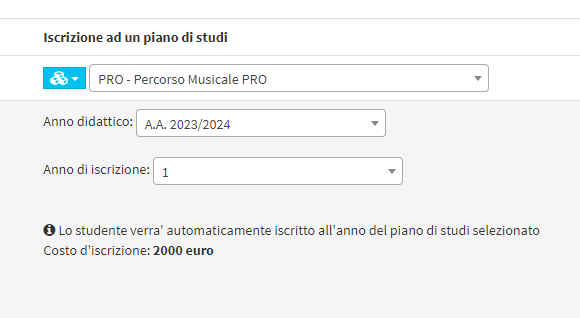
You will now be able to add the enrollment to the Shopping Cart and complete the enrollment order normally.

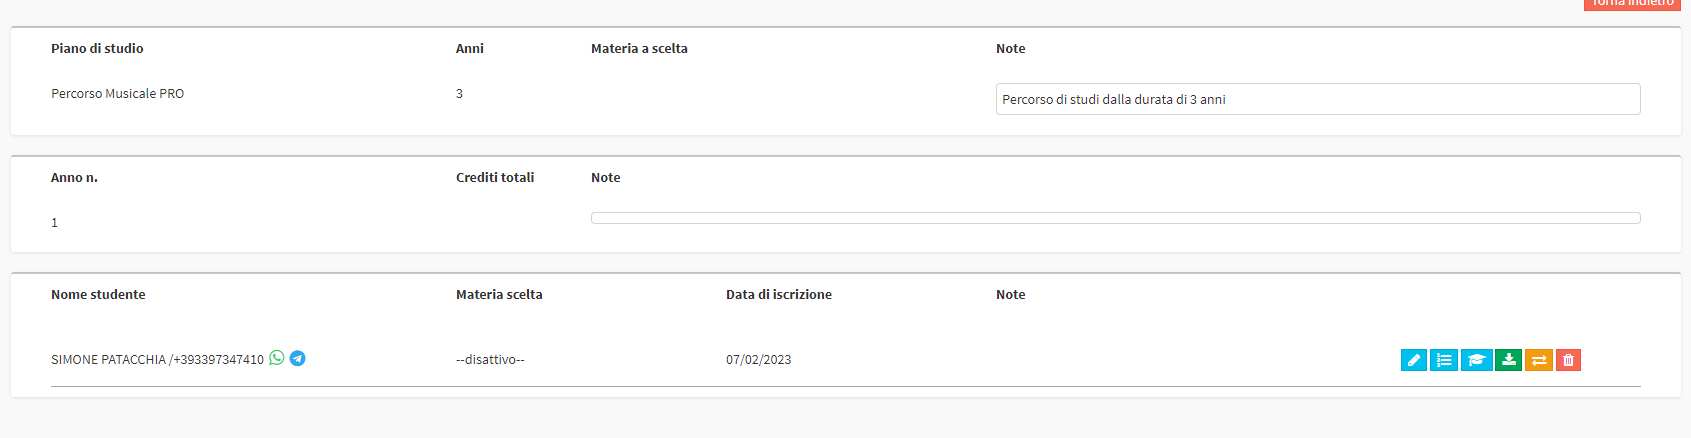
At Didactics → Study Plans will now result in a Student enrolled in the first year:

By clicking on the blue icon "Show Subscribers" shown in the figure, we will access the list and Configuration of all the Students enrolled in the Year:

The triangle of attention next to the Students name indicates that the Student in question is not fully configured.
By clicking on the blue button "Manage Enrollment." we will see what is missing in the Student configuration:

It will appear the list of all the Courses in which the student is enrolled and the course that is missing configuration, from this screen it will also be possible to exempt the Student from taking one or more courses (here is the guide to exempt a Student from one or more courses in a Study Plan):
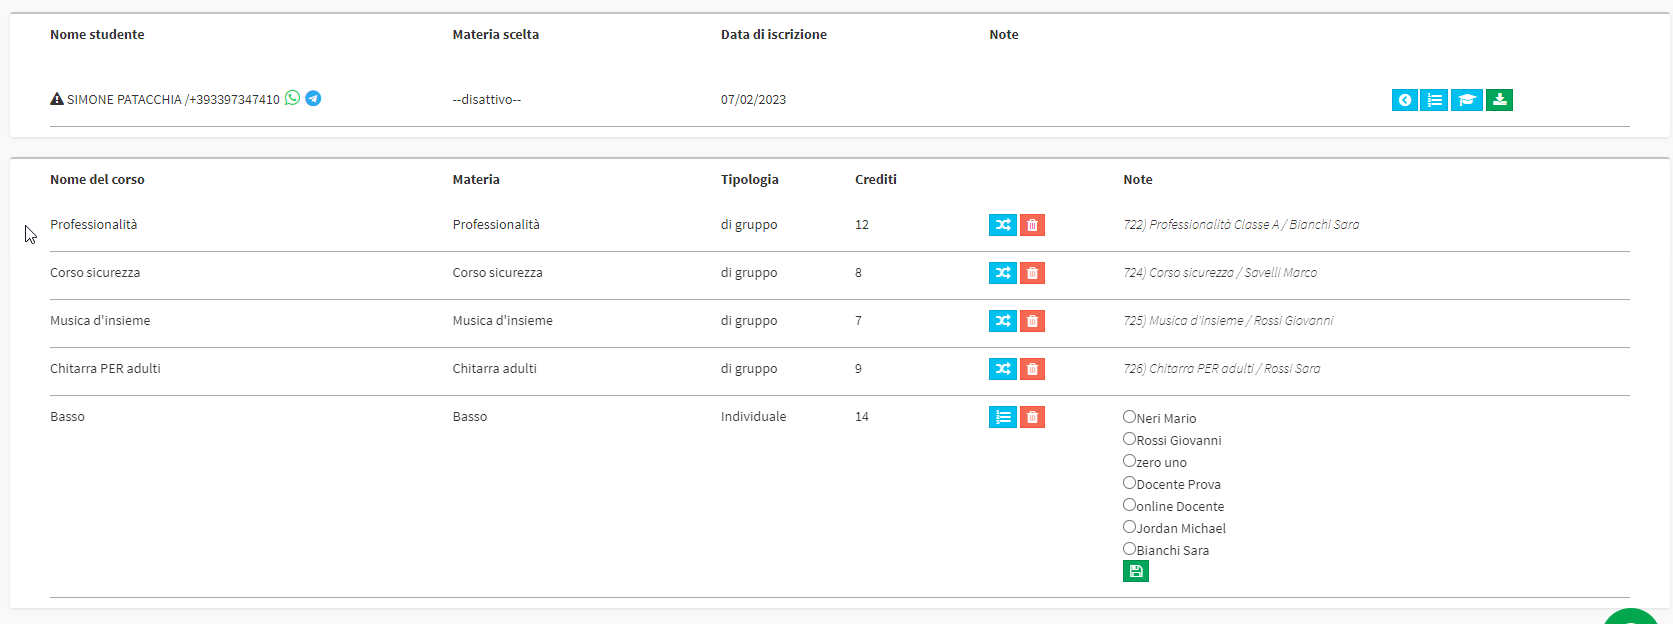
For the Individual Bass Course ScuolaSemplice detects multiple Lecturers associated with the Subject so for each student enrolled in the Study Plan the Course Lecturer must be indicated. Select the Lecturer and click on the green disk-shaped icon:

Now the subscriber will appear correctly configured:
Click here for the Guide on Massive Migration of Students to the Next Year of the Study Plan.