Configuring SDD Mandates
Enabling SDD mandates allows you to request a SEPA mandate from your banking institution to proceed the activation of a mandate that sends the automatic payment to your own Bank.
1 - SDD activation for account management.
The first step to take in order to proceed with SDD configuration is to navigate to Tax Management → Tax Settings and proceed with the edit of the company's account management:
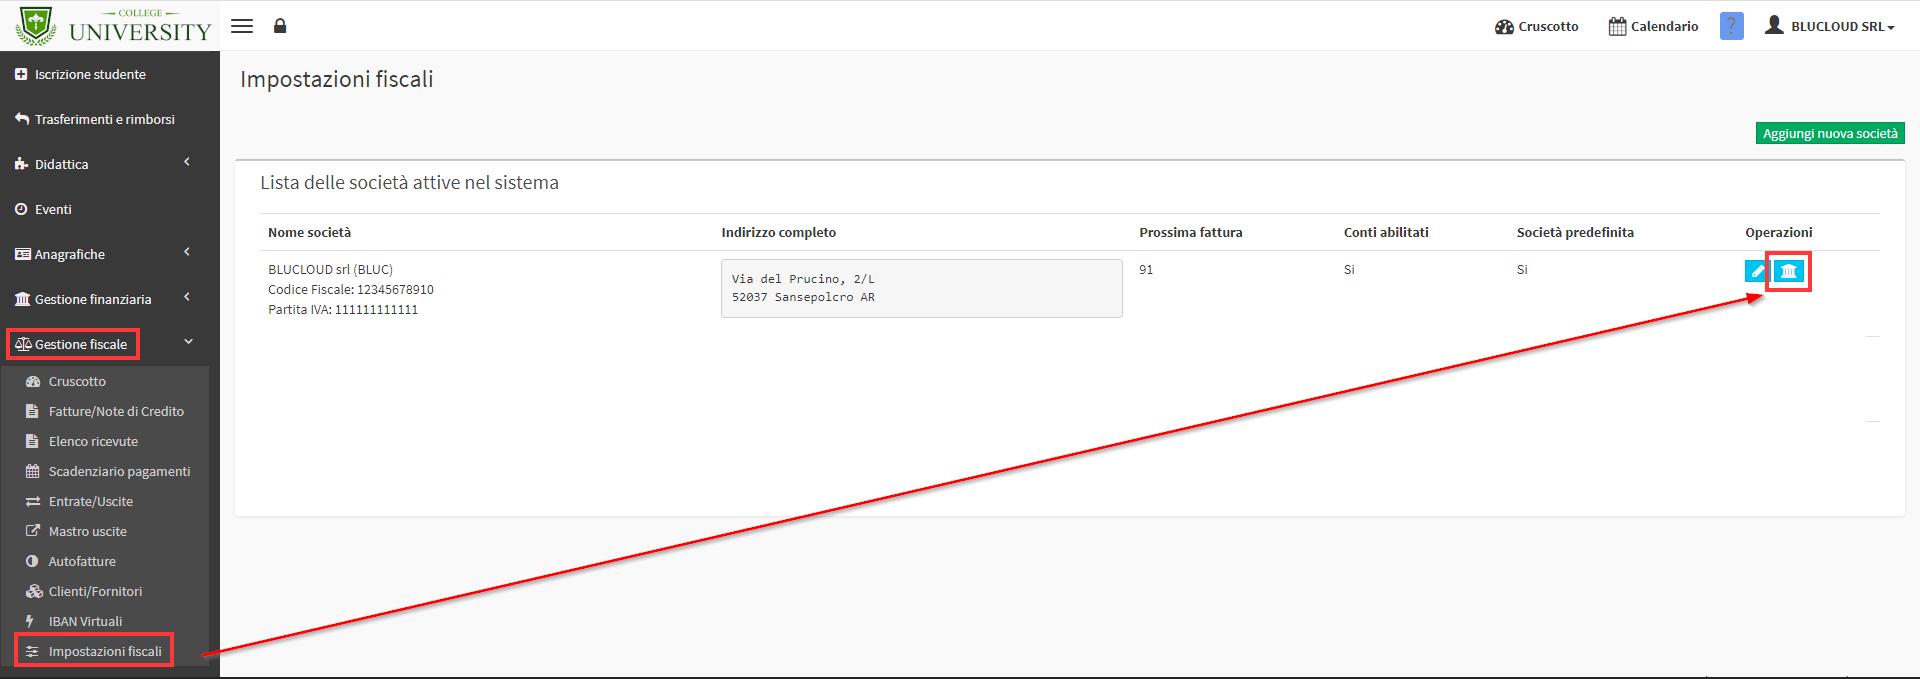
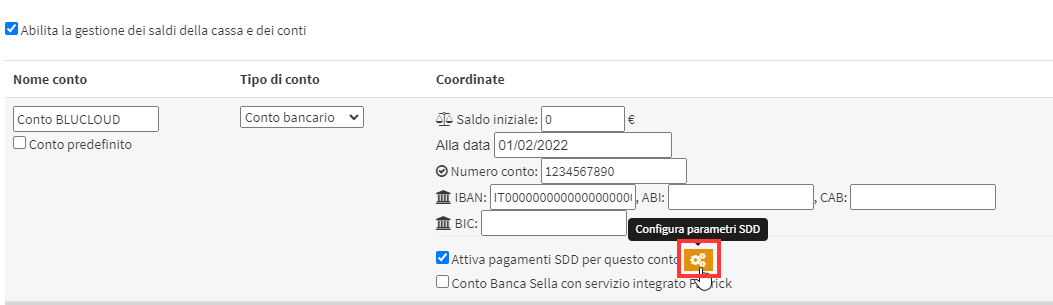
Entering "edit" of the account of interest check the item Enable SDD payments for this account:

2 - SDD Configuration
After activating the flag as explained above, simply save the change e re-enter the account management to configure the extension by clicking in the orange button Configure SDD Parameters:
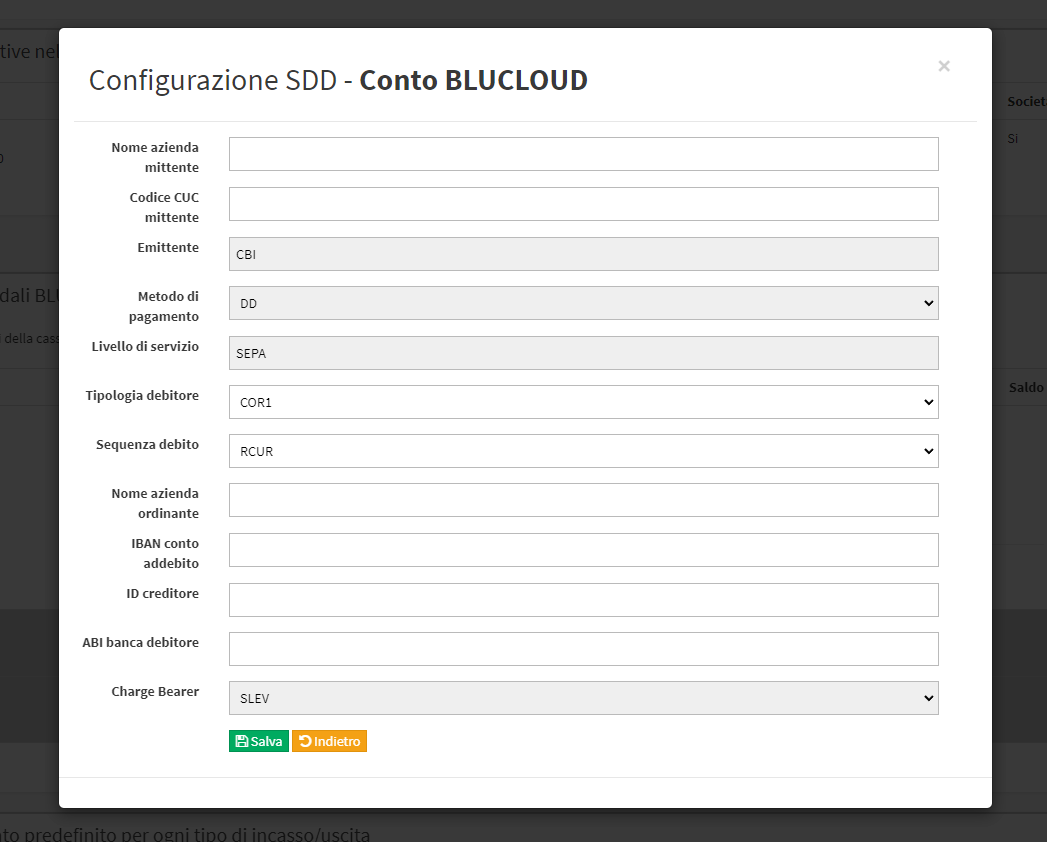
This button will give access to a pop-up in which all the information needed for configuration:
|
Sender company name |
Company issuing the request for SDD payments |
|||
|
CUC Code Sender |
8-character alphanumeric code that is assigned by the banking system |
|||
|
Issuer * |
Default: CBI |
|||
|
Payment method |
Specifies the Transfer method that will be used to transfer the money (iso 20022): |
|||
|
CHK (Cheque) : |
Written order to a bank to pay a certain amount of denare from one person to another; |
|||
|
TRF (CreditTransfer) : |
Transfer of a sum of money to the account manager's books; |
|||
|
DD (DirectDebit) : |
Collection of a sum of money from the debtor's bank account by the creditor. The amount and dates of collection may vary; |
|||
|
TRA (TransferAdvice) : |
Transfer of a sum of money to the account manager's books. A notice must be sent to the account holder; |
|||
|
DIRE (Direct) : |
Direct method; |
|||
|
CLAS (Clasical) : |
Classic method; |
|||
|
In the case of XML for SDD payments, the code to use is DD because it is the creditor who collects sums of money from the debtor(s) |
||||
|
Level of service * |
Default: SEPA |
|||
|
Debtor type (pattern) |
It admits only 3 values such as: |
|||
|
CORE |
||||
|
COR1 |
||||
|
B2B |
||||
|
For the SDD configuration, it will be necessary to set the item CORE |
||||
|
Debit sequence (Type of collection sequence) |
||||
|
FIRST : |
First in a series of dispositions |
|||
|
RCUR : |
Upon authorization, it is used for a series of collections on a regular basis |
|||
|
FNAL : |
last in a series of provisions |
|||
|
OOF : |
single not repeated |
|||
|
Name of ordering company |
Creditor company name (Name of the company holding the crediting account) |
|||
|
IBAN debit account |
IBAN of the account to be debited |
|||
|
CREDITOR ID. |
Creditor identifier, a code to be requested from the branch of your bank that identifies the creditor within the SEPA |
|||
|
ABI bank debtor |
The ABI (Italian Banking Association) code is a number consisting |
|||
|
Charge Bearer* |
Default: SLEV Available values ISO20022(including SLEV): |
|||
|
CRED : |
All transaction costs are borne by the creditor; |
|||
|
DEBT : |
All settlement costs are borne by the debtor; |
|||
|
SHAR : |
Both parties support their own costs; |
|||
|
SLEV : |
Both parties support their own fees(Recommended on SEPA payments); |
|||
3 - Configuring Mandate Data
After configuring in account management the information regarding SDD, we will be able to specify, in each entry order, i data for payment via SDD, to do this it will be necessary to navigate to Financial Management → Order Management and enter the relevant order via the appropriate blue button Manage installments and payments:
Below the order master data will be an orange Configure Data for Payment by SDD button:
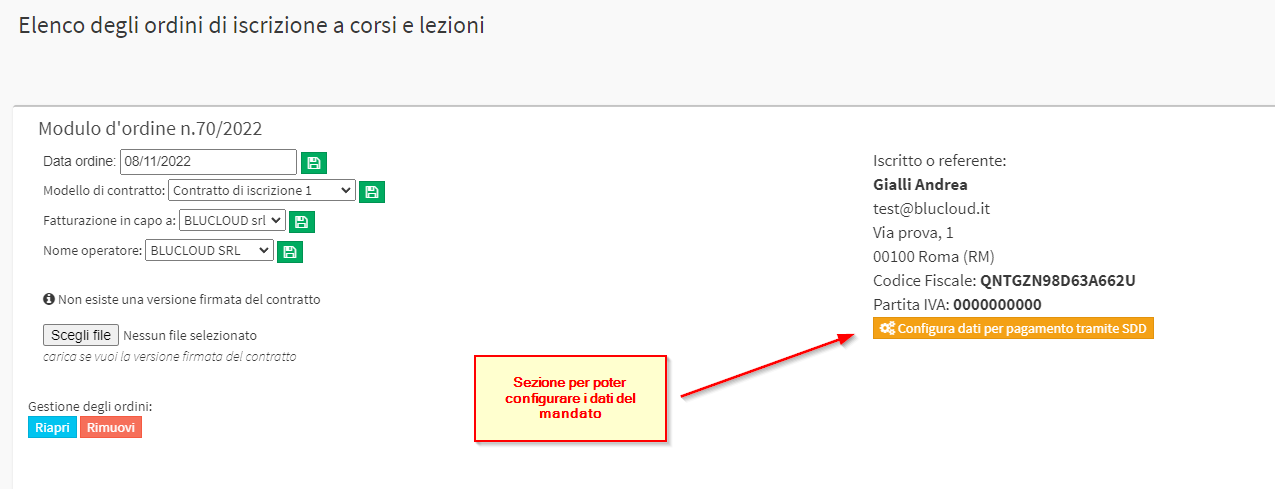
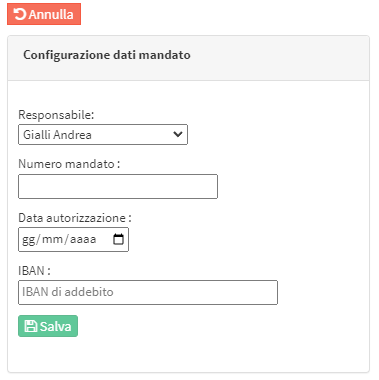
A window will open to fill in the data of the mandate of the selected order:
4 - Export SDD traces
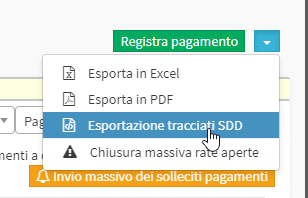
After configuring the SDD payment data in the orders reported to the correct tax company, you will need to navigate to Financial Management → Student Fees and via the blue arrow located in the upper right hand corner and click on Export SDD Tracks.:
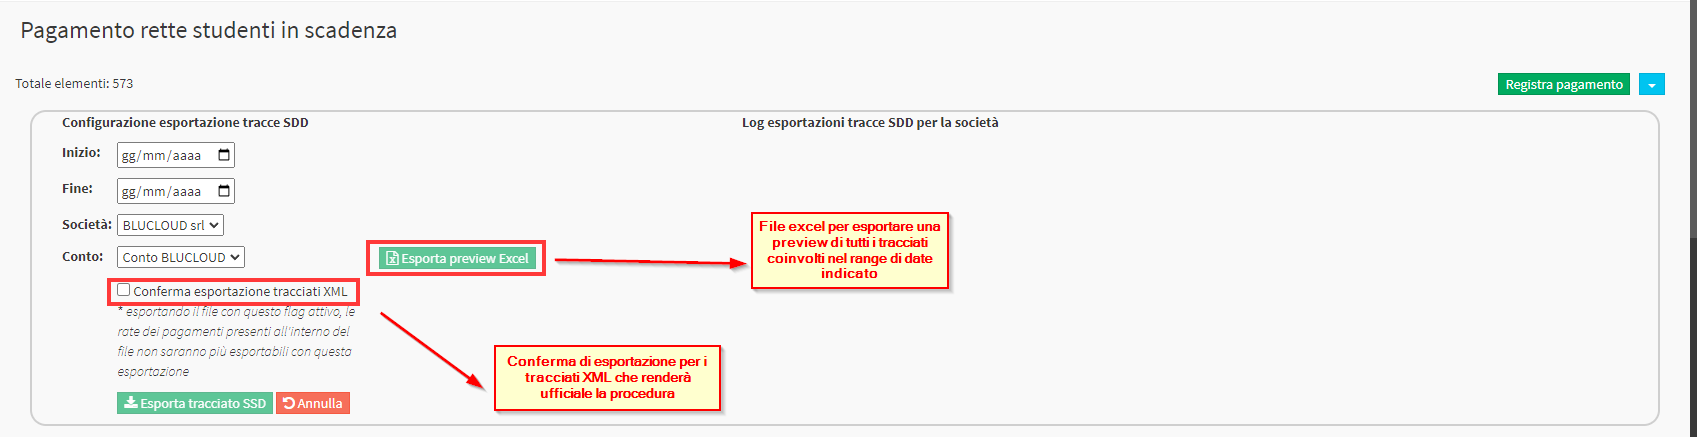
Within the box that will be displayed, a date range of the installments for which you want to export the plot. The following will be returned installments, the Company, and the Account of reference.
Note: Depending on the account chosen, the configuration of that given account will be taken into consideration.
Click the green button Export SDD path XML trace export will be performed. the procedure will be considered official in case you check the checkbox Confirm XML path export, as a result it will no longer be possible to export the installments involved in the specified date range, nor the respective preview since these installments will already be linked to the SDD system.
EXAMPLE:
Taking into consideration the order 70/2022 taken as an example for drafting this guide, we can go to configure the export of SDD traces by setting a date range from 08/12/2022 (due date of the first installment of the order to 08/03/2022 (due date of the last installment of the order) so doing the preview that will be exported will be as follows:

4.2 – Esportazione Tracciati SDD con periodi pre-configurati
E’ possibile configurare dei periodi precisi da poter utilizzare, evitando di selezionare data di inizio e fine ad ogni esportazione.
Per farlo sarà necessario accedere alla sezione Configurazione → Impostazioni → Impostazioni relative agli ordini → Impostazioni SDD e configurare i vari periodi desiderati compilando i campi Nome, Giorno inizio e Fine, Mese Fine.
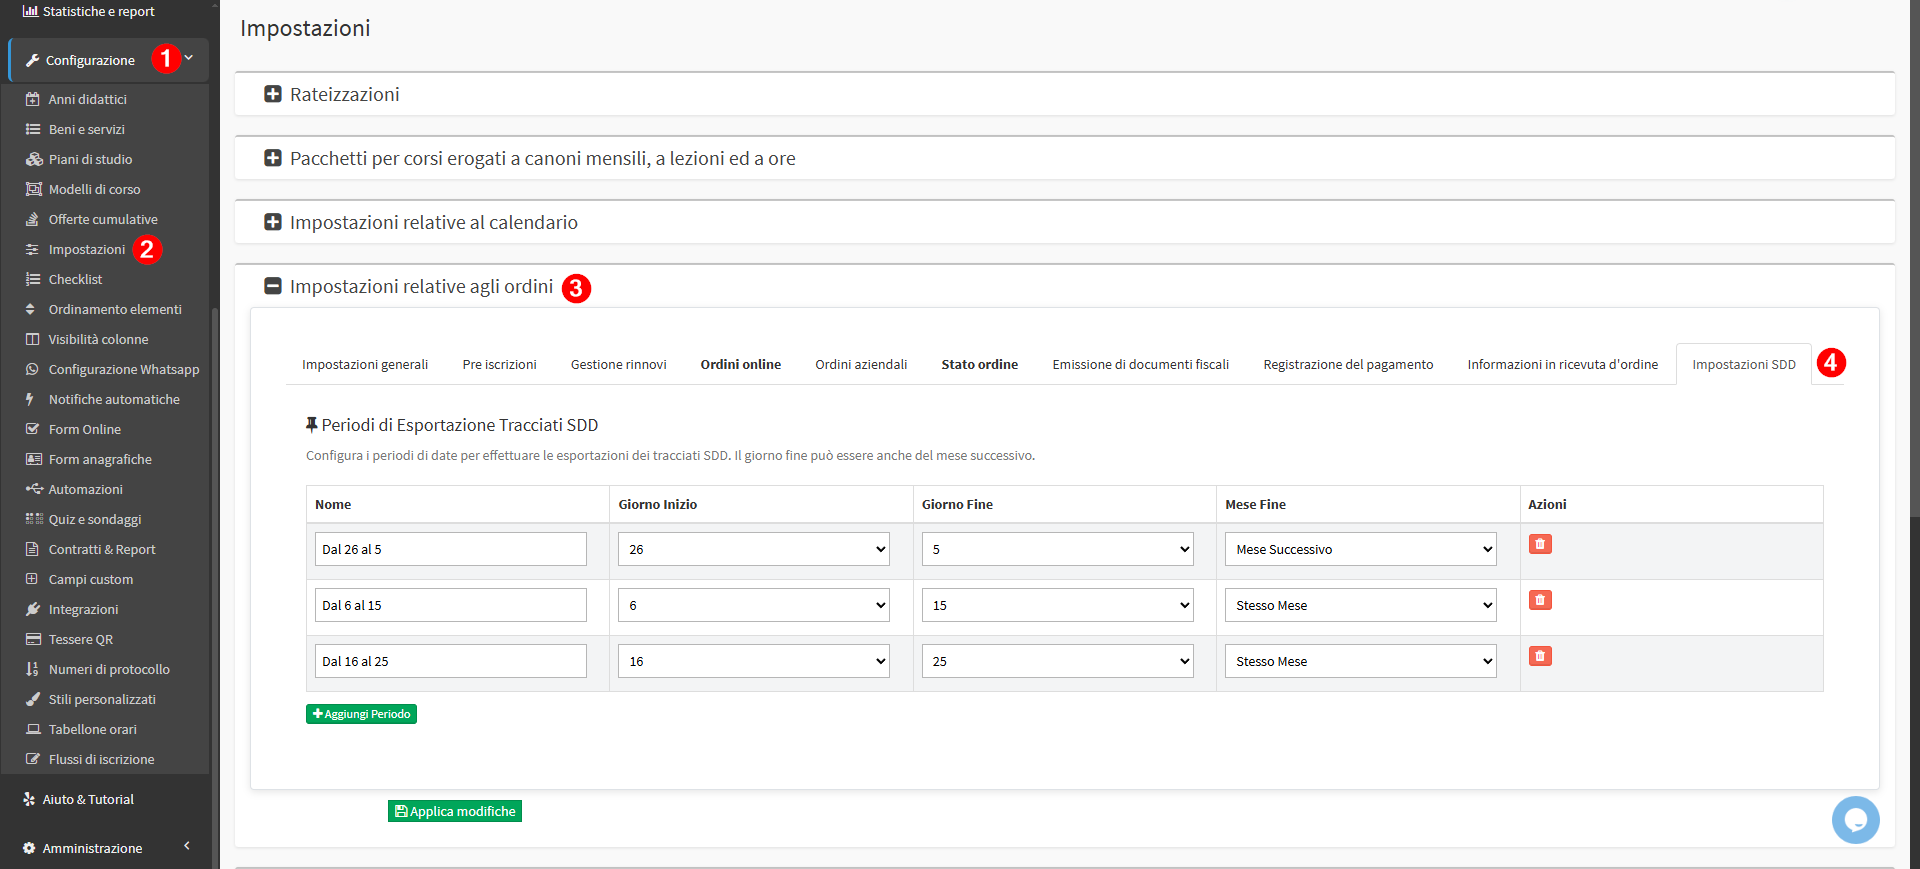
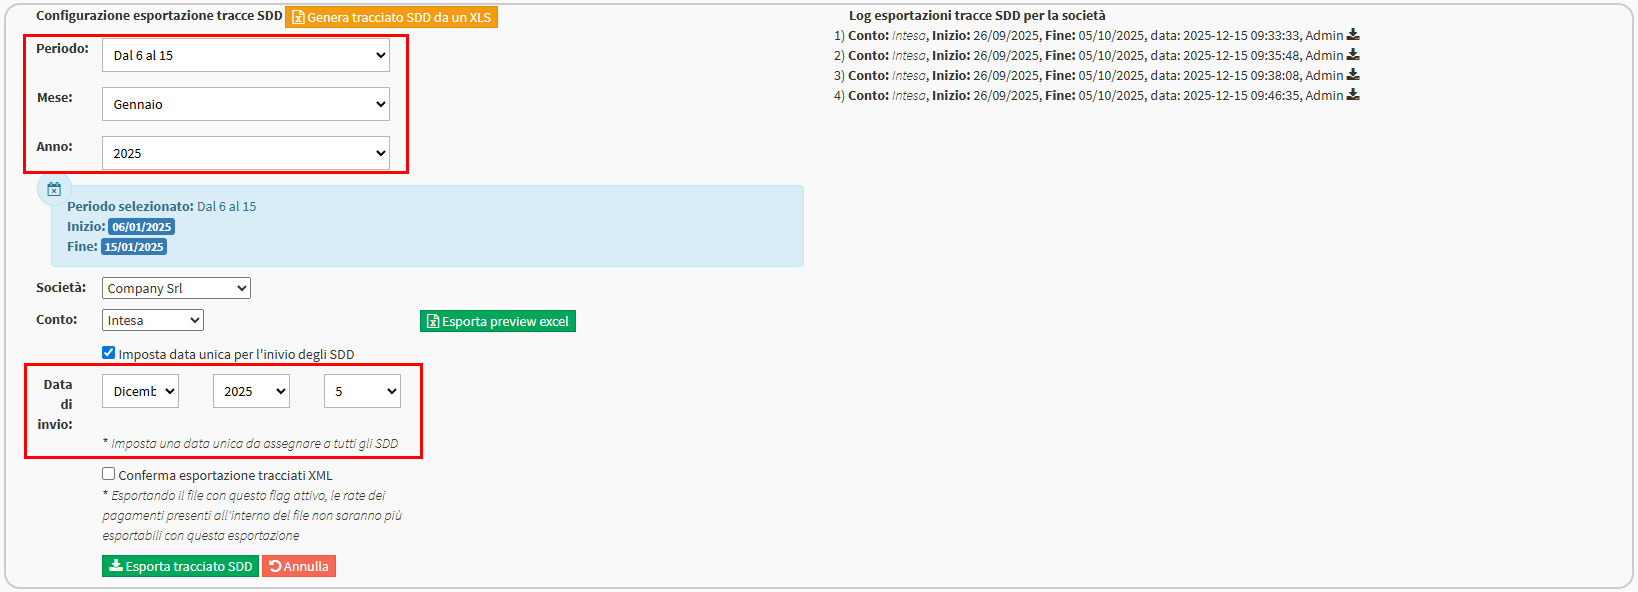
Ora in Gestione Finanziaria → Rette Studenti la sezione dedicata all’esportazione dei tracciati verrà alterata per l’utilizzo dei periodi. Sarà possibile quindi scegliere un periodo configurato per un determinato mese e anno.
Una volta selezionato Imposta data unica per l’invio degli SDD si potrà scegliere la data unica che verrà inserita nel tracciato e che verrà, quindi, utilizzata per gli addebiti.
5 - LOG export SDD Tracks
After formalizing the XML export of the SDD traces, a log of all exported traces up to that point:
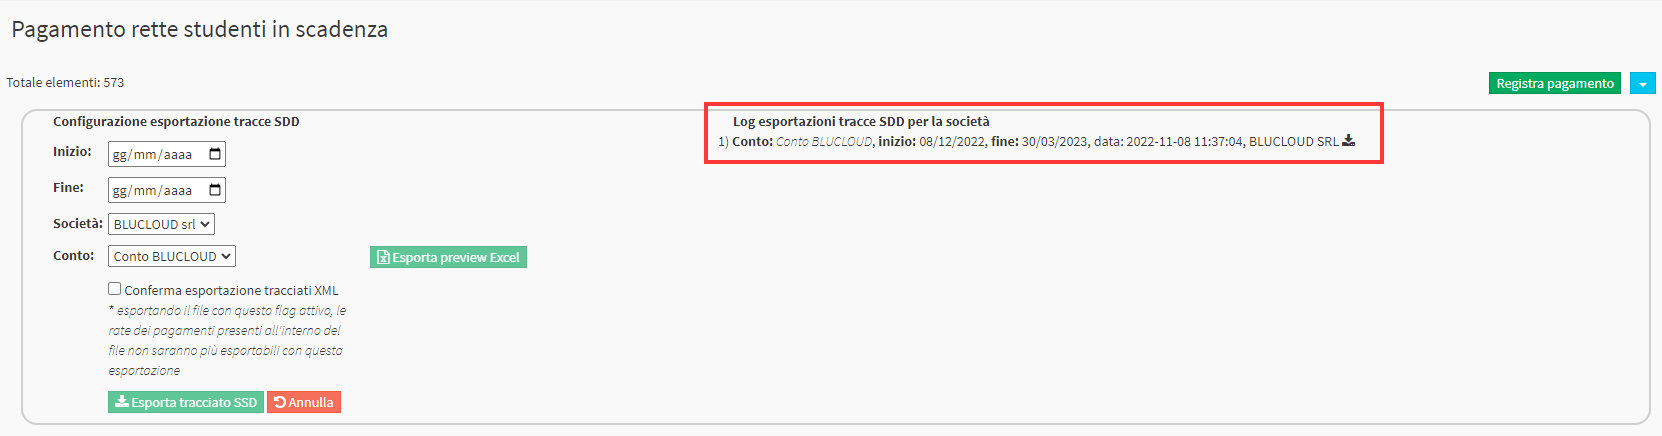
This log will also be available in the relevant account in Fiscal Management → Fiscal Settings → Account Management):

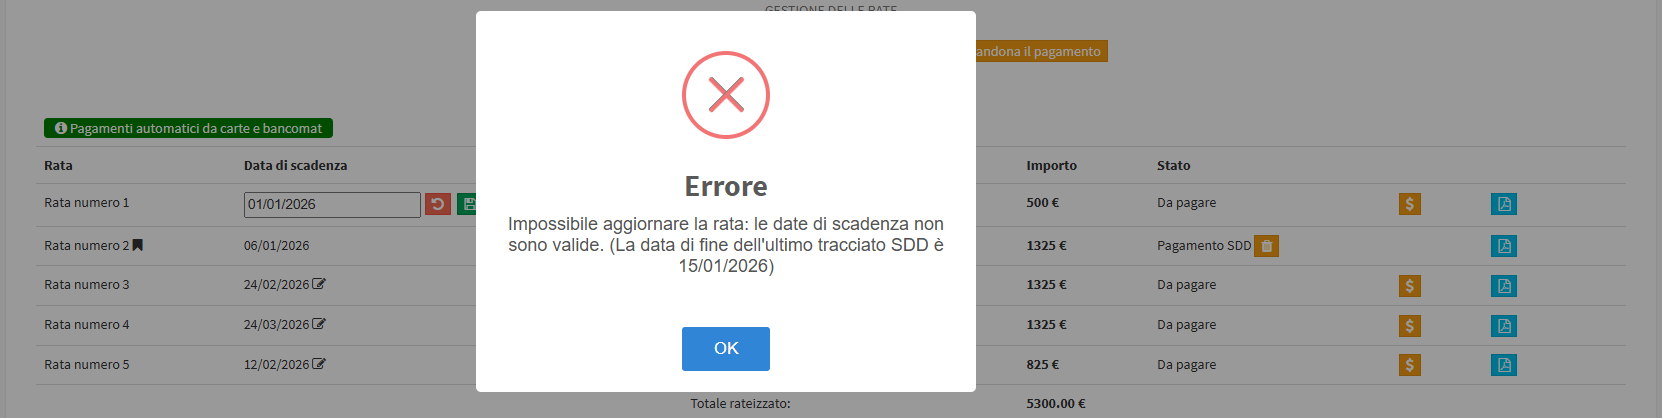
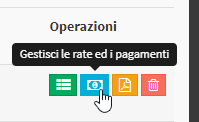
6 – Gestione delle rette insolute ed Esclusione delle rate dagli SDD
All’interno della sezione Gestione Finanziaria → Gestione degli Ordini ed accedendo a Gestisci le rate ed i pagamenti si potrà monitorare la situazione delle rate: quelle che sono state esportate nel tracciato e sono quindi destinate ad essere pagate tramite addebito avranno un’icona accanto al nome:
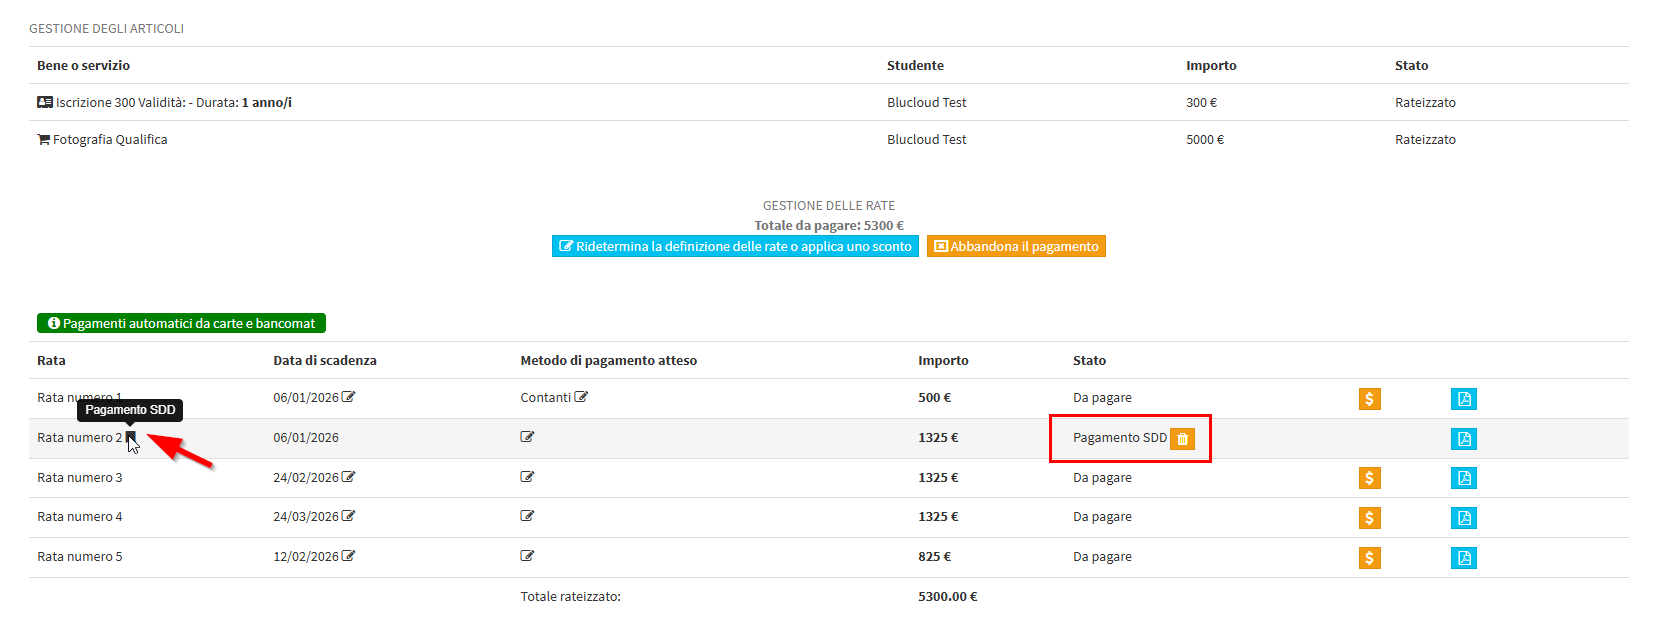
Il pagamento tramite SDD sarà indicato anche nella colonna Stato dove si avrà anche la possibilità di sganciare la rata dall’SDD con il tasto giallo.
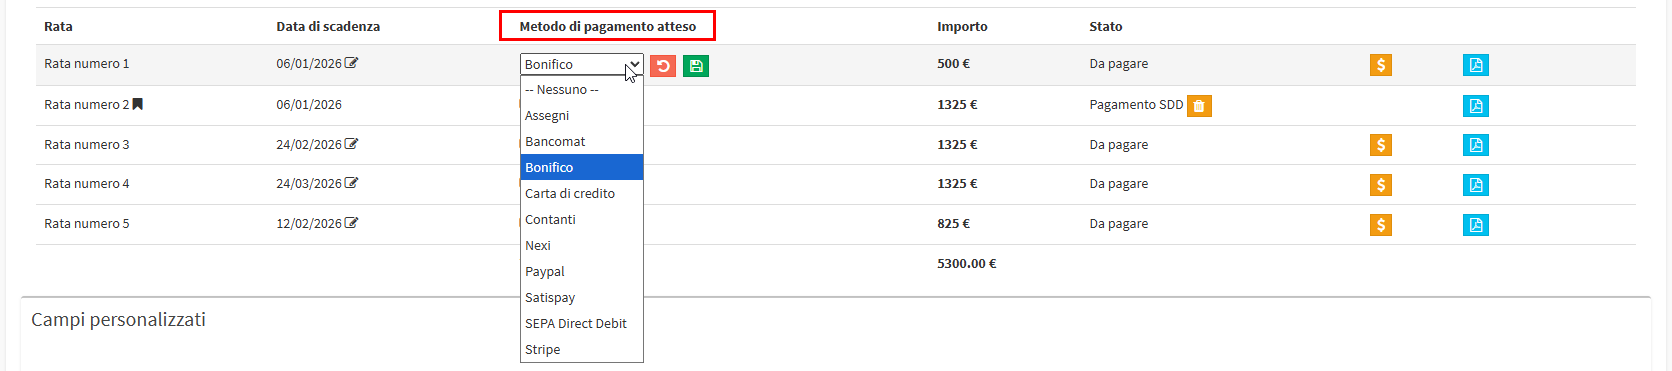
Per Escludere una rata prima dell’esportazione del tracciato basterà indicare un metodo di pagamento atteso nell’apposita colonna:
Per le rate non ancora esportate o sganciate dall’SDD sarà possibile alterarne la scadenza per includerle in un periodo specifico, la procedura di modifica è quella standard ma non sarà possibile inserire la scadenza all’interno di un periodo già esportato.