Connect and Send Certificates or Attestations in Courses
To proceed with linking a Certificate/Attestation to a course navigate to Didactics -> Group Courses and in the Tab Edit we will find the reference field Linked Certificate/Certificate, where we will go to select the Protocol we just created:

Only after performing this operation, in the Tab Enrolled Students next to each student enrolled in the course, a new column will appear regarding the certificates/certificates:
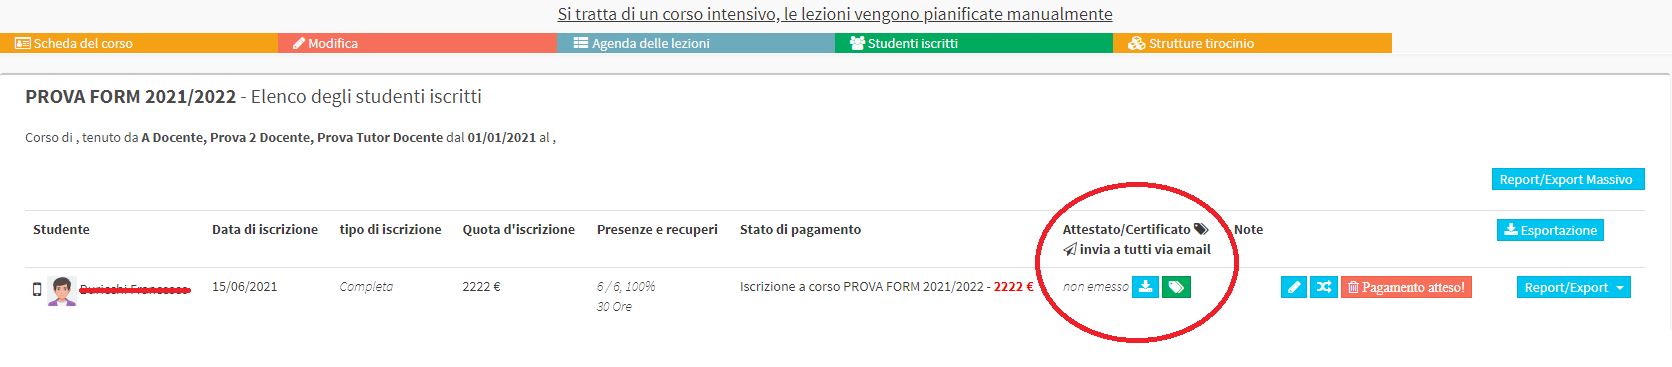
Clicking on the blue button ![]() we can download the certificate as a PREVIEW without thereby generating the protocol number but simply to be certain that the information entered in the certificate we are going to generate is correct.
we can download the certificate as a PREVIEW without thereby generating the protocol number but simply to be certain that the information entered in the certificate we are going to generate is correct.
Clicking on the green button ![]() we are going to GENERATE the certificate in all respects, thus making it official e thereby blocking the protocol number Which can no longer be used for any other document.
we are going to GENERATE the certificate in all respects, thus making it official e thereby blocking the protocol number Which can no longer be used for any other document.
After clicking on the green button, an additional window will appear in which we need to confirm our choice (inserted to avoid any errors in the irreversible generation of the certificate)
We have finally generated our Certificate with the Unique protocol number, and now we can immediately see that the two buttons in the column Certificate/Certificate were respectively replaced in a green ![]() which has the function of DOWNLOAD the certificate with its protocol number already applied, and in a yellow
which has the function of DOWNLOAD the certificate with its protocol number already applied, and in a yellow ![]() that we will need to send the certificate immediately just generated directly to the student's Email address (if present in his registry).
that we will need to send the certificate immediately just generated directly to the student's Email address (if present in his registry).