Configuration and compilation of Checklists for Courses.
The Checklists are divided into two sections:
- Student Checklists that make it possible to verify that the participants in a course have certain requirements to participate in it.
- Course Checklists that allow you to verify that the course has passed all the steps before the start of classes or after they have ended.
Configuring Checklists
Navigate to Configuration → Checklist, from here we will have the ability to create an initial Checklist:
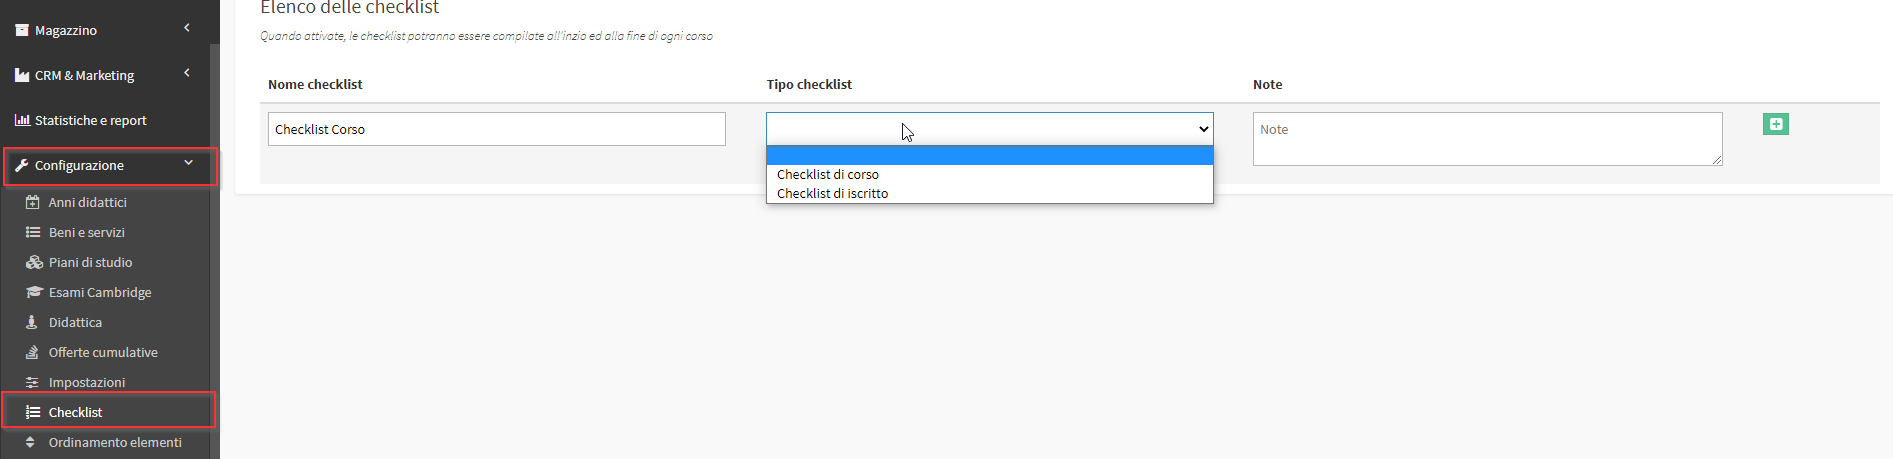
Then enter the following data:
- Checklist name: The identifying name we want to enter
- Checklist type: Whether it is a checklist for the whole course or for individual course enrollees.
- Notes: Any additional notes
Pressing on the green icon will save the changes:

With the buttons to the right you will be able to enter questions, edit the checklist o delete it. Let's click on the first button List of questions to fill out the checklist:

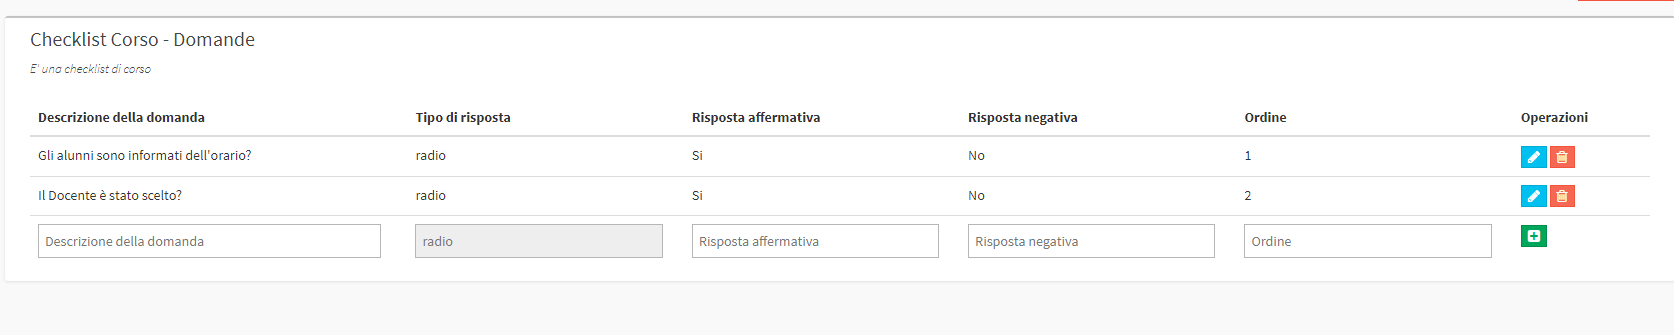
The following items will be present in the Course Checklists:
- Question Description: Enter the question to be answered in the Course
- Response Type: The response type is not editable in the Checklists course
- Affirmative answer: Enter the affirmative answer to the question written in the first Box
- Negative answer: Enter the negative answer to the question written in the first Box
- Order: The order of appearance of the application
When you have finished filling out the application click on the + to the right.
Repeat for all the questions you want to include in the checklist:
For checklists on individual Student the settings change:

Question description: Three parameters are insertable:
- Attachment existence check: Used to indicate whether the student has attached the document chosen in Answer Type, these must first be created as Custom Fields (FILE) for master records of Students:

- Verify validity attachment: Need to check the validity of an attachment uploaded by the student. Again, these must first be created as Custom Fields (FILE with Expiration) for the master records of the Students. It will then need to be indicated whether the Document is valid:
- Compared to the course start date
- Compared to the end date of the course

- Checkbox: As in the checklists per course explained above

Enabling Checklists
Move now to Configuration → Settings → Course-related settings → Checklists. Here we could set which checklist to use by default for the Pre Course Checklists, Post Course and for Student:
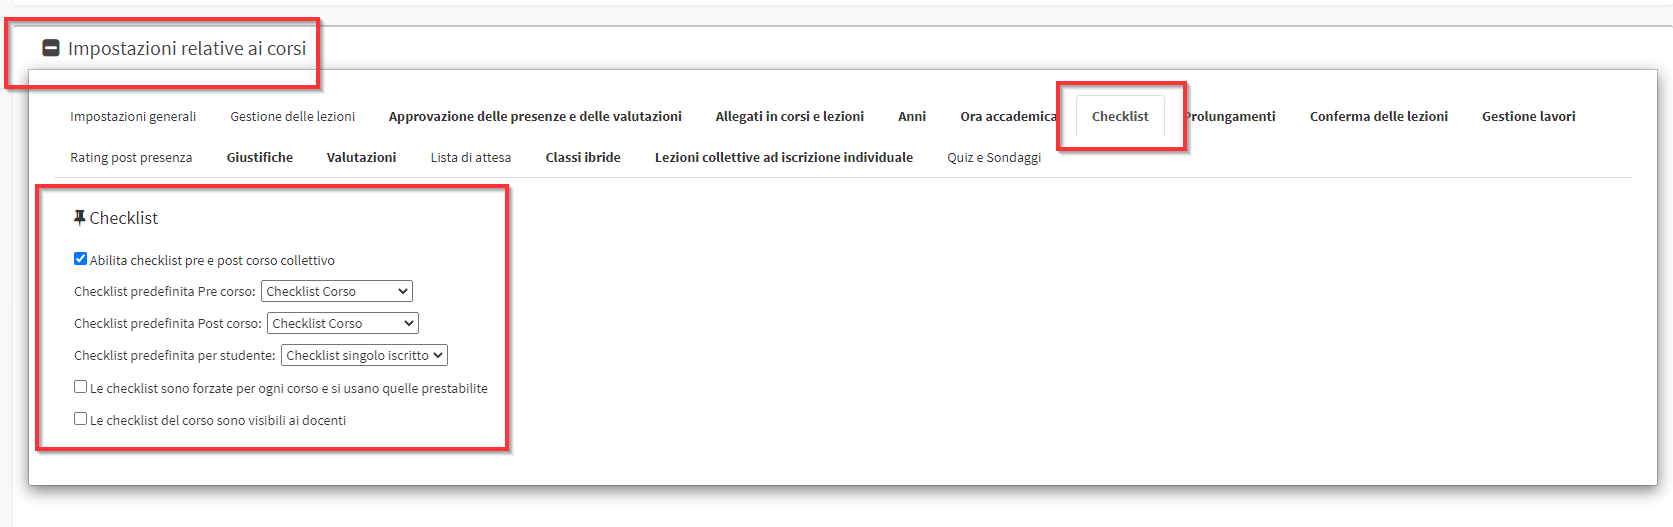
If not already enabled check the box. Enable pre and post course Collective checklist.
The Checklists are forced for each course, and the lendable ones are used., in case more than one Checklist has been created there will be no choice within the Courses, it will be forced the use of those predefined ones on this page.
Checking the item. Course checklists are visible to faculty, the latter will be able to view(not edit) the pre- and post-course lists.
Once you have finished enabling click the Apply changes to finish the operation:
Use of Course Checklists
When creating a Collective Course, in the list of Courses present in Didactics → Collective Courses two boxes will appear indicating whether the pre- and post-course checklists have been completed:
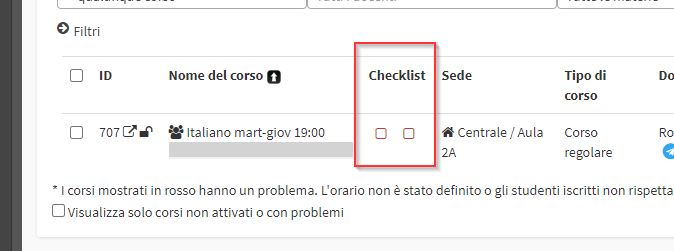
If the two boxes do not appear in one or more courses enter the Tab Edit of the individual course and choose the lists from the entries present:

If properly configured in the Course Tab there will be the sub-menu Checklist in which we will find the two lists to be completed:

Click Fill out pre course checklist we will access the compilation of the set checklist:
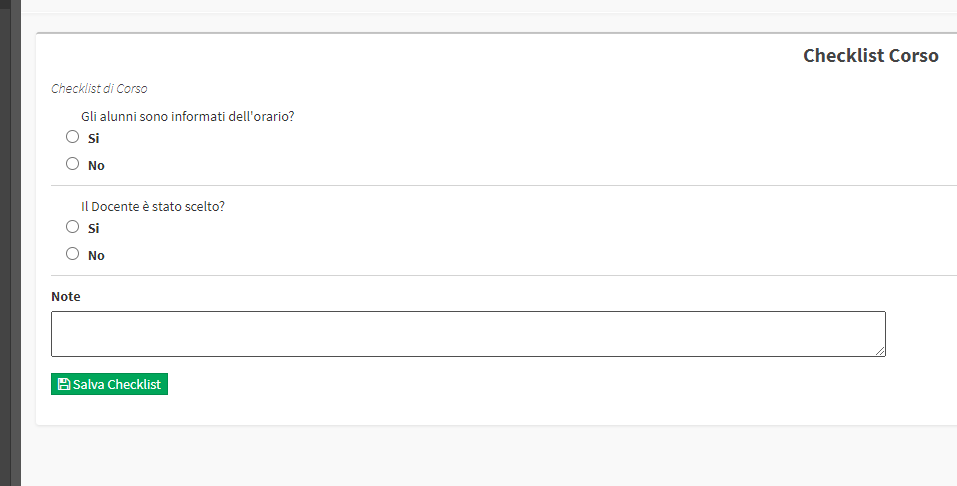
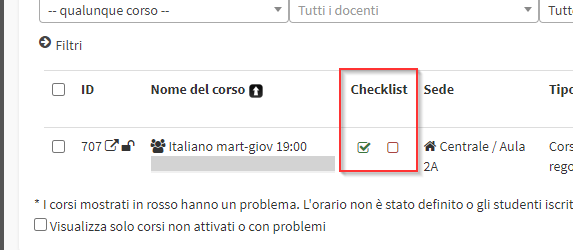
When you have finished filling in you will need to click the Save Checklist to confirm the changes, now in the list of Courses the first checkbox will be checked:
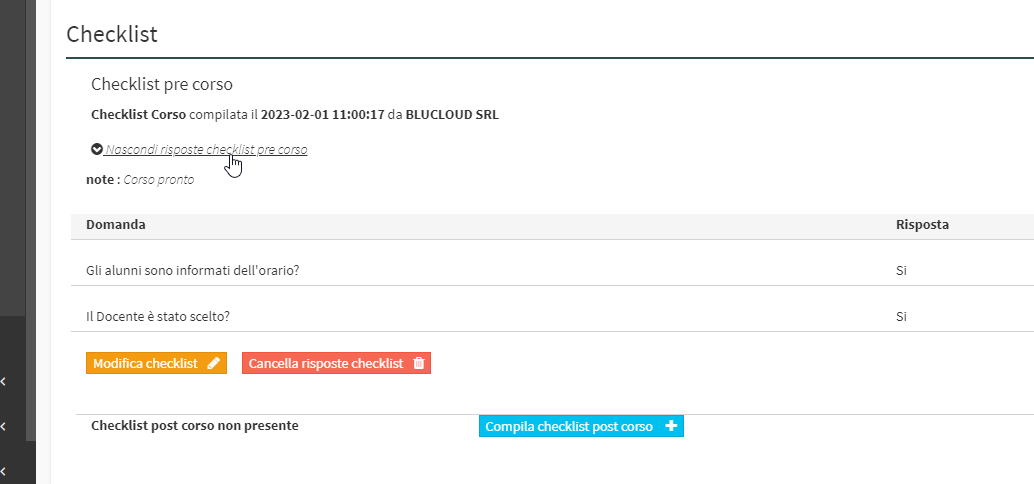
Within the Course Schedule it will be possible to consult the checklist responses with the possibility of delete or edit the answers:
Using Student Checklists
Le student checklists are fill in automatically based on the settings. For example, if it has been requested that the Student must have Curriculum Vitae attached., if it is present the attachment in his or her master record (Master Records → Students → Edit), the checklist will be checked:

In the Student's master data is present the uploaded Curriculum:

In case you want to exempt a Student from this checklist you will need to click in the Checklist not passed:

And click on Disable obligation for this student:

For the Student in question will result in the Positive Checklist even if it does not have the Document linked to the registry.