Upload documents and associate them with courses
Uploading documents to your own storage of ScuolaSemplice
To upload one or more documents to your virtual library at ScuolaSemplice, which can then be associated with courses and then downloaded by enrolled students, navigate to Master Records → Documents.
The use of storage for archiving documents and multimedia files, may be subject to constraints and restrictions, in terms of space available. Each customer has a free supply in a storage space of up to 100 MB and unlimited traffic for accessing these documents. To request via email from the staff of ScuolaSemplice more storage space, click at the top of the screen on "purchase more storage space".
Click the green button in the upper right corner "Upload document" and, from the next, screen, fill in the following fields:
- Document name*: the name of the document to be uploaded
- Description: the description of the document, if any
- Related tags: any linked tags to facilitate searching for the document when associating it with the course. Flag the checkboxes of the tags you intend to associate with the document ***
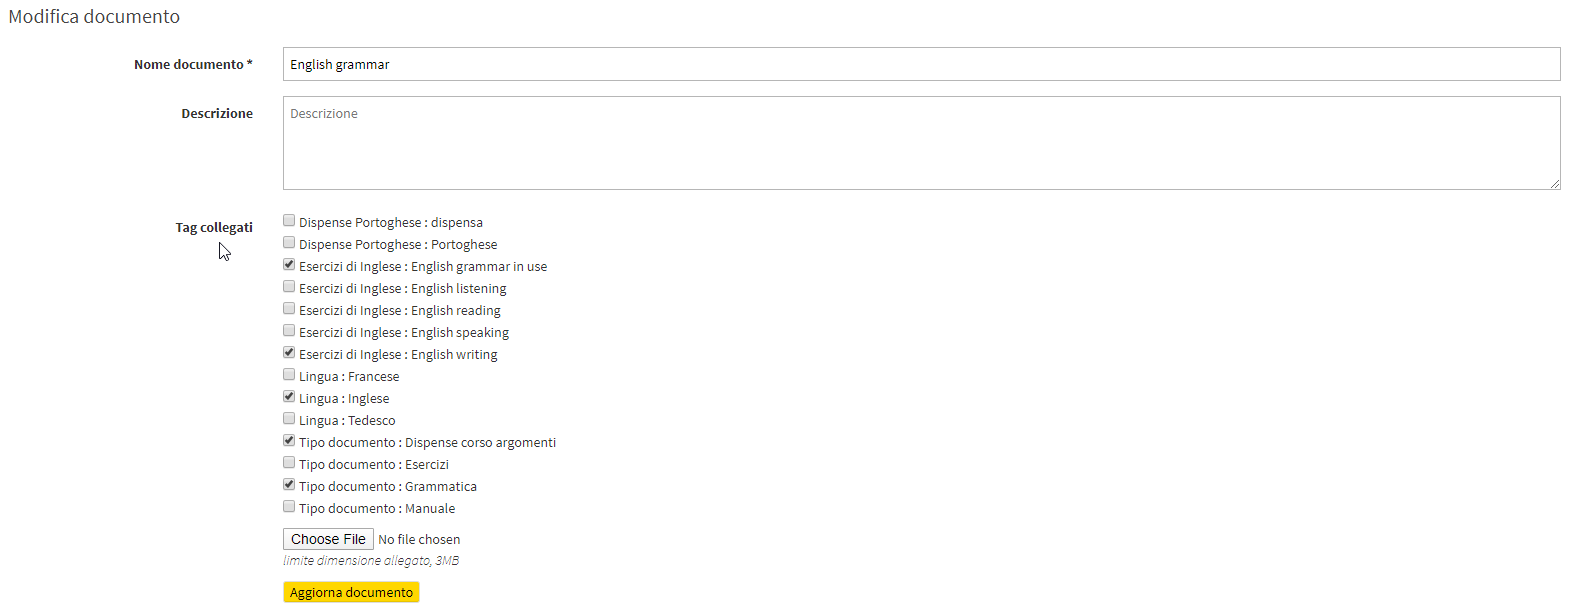
- Choose file: select the file you intend to upload to your storage (maximum size per file is 50 MB)
Click the "Upload document" to finish the operation.
Note: The client is solely responsible for the material uploaded to the storage space and in any case agrees not to upload material that violates applicable laws or may infringe copyright or the rights of third parties.
*** Linked tags can come in very handy to make it easier to find the document you intend to associate with a course, especially in cases where many documents have been uploaded to your storage.
So always from Master Data → Documents click the blue button at the top right "tag definition" (to group tags by type) and, from the next screen, enter the tag name and click the blue button with + to save.

After entering the tag name, you will be able to enter an arbitrary number of tag values by filling in the empty field next to it and clicking the blue button with the +.

Association of one or more papers with a course
To attach one or more documents to a course, when creating the course (so collective course), from the creation tab, scroll to the end of the page under "Attached documents" and click the blue button "Attach a new document".
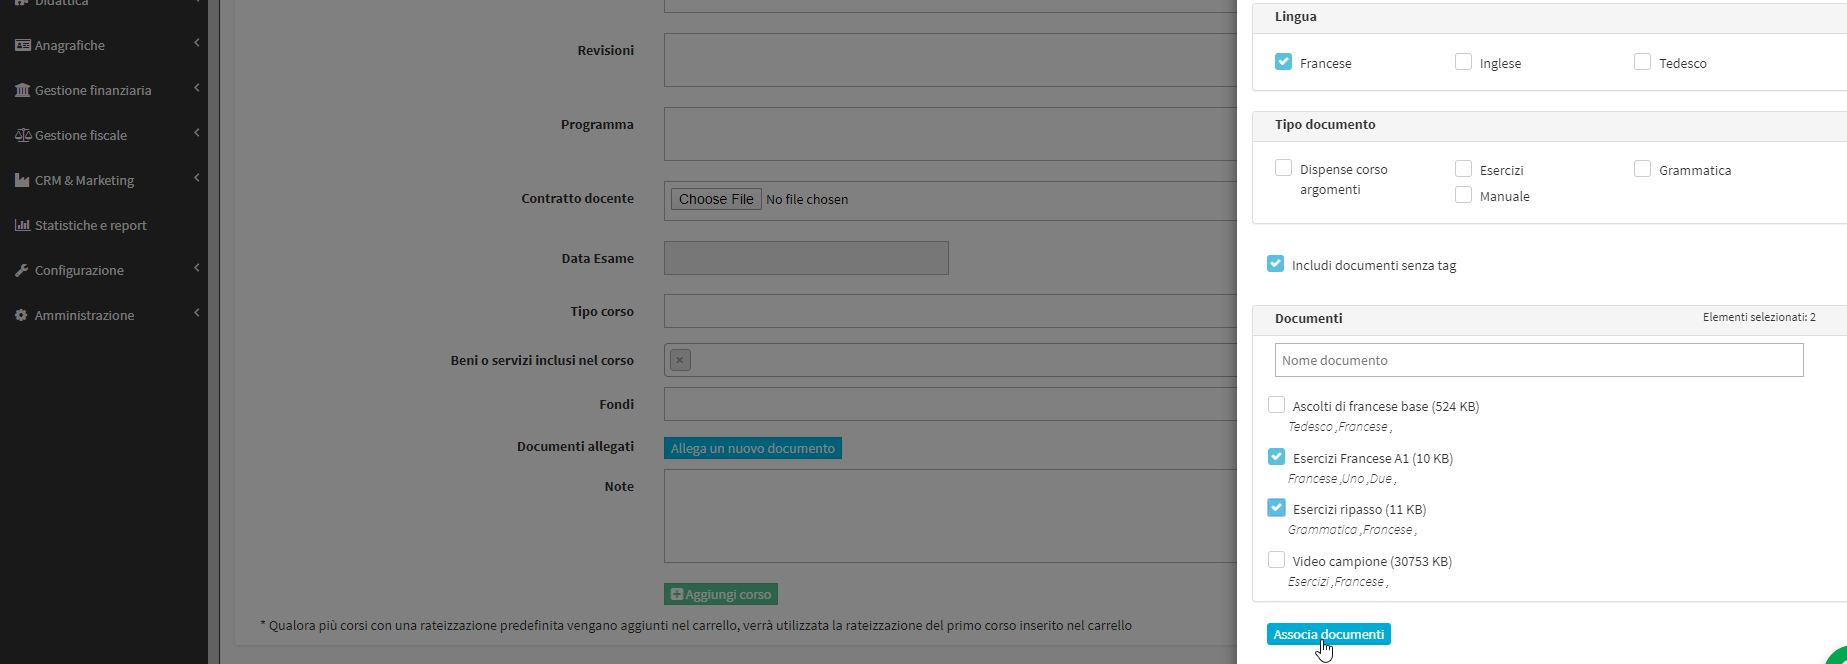
Then from the new window, enhance the checkboxes of the tags for which you intend to search the document and click the "Document Search".
Then select according to your search the document(s) you want to attach to the course.
Click the "Associate documents" to finish the operation.
For an existing group course or any individual course instead, the procedure will be the same but you will have to enter the "Course Tab" and click the blue edit icon next to "Course Attachments (n)".
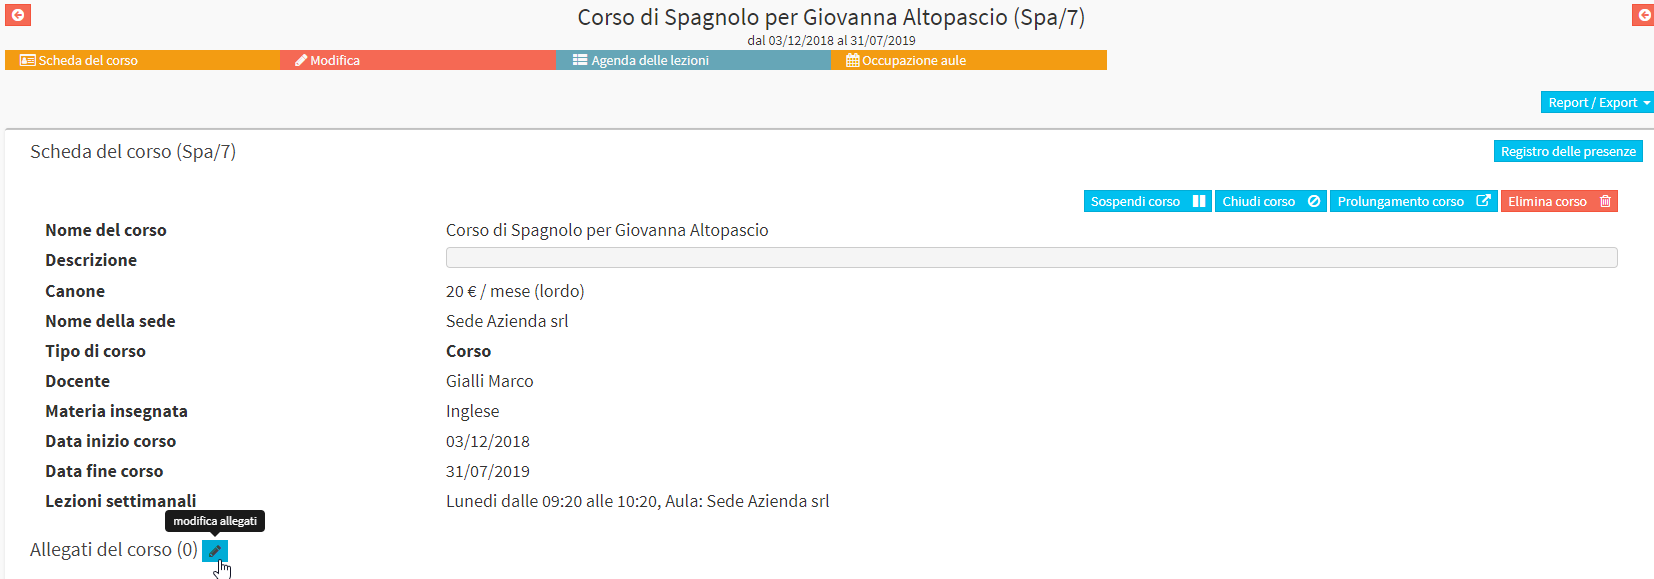
From the next screen click the "Attach a new document", search and choose the document in the same way explained just above, and finish the operation by clicking the "Attach document"
IMPORTANT: Teachers, if enabled, will be able to upload documents and associate them with their courses taught, via their teacher web account (click here to read the guide on creating teacher web accounts), in the same way as the secretary's office, the procedure will be exactly the same as explained in this Wiki article at ScuolaSemplice.
To enable lecturers to use document management navigate to Configuration → Settings → Settings related to faculty → Disk space management and flag the checkbox "Enable document management for faculty members."
Downloading documents via Student Web Account (or Parent/Guardian Web Account)
The student (or parent/guardian) will be able to download the attachments related to the course by accessing the Course Tab:

Then scrolling down to Course Attachments you will find a list of all the documents linked to the course, and on the right will be the button to download the documents:

Downloading documents via Student App (or Parent/Guardian App)
The student (or the responsible tutor connected in the same way) will be able to download documents (such as handouts, exercises, concept maps, etc etc) that the secretary or lecturer has attached to the course(s) they are taking, nimbly via their App.
Enter the top left section of your App "Courses". Courses to which one or more documents have been attached will be marked with this icon ![]()
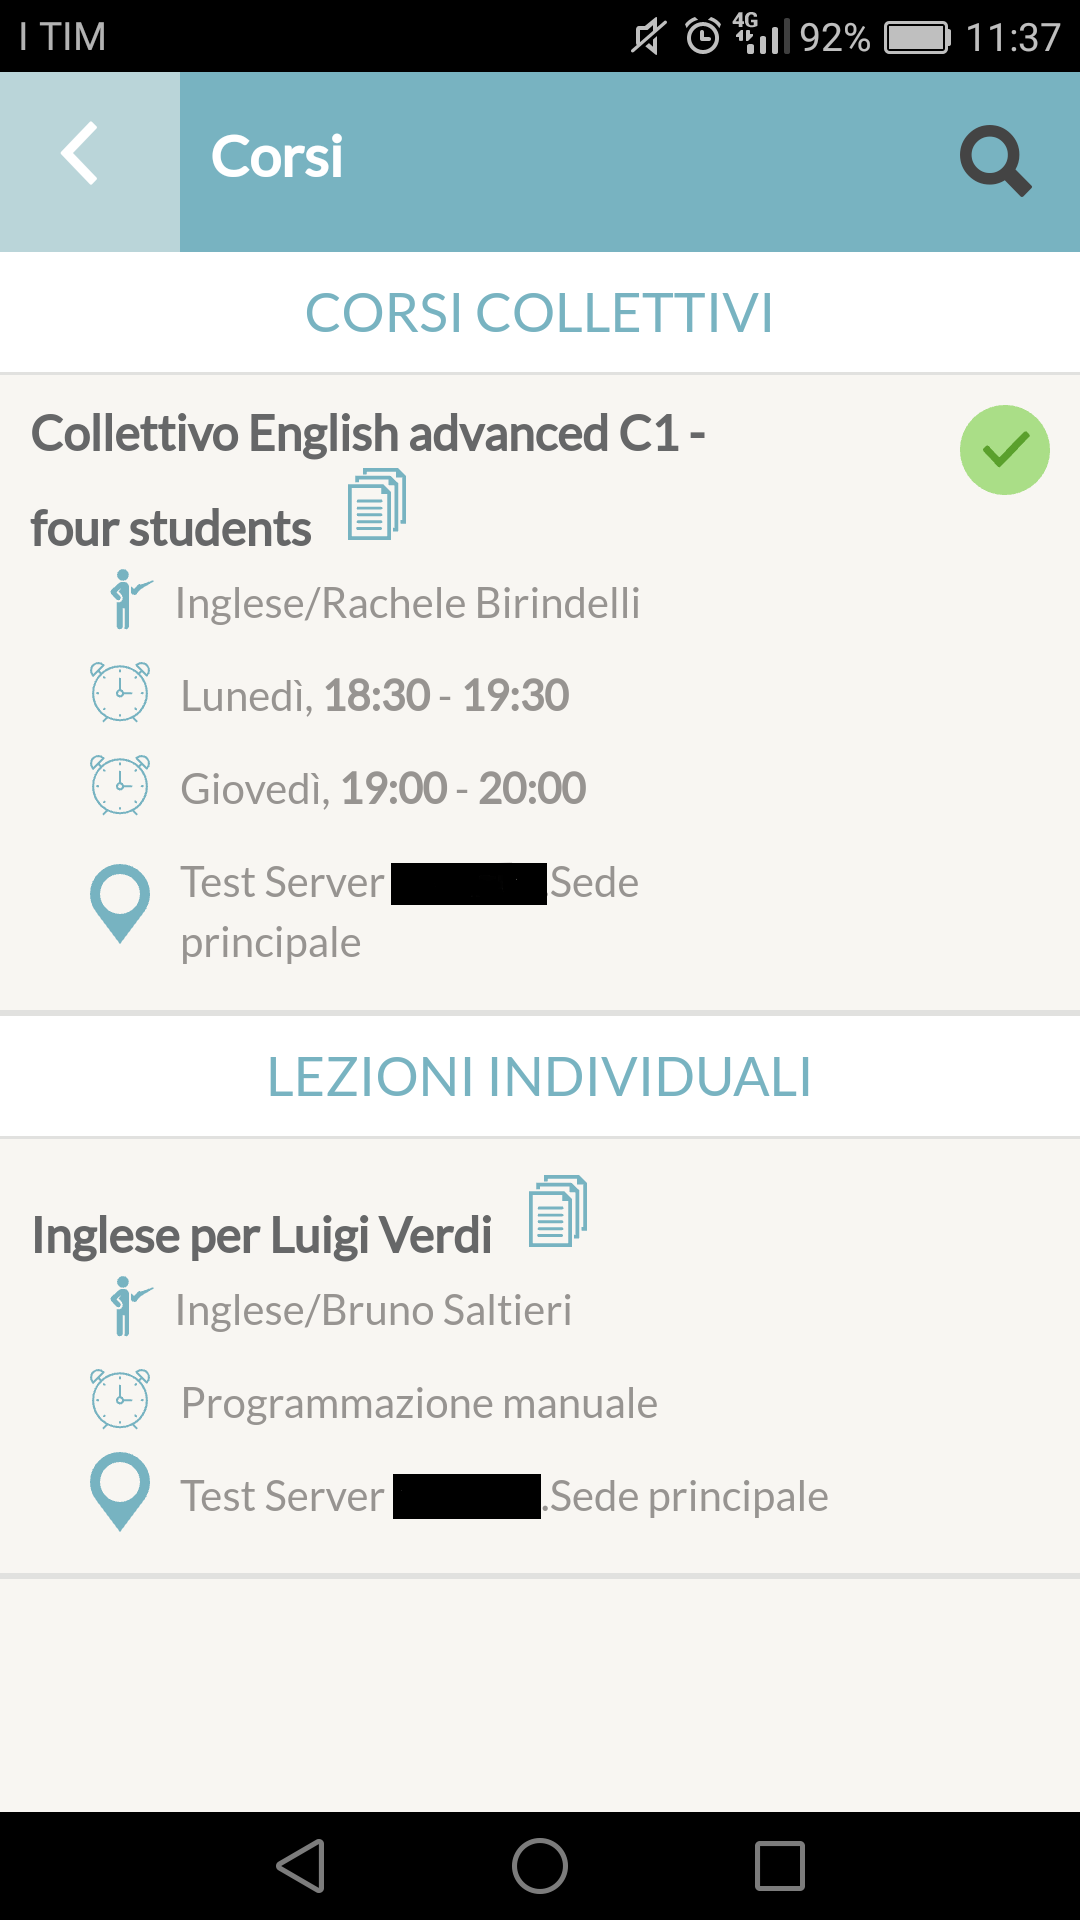
Then press in the course with the attachment to enter it. In addition to all the details and information about the course in which the student is enrolled, if attached, there will also be the document that can be downloaded.
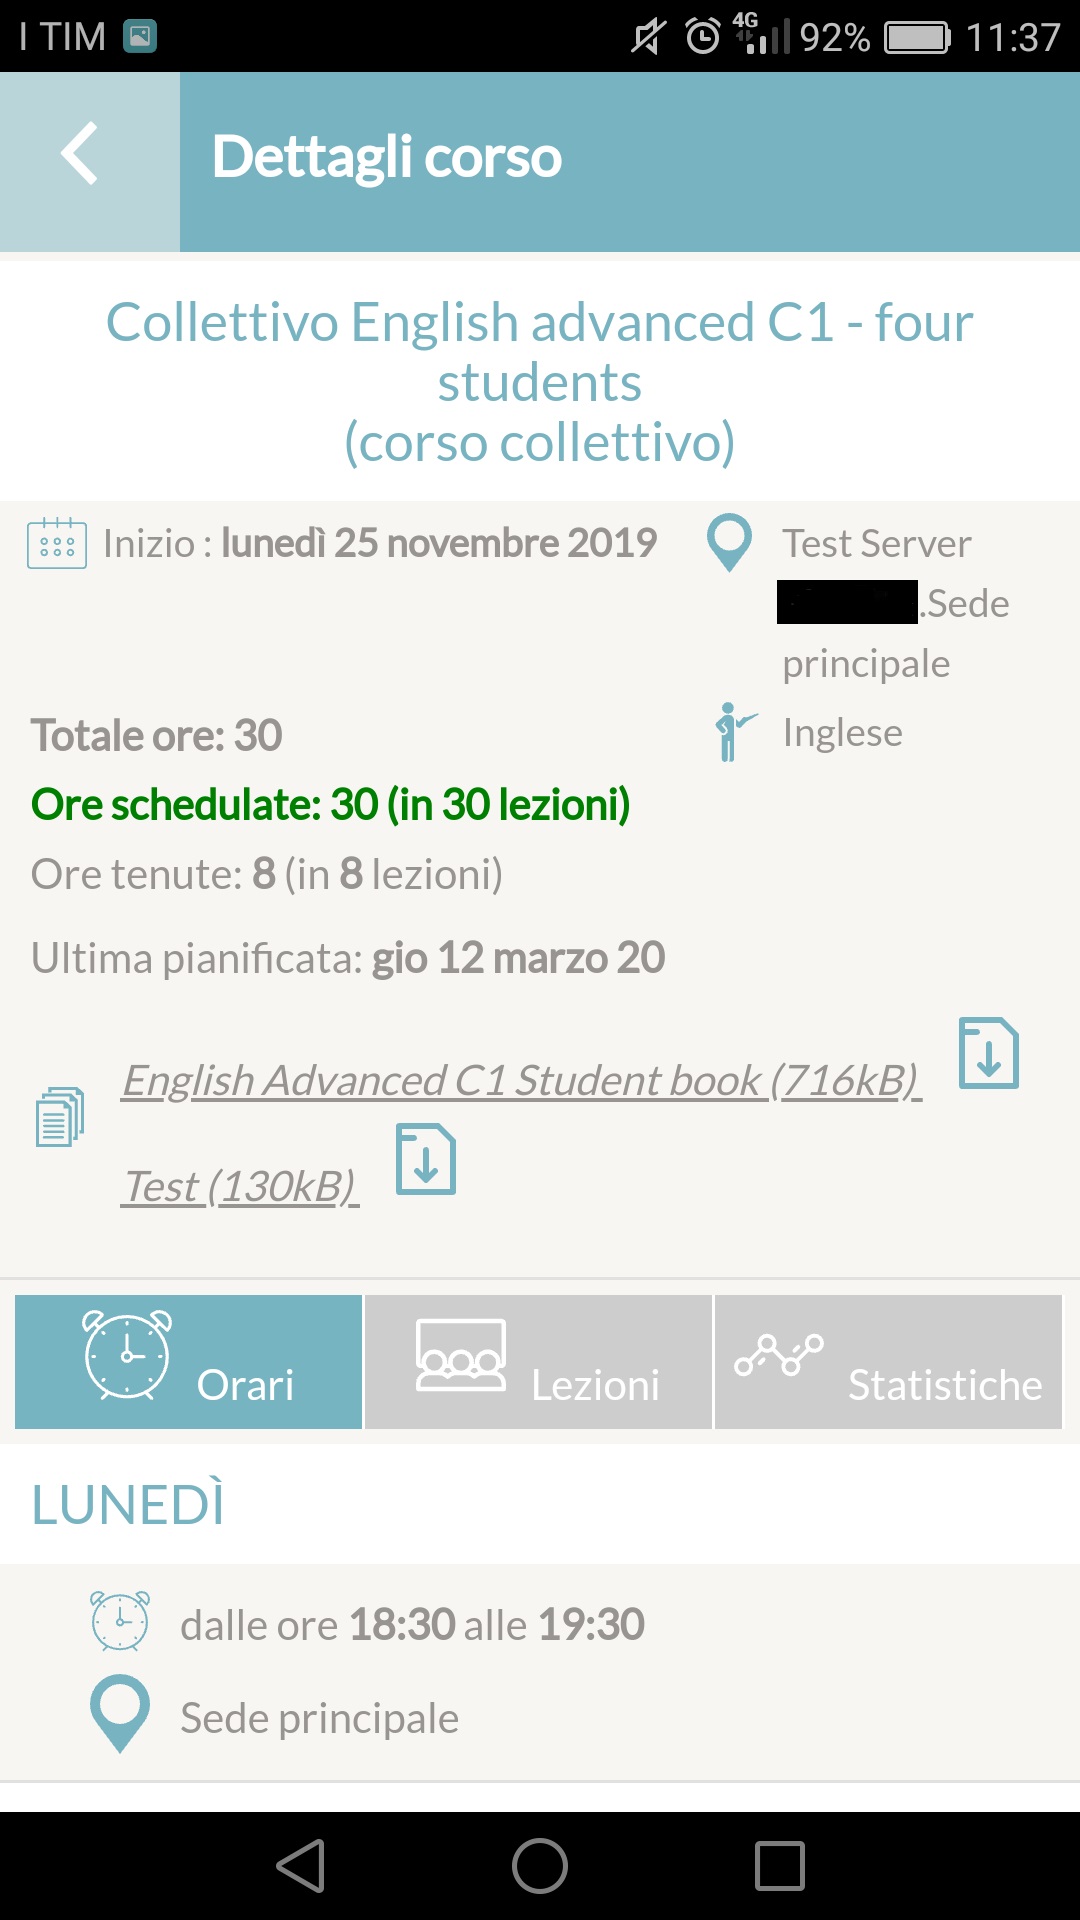
Then press the icon ![]() To download the file associated with the course.
To download the file associated with the course.
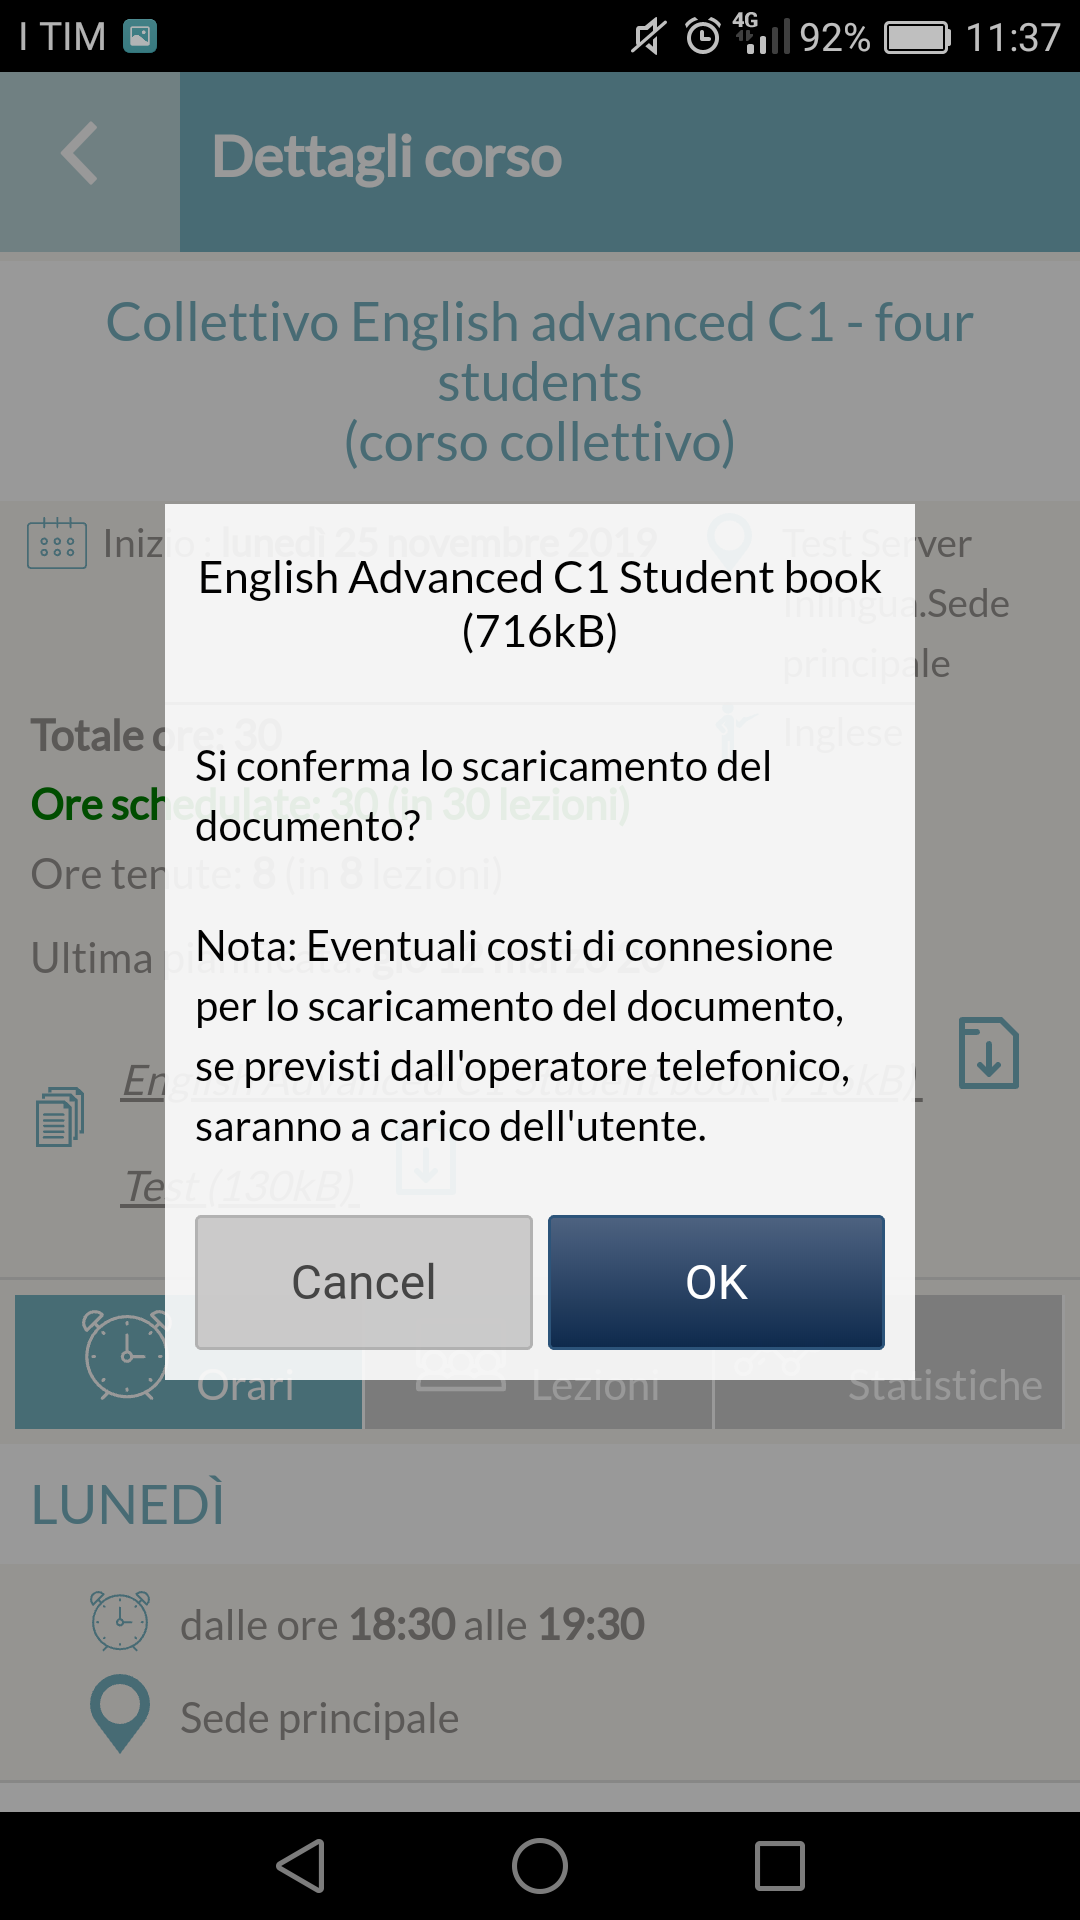
Press the "OK" to finish the operation and download the document.
N.B. Please note that the documents will also be downloadable through the Parent/Guardian App if the student is a minor and the App is used by the parent.