Examination management
To create one or more exam sessions for which to enroll students, navigate to the menu item Didactics → Examination List and click the button in the upper right corner "Add exam":
 From the next screen, fill in the following fields:
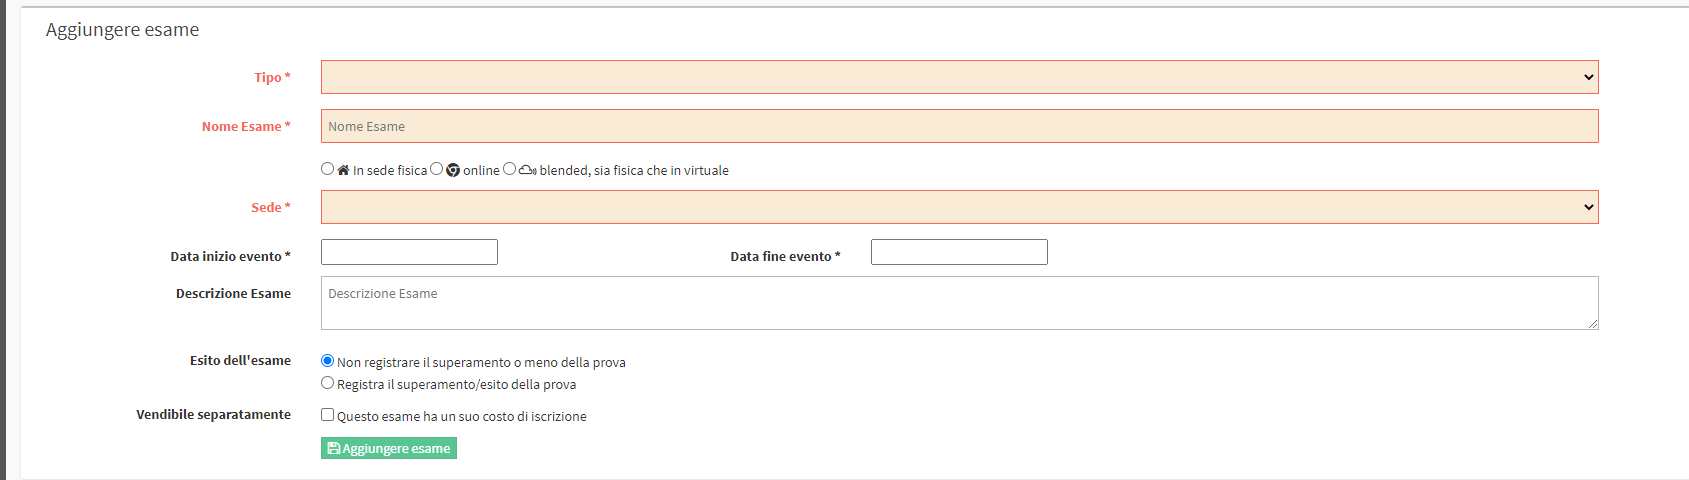
- Type: from the drop-down menu, choose the option "Examination / Certification" (required field)
- Exam Name: the name of the exam (required field)
- Location: the educational venue where the exam will be given (required field)
- Subject: the subject/language being examined (required field)
- Event start date: the start date of the exam (required field)
- End date of event: the end date of the exam (required field)
- Examination Description: any description of the examination
-
- Do not record passing or failing the test: through this option, you will not be asked to specify whether or not you passed the exam
- Records the passing/outcome of the test: through this option, you will be prompted by the system to record pass/fail of the exam, being able to choose these two possibilities:
- Records the final evaluation obtained
- Records the successful or unsuccessful passing of the test
- Sold separately: place the following checkmark to be able to make registrations for the exam you are creating, and choose from these two options below:
- Specify Manually: manually enter the cost of registering for the exam.
- Link an asset/service: in case a good/service has been created with the corresponding cost, it will be possible to link it to the exam so that it will be automatically used as the cost of exam registration
Click the "Add examination" to complete the operation.

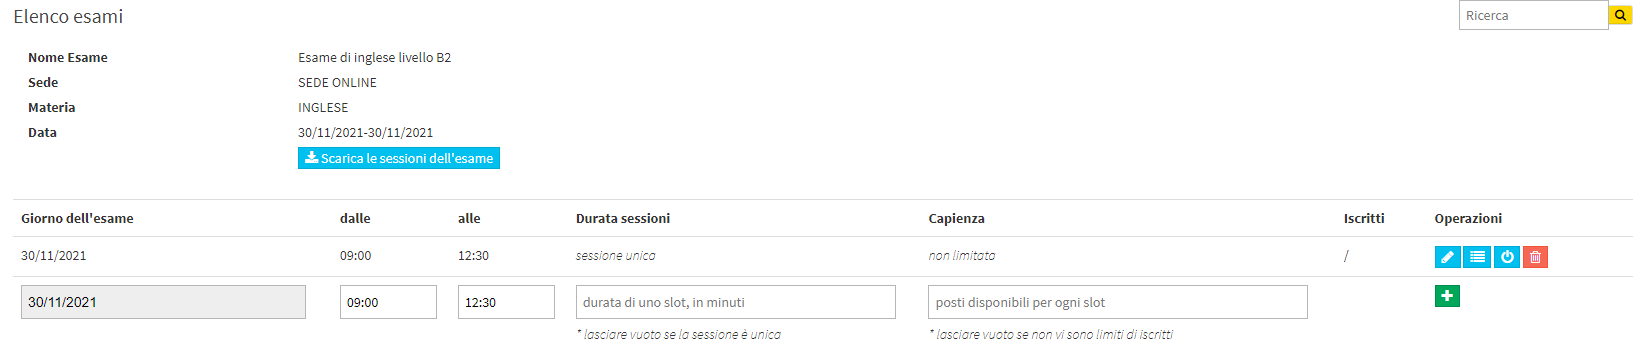
Once the exam is created, the system will prompt you to create the session(s) of the exam; then fill in the following required fields:
- Examination Day.: the day of the exam, being able to choose a date between the event start and end dates specified above. In case you are creating a single exam date, it will directly coincide with event start/end date
- from: indicate the start time of the examination
- at: indicate the end time of the exam.
- Duration of sessions: fill in this field in case there are multiple sessions of the same exam on the same day, which students can register for. Leave it blank instead in case it is a single exam session
- Capacity: indicate the maximum number of participants for the examination session (or for each slot in case a duration of each individual session was indicated in the previous field); leave the field blank in case there are no limits related to the number of participants.
Click the green button with the + to add the exam session.
Examination registration
Navigate to the panel "Student Enrollment" and, via the center blue button of enrollment types, choose the option "Registration for an exam". Then choose the student's master data and the exam in which you intend to enroll them.

Then place the exam in the shopping cart and proceed the normal registration and order issuance process.
Then by going back to the Teaching → Examination List menu, the system will have updated the section dedicated to exam takers, both in the outer row;
 either by going inside the session by clicking the second icon.

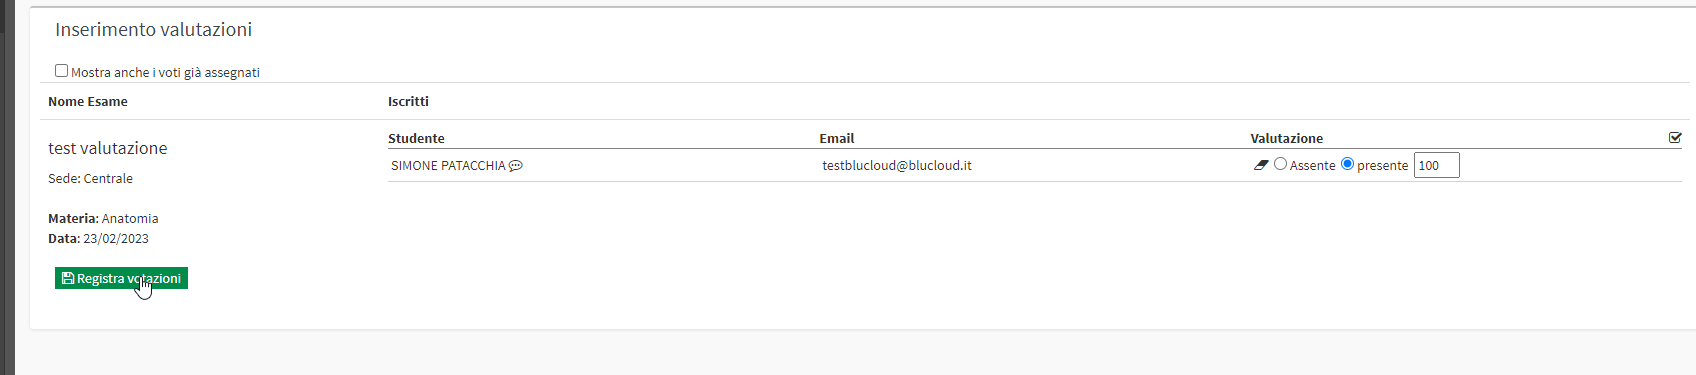
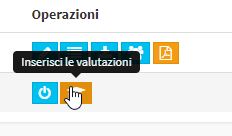
Once the Exam has been taken, if the option has been checked. Record the final grade obtained, the Teacher assigned to the Exam or the Registrar can enter the grade by navigating to Exam List → Enter Grades next to the Exam of interest:
In the box that opens, enter whether the Student was present at the Examination and the grade obtained and click the button Record Grades to save: