Configuring and Using the Warehouse
With the warehouse, it will be possible to manage the School's inventory, the unloading and loading of Goods in stock, and the tracking of orders and Inventory movements.
0. Utilization plans
The Warehouse has 3 floors of use:
- STANDARDS:
- Maximum number of warehouses: 1
- Maximum number of products: 50
- Maximum number of pieces: 1000
- Corporate Orders: Not provided
- REGULAR
- Maximum number of warehouses: 5
- Maximum number of products: 500
- Maximum number of pieces: 10000
- Corporate Orders: Not provided
- ENTERPRISE
- Maximum number of warehouses: Unlimited
- Maximum number of products: Unlimited
- Maximum number of pieces: Unlimited
- Corporate Orders: Available
Note: To request service activation, contact the Sales Department at commercial@blucloud.it
1. Enabling the Warehouse
After activating one of the chosen plans in management, the item will appear Warehouse:

In the submenu Settings will be displayed all the plans that can be activated and the enabling of the warehouse.
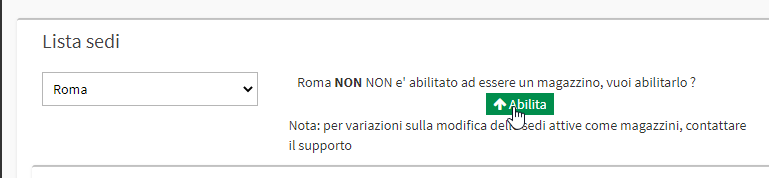
Choose a Location of your School and click on Enable (to create multiple Locations read this guide):
2. Creation of Categories and Subcategories of Products
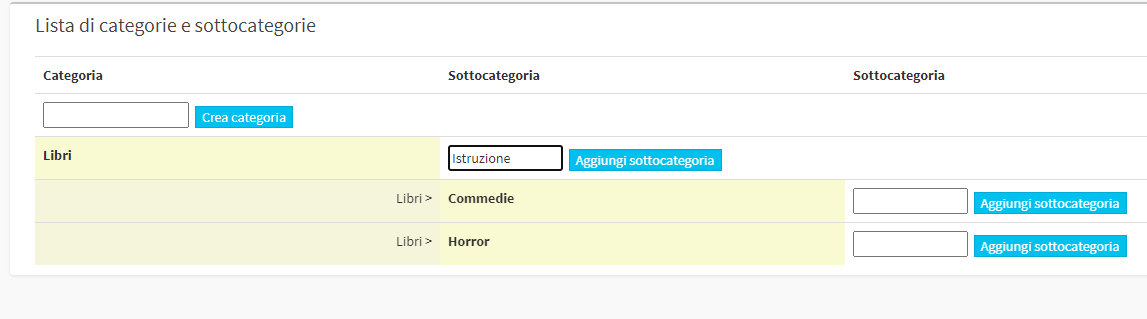
Move now to the section Warehouse → Product Categories and enter the Name of a new product category to be added and click on Create Category:

It will also be possible to create Subcategories:
3. Addition of Products
Now in Warehouse → Catalogue of products you will be able to add Products to the warehouse. Click on the icon Add a Product in the upper right hand corner:

From the screen that opens fill in all the Mandatory fields:
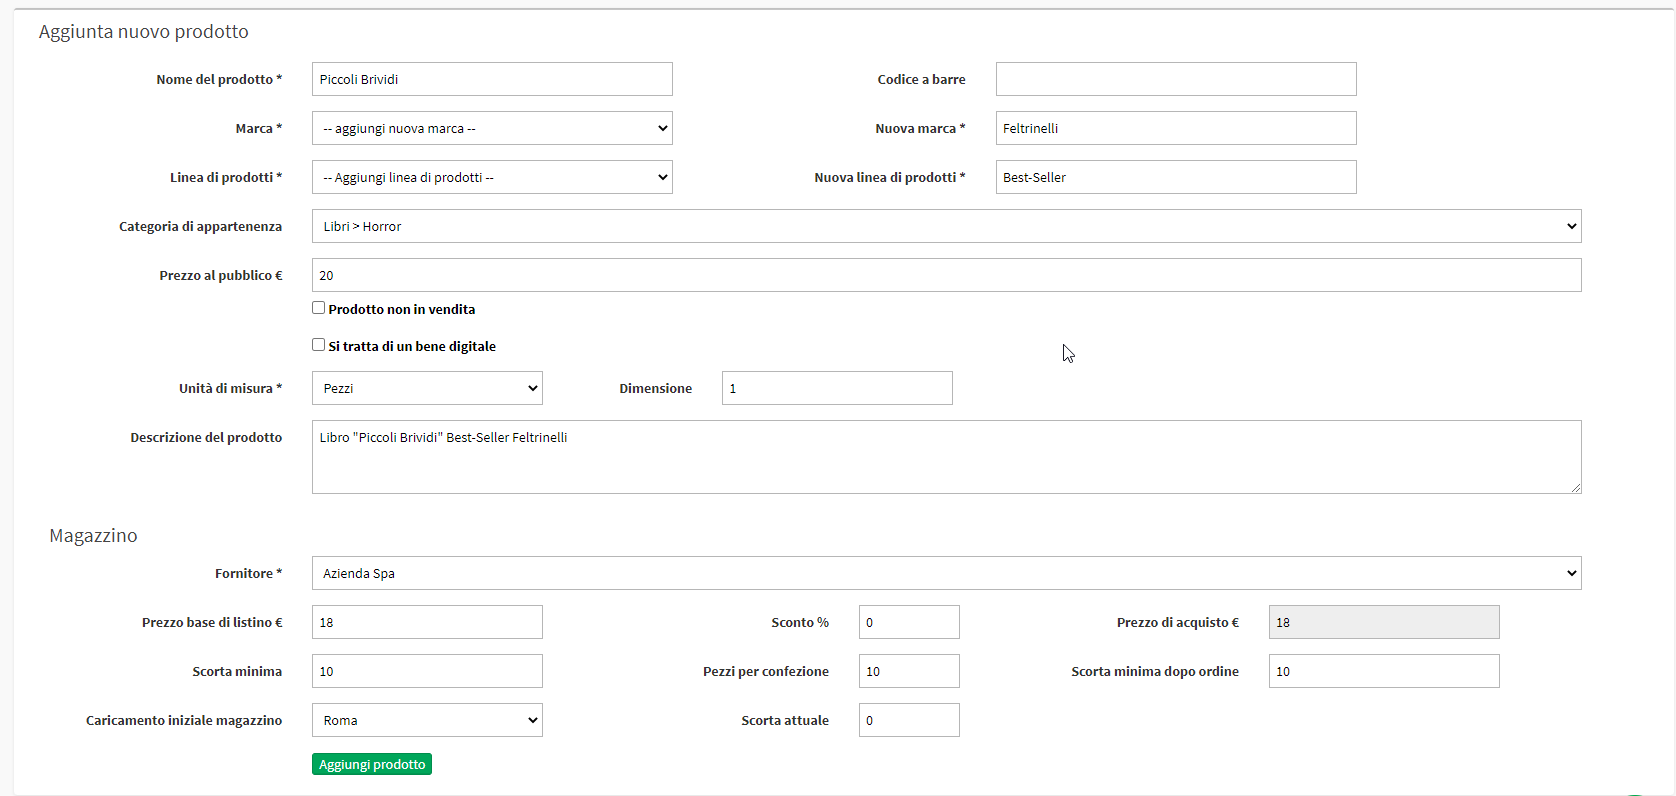
- Product Name: The Product Name
- Bar code: The bar code, if any, of the package/product
- Brand: Brand of Good
- Product Line: The line to which the product belongs (e.g. Best-Seller, Gold Line, Platinum, etc.).
- Product Category: The Product Category created in the appropriate Product Categories section.
- Public price: Price at which the good is sold to the public
- Unit of Measurement: Indicate the unit of measurement of the Good
- Product Description: Optional short product description
Warehouse
- Supplier: Select the Supplier of the Good present in Tax Management → Customers/Suppliers.
- Base List Price: The price Gross of Asset Discounts
- Discount: The discount, if any, applied to the order
- Minimum stock: The stock that must be in the warehouse at all times.
- Pieces per package: Pieces per package ordered
- Initial Warehouse Loading: The Initial Warehouse Membership.
- Current Stock: Number of pieces currently in the Warehouse
Now the Product you just created will be visible in the product list:

With the side buttons we will be able to Modify the Product, View/Modifyfect the image o Delete the Product.
4. Inventory and product quantity management
In Warehouse → Inventory we will display the current quantities in the warehouses with the ability to Edit:

The screen that will open will be as follows:
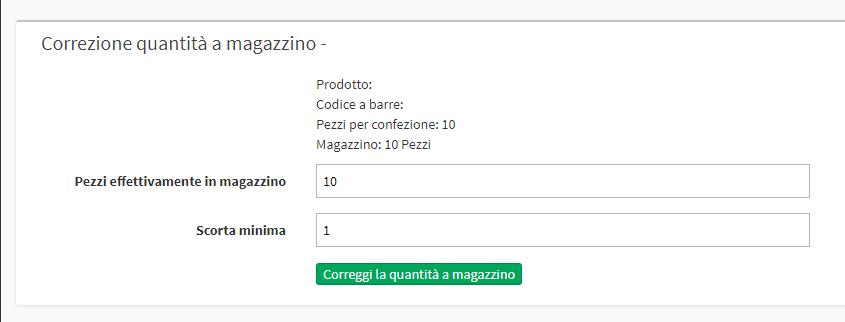
By changing the actual Pieces in stock we will go to generate a movement that can be viewed in Warehouse → Manage Movements Loading or Unloading. This page will display all the Warehouse Movements:

5. Sale of an Asset
For create an Order navigate to the left panel Student Enrollment and select the Student interested, the Good and the Quantity purchased:

Checking Download goods from the warehouse now the quantity purchased will be immediately deducted from the inventory.
If the checkmark is not placed in Warehouse → Order Management., the order will remain in delivery status and therefore the Sold Good not yet deducted from the Remaining Quantity:

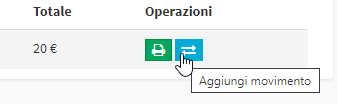
The section will show all Orders that contain Warehouse Goods, clicking on Add Movement next to the generated order will go to create the movement:
In the window that will open we will go to make the movement, clicking on Insert new movement and entering the details:
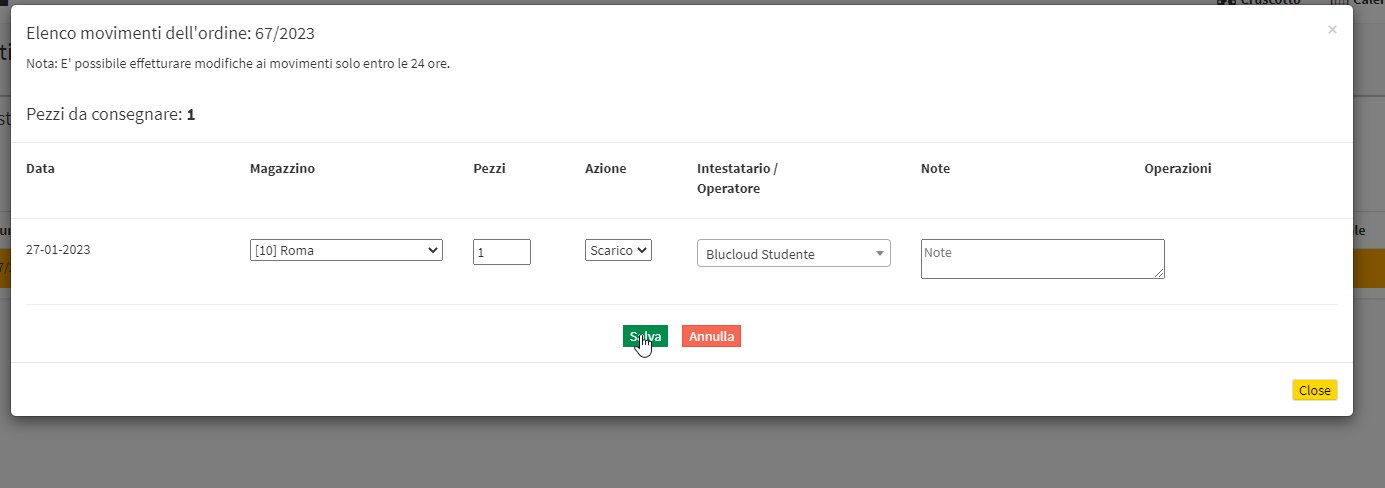
By clicking on the Save the delivery will be recorded and the Good scaled.
6. Loading or Unloading the Warehouse
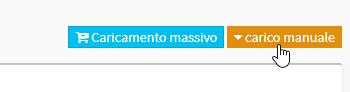
In Warehouse → Loading Warehouse we will have the possibility to Load o Unload the stock of an asset. We click at the top right of the screen to indicate whether it is a Download or a Warehouse Upload.:
We are going to select the Location, the Asset and the Quantity buys:
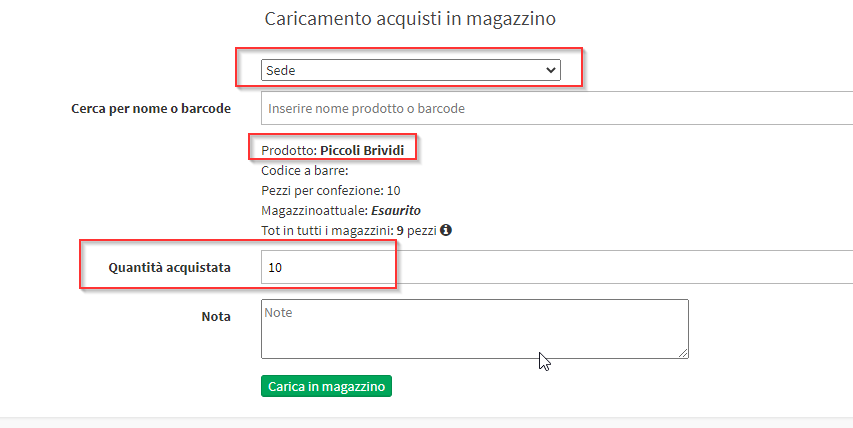
Note: This operation will be recorded on the Movements Management page.
Downloading, on the other hand, in addition to asking for the same data, also asks for the user to whom we are selling the Good:
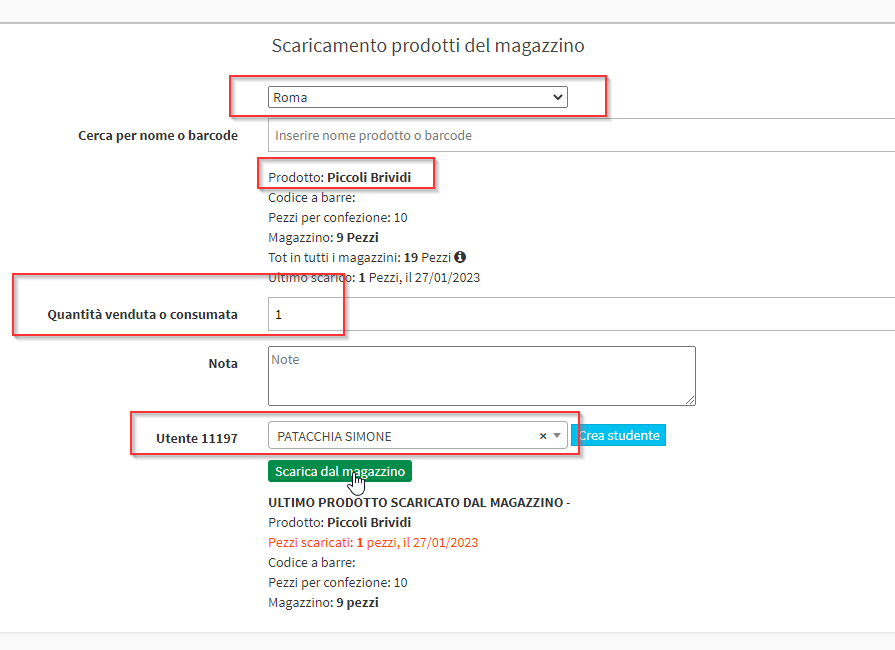
In this case no order will be created but will only be recorded the Unloading of the Goods to the User..