Sending Email, PUSH and SMS Notifications
To send push, email or SMS notifications to users click on Administration → Send/List Messages.
PLEASE NOTE: SMS is an additional paid service, the cost is € 0.08 + VAT per SMS. If interested, please send your request to administration@blucloud.it
From the next screen, fill in the following fields:
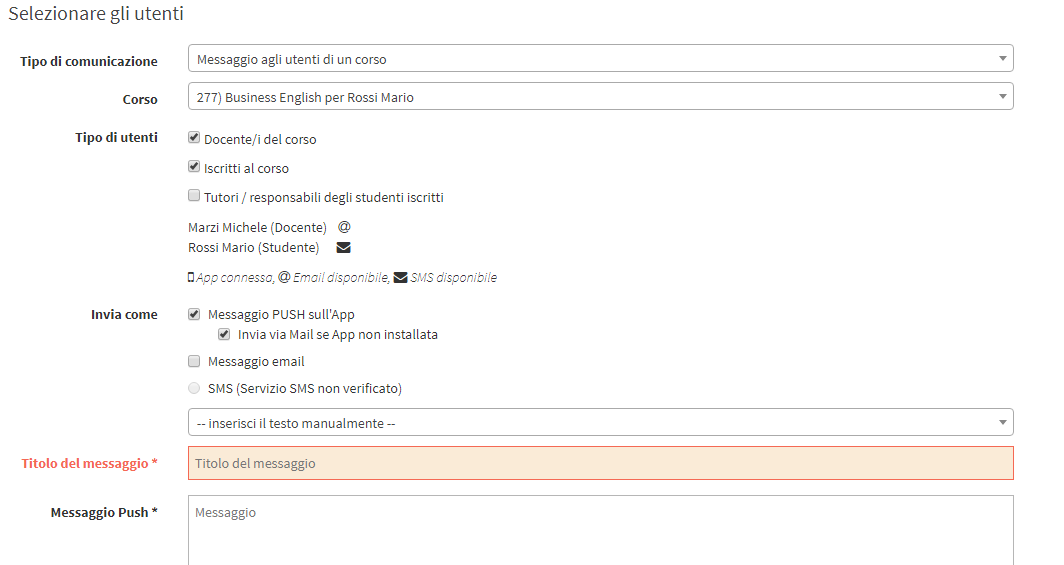
- Type of communication
- Message to users of one or more courses: in this case, you will be able to select the course and the users (teachers, enrolled, tutors/supervisors)
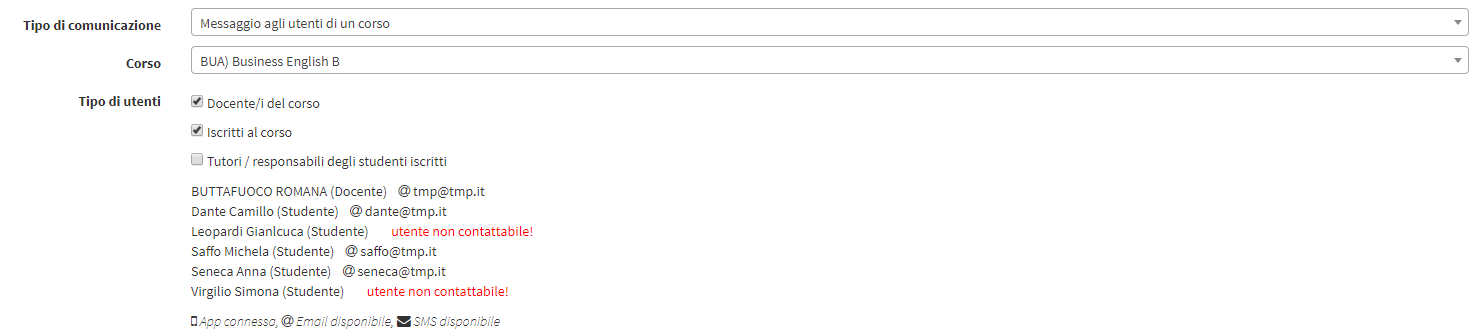
After choosing the specific course and the type of user to send the communication to, the system will show the email address and connection status of the User App users involved.
In the event that the app is not connected and email and mobile number have not been entered into the registry of one or more users, the system will report that they will not be contactable.
- Message to one or more specific users: choose a specific user from students, tutors/supervisors or faculty.
After selecting the specific user, the system will display the user's email address (if present in the master data) and the connection status of their App.

- Message to teachers: to select all school teachers.
- Message to students: to select all students in the school.
- Message to guardians/managers: to select all guardians/managers in the system
- Message to leads: to select all potential customers in the system
- Message to students and tutors/supervisors: to select all students in the school and their tutors/supervisors
- Message to users of one or more courses: in this case, you will be able to select the course and the users (teachers, enrolled, tutors/supervisors)
IMPORTANT
* The number in round brackets indicates the number of users who would be recipients of the message with the settings set.
** In case you choose to send a communication to all students. tutors/supervisors, faculty or leads (potential customers), you will be able to use filters to select only a certain type of user.
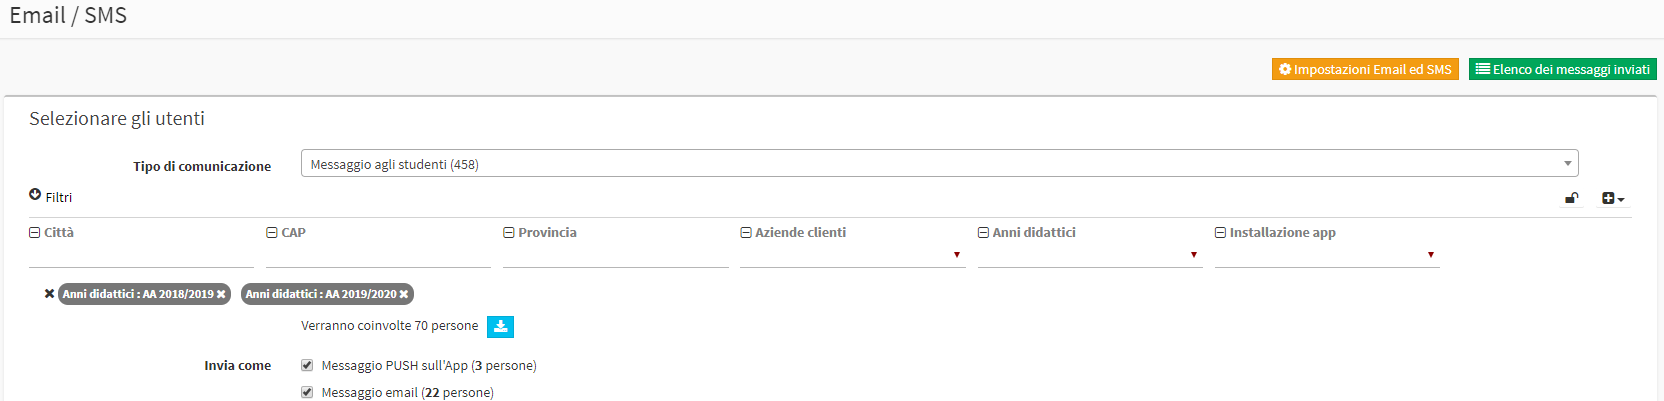
Then click on → Filters to expand the section with the filters present by default.
To add more filters, which can be either fields already in the system or custom fields created independently for your own specific purposes (to create new custom fields navigate to Configuration → Settings → Settings related to custom fields), click the ![]() , select the filters to be added and click the icon
, select the filters to be added and click the icon ![]() To save the setting.
To save the setting.
It will then be possible to filter the recipients of the message using one or more filters, and the system as it goes along will show the number of users who will be involved in sending the communication.
By clicking the x next to the added filter, you will be able to remove it.
After choosing the recipients of the message and possibly having used one or more filters, under "Number of people" the number of users to whom the message will be sent will be shown, with the icon next to it ![]() to download the Excel file of the list of recipients of the message you want to send, with cell phone number and email address for each student line.
to download the Excel file of the list of recipients of the message you want to send, with cell phone number and email address for each student line.
This type of export could come in very handy in cases where the message recipients are a large number (for example, thousands), and it is therefore recommended to use an external mailing service.
N.B. If you intend to send a message to all active students, who are taking courses in the current A.A., or who are otherwise found to be enrolled in courses that are still open, you will have to use the filter "Student Status" and choose "Active" and/or the " Educational Years " filter by choosing the current academic year (if you do not use any filter, if, for example, you choose to send a message to all students, the system will select as recipients of the message all students in the registry)
- Course: is shown when Communication type is set to Message to Course Users and allows the specific course to be selected.
- Type of users: is shown when Communication Type is set to Message to course users and allows the user to select the type of course users to whom the message is to be sent (Course Lecturer(s), Course Enrolled, Tutor(s)/leader(s) of enrolled students).
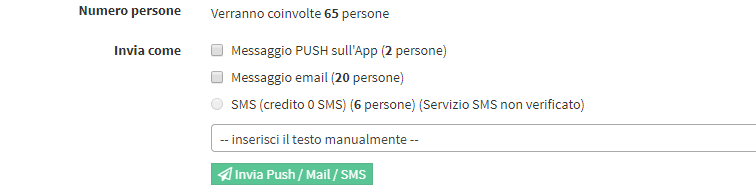
- Submit as: to select the type of sending
- PUSH message on App (if selected, "Send via Mail if App not installed" can also be selected)
- Email Message
- SMS
By choosing how to send the communication to its users, the system will show how many people will be involved by sending mode (in case the number is lower than expected, it means that some recipients do not turn out to be connected to the App and/or do not have email address and/or cell phone number entered in the registry.
- - Enter text manually -: you can enter the text of the communication manually or use a previously entered custom template (click here for guidance on message templates)
- Message title: the subject of the email or push notification
- Message ....: the body of the email, push notification or SMS
If you choose to send a communication via email, you will also be able to add an attachment that has a maximum size of 1 MB.

Finally, click Send Push / Mail / SMS to complete the operation.
Message list
All messages sent (email and SMS, manual or automatic system) are listed in the Message List, which can be reached at Administration → Send/List Messages, by clicking the List of messages sent.
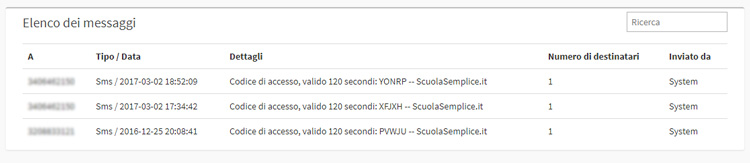
For each message is indicated:
- A: the recipient of the message
- Type/Date: the type of message (Email, SMS) and the date and time it was sent.
- Details: description of the message sent
- Number of recipients: the amount of recipients of the sent message
- Posted by.: the user who sent the message (System in case of system or automated submissions)
- Operations: click the icon to see the details of the message
IMPORTANT: Contact support by sending an email to support@blucloud.it for Email and/or SMS activation and configuration.