Exams report generation via ODT template
→ Download this guide in PDF format![]()
-
1. INTRODUCTION
In the direction of allowing the individual school autonomous management of certificates, attestations, reports and other documents, the system allows for the preparation and activation of documents in total autonomy, which will then be exportable for each examination.
The report will have to be a template in .odt format, i.e., OpenOffice, the content will be made dynamic through the use of placeholders responding to a predefined syntax, being able to choose from an extensive list of entities and attributes that allow documents of various types to be generated.The generation of a report from odt template enables the generation of documents in Open Document Text format (ODF text document, .odt extension), containing dynamic information, using an .odt file, called a template, in which appropriate placeholders are inserted, which, in the final generated document, will be replaced by the value indicated by the placeholder.
WARNING: template refers, in the context of this documentation, to a normal .odt file containing placeholders, the file must be in ODF text document format, extension .odt.
The template for generating the final document, to be uploaded when setting up the report, is a normal odt document, and where there is text, a placeholder can be inserted there, within the normal text flow, even within a table.
2. DEFINITION OF PLACEHOLDERS
La sintassi per definire un segnaposto è {oggetto.attributo}, il nome dell’oggetto è la parte del nome a sinistra del punto, il nome dell’attributo è la parte a destra del punto; quindi, ad esempio, per mostrare nel documento finale il titolo dell’esame si usa {exam.title} e per la descrizione{exam.description}.
If the name of the object is plural, in English, it means that it is a list of values, which can be used within a table or to create a list of values in the final document, using an appropriate syntax to indicate the beginning and end of the list; the list of placeholders below indicates when a placeholder is a list.
3. LISTS OF PLACEHOLDERS
The syntax for using a list of values, involves indicating where the list begins and where it ends; in the block of text enclosed between the two markers, placeholders are inserted to show the values of each list item, for example, to list the full names and email address of each student in the course:
[!-- BEGIN students --]{students.fullName} {students.email}[!-- END students --]the line between
[!-- BEGIN students --] e [!-- END students --]will be repeated for each student, in the final document.Two special placeholders are available for each list item, _position, the position of the item in the list, and _total, the total number of items in the list.
4. PLACEHOLDERS IN TABLES
The syntax for using a list of values within a table involves indicating where the table row begins and where it ends; in the block of text enclosed between the two markers, placeholders are inserted to show the values of each item in the list, e.g., to list the full names, email address, and mobile phone of each student in the course, within a table:
[!-- BEGIN row.students --]

{students.fullName}
{students.email}{students.mobile} [!-- END row.students --]
the table row between
[!-- BEGIN row.students --]e[!-- END row.students --]will be repeated for each student, in the table of the final document.6. FILTERS
Filters allow an operation to be performed that changes the value of the individual placeholder entered in the document and are available for any type of odt report, regardless of section.
The available filters are as follows:
- cut allows us to limit the length of a text within the given value, for example to limit the length of the course name to a maximum of 5 characters we can use the placeholder {course.name|cut[5]}
- daysbefore allows us to compute a date earlier than the date of the valorized placeholder, e.g. if we want to get the date corresponding to 2 weeks before the start of the course we can use the placeholder {course.startDate|daysbefore[14]}
- daysafter allows us to compute a date later than the date of the valorized placeholder, for example if we want to get the date corresponding to 1 week after the start of the course we can use the placeholder {course.startDate|daysafter[7]}
- lowercase changes the value of the placeholder to lowercase, for example to show the course name all in lowercase use the placeholder {course.name|lowercase}
- uppercase changes the value of the placeholder to uppercase, e.g. to show the course name all in uppercase use the placeholder {course.name|uppercase}
- uppercasefirst changes the value of the placeholder by capitalizing the first letter, e.g. to show the course name with the first letter capitalized use the placeholder {course.name|uppercasefirst}
If two versions of the same placeholder are needed in the document, one filtered and one unfiltered, simply add a _ (underscore) to the second occurrence of the placeholder, e.g., use {course.name|cut[5]} to show the abbreviated course name and {course_.name} to show the full course name later.
7. LIST OF AVAILABLE PLACEHOLDERS
Exams Placeholders
examination dataSIGNAGE VALUE NOTES {exam.title} name {exam.description} description {exam.location} headquarters {exam.subject} matter {exam.subjectAlias} Alias matter {exam.argument} topic {exam.teachingyear} school year {exam.teachingyearperiod} school year period {exam.startdate} start date {exam.enddate} final date {exam.cost} cost Placeholder certification section Exams
certification dataSIGNAGE VALUE NOTES {certification.subject} matter {certification.subjectAlias} Alias matter {certification.issuer} issuing entity {certification.certification} certification Placeholders students section Exams
student dataSIGNAGE VALUE NOTES {students.id} unique identifier {students.fullName} call sign {students.email} email address {students.name} name {students.surname} surname {students.taxcode} tax code {students.vatnumber} VAT number {students.birthdate} date of birth {students.birthday} birthday {students.birthplace} place of birth {students.birthprovince} province of birth {students.gender} genre {students.address} address {students.cap} zip code {students.citizenship} citizenship {students.city} city {students.province} province {students.country} country {students.countryCode} country iso code {students.mobile} mobile phone {students.phone} landline {students.pec} certified electronic mail {students.passport} passport {students.customfields} custom fields {students.profession} profession {students.maritalstatus} marital status {students.qualification} qualification {students.notes} notes {students.cardnumber} number of the card, if any {students.examdate} exam date {students.examstarthour} initial examination time {students.examendhour} final exam time CONDITION VALUE NOTES {students.isAdult} true if adult, to be used in conditional block {students.isNotAdult} true if minor, to be used in conditional block 8. UPLOADING ODT TEMPLATE TO SYSTEM
To enter the report template into the system navigate to Configuration → Reports and click the "Add Report".
From the next screen fill in the following fields:- Name*: the name of the report
- Description: any description of the report
- Report type: choose the "From odt template" option to be able to upload your own template
- Section in which to show the report *: Exams
- Template extension: OpenOffice Write (.odt)
- Report template: upload the template with odt extension of your report
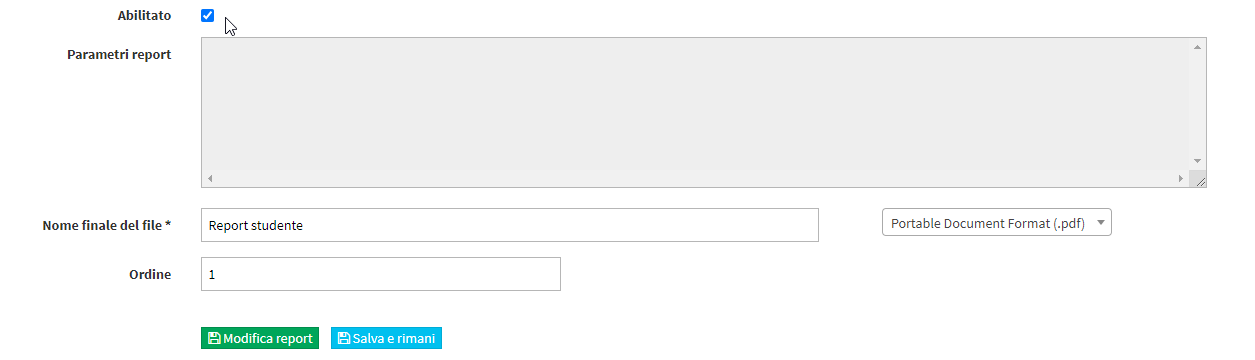
- Select type: select the type of file extension that the report should have when exporting it, being able to choose from:
- OpenOffice Write (.odt)
- Portable Document Format (.pdf)
- Order *: the order in which the reports are listed (e.g. 1, 2, 3, etc.)
Click the "Add report" to save the operation.
After uploading the template, go into editing the template (by clicking the icon with the edit stick) and check the "Enabled" to enable the export of the report from the courses and click one of the two buttons at the bottom of the page to save the operation.
Finally, click the icon
 on the row of the uploaded template to enable administrative accounts that will be able to view and export the report from courses or enrolled students.
9. USE OF REPORTS
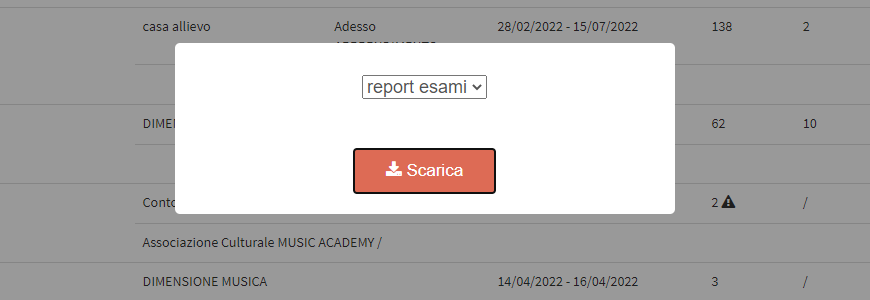
To export a teacher's report, navigate to the menu item Master Records → Exams List and click in the yellow Reports:

From the next pop-up shown by the system, choose the report via its drop-down menu (in case more than one report has been uploaded) and click the "Download" button to perform the export.