Creating an Online Form
To create a new Online Form navigate to Configuration → Online Form, from the next screen, click the button in the upper right corner Add.
Then fill in the following fields:
- Name* : the name of the form
- Description: possible description of the form
The forms may be used either to make registrations for collective courses and to sell goods or services, or to collect or supplement user data for purely demographic purposes without including registrations.
Below specify how to use the form with the possibility of checking the following options:
- Use for course registration: checking this box will make it possible to use the form as a registration form for a specific course. If checked, it will be possible later to enter the flag Default for courses to make the form default by the system, in the absence of specific choices in the course settings.
Through this option then, you will be able to enable the enrollment form from the individual collective course edit form by entering the flag Students can independently register for the course under Open Enrollment, then specifying the closing date for enrollment and the form to be used.
After saving, from the course tab it will be possible to retrieve the link that the system generated for course registration and send it to users for completion.
- Uses for goods, services and classes: Checking this box will allow you to use the form as an enrollment form for a specific good or service. Using the drop-down menu below you will be able to choose from courses and services available in the system.
After selecting an item, click the to add it and below the
  To separate it from the next one.
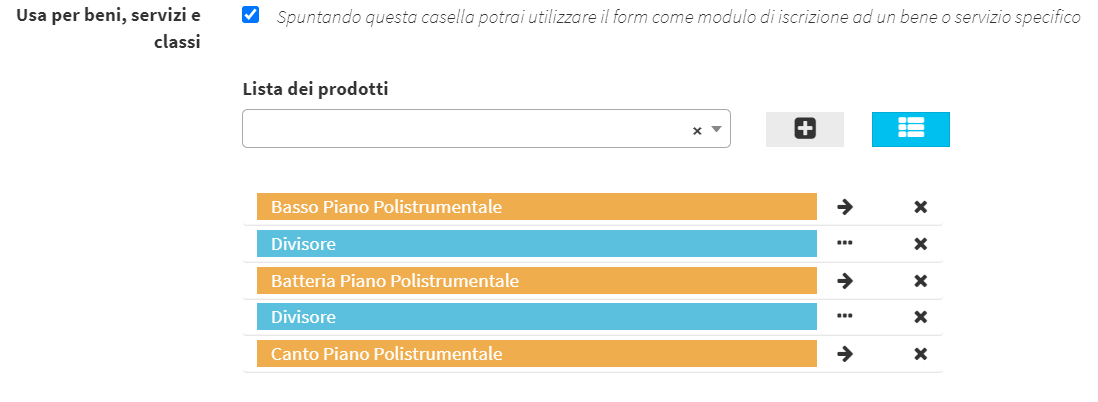
Following after completing the remaining part of the configuration which will be covered shortly below in this guide, from the line of the created form it will be possible to retrieve the link created by the system via the third icon.

The number of items associated with the form will be specified, i.e., the classes, goods, and services that have been selected and that users will then be able to choose when filling out the form.
- Use for master data completion: Checking this box will allow you to use the form with already enrolled students for data completion and integration
Please note, if when choosing the flags you decided to check one of the first two, i.e., course enrollment or use for goods, services, and classes, the system will allow you to go in and define additional specific parameters:
- Educational Year: Specifies the educational year to be associated with the Online Form.
- Student fees: (if any) membership fee previously created in Administration -> Economic Settings

- Collection of user preferences: When registering for individual courses and pre-registering for group courses, disable the box that allows the collection of (non-binding) student preferences for time, days, and teacher
- Omission of purchase cost: useful in case students are aware of the cost of the course and it becomes necessary to hide that cost from the form
- Age of majority: by enabling this flag, enrollment will be possible ONLY for students 18 years of age or older
- Unification of orders: enabling this flag, if the user makes multiple entries, it will be possible to unify all orders made by the same user into a single one
- Information to be shown in selling a course: through this section, it will be possible to have only some of the information pertaining to the course appear on the first screen of the form.
This information can be the basic course information, such as duration, start date, etc., or even custom fields (always inherent to the course) that have been created previously
- Sending notification to specific addresses: in the text field, it will be possible to indicate one or more email addresses (separated by semicolon ; ) to which a communication will be sent whenever an entry related to that given Online Form occurs. (Below is the format of the email in question).
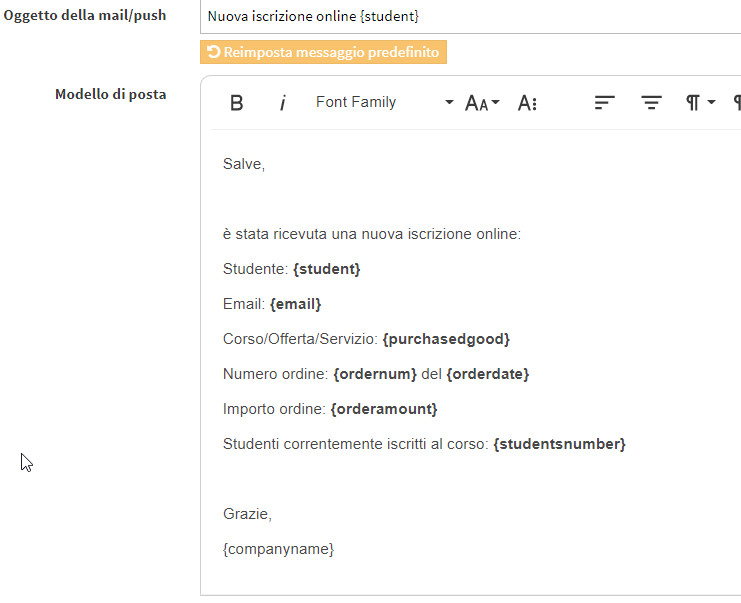
- Default contract template: in case multiple enrollment contracts have been uploaded to the system, choose via the drop-down menu the contract to be used
- Reload contract signed: By checking this box, enrollment through this form will require the completion and subsequent reloading of a contract document (click here for the complete Guide).
- Reload contract in pdf only: By checking this box, enrollment through this form will accept reloading a document in PDF format only
- Enrollment occurs only when the user uploads the signed contract: The contract will remain in draft status until the user uploads the signed contract and only at that time will enrollment occur
- Eliminates entries for which after days the signed contract has not been uploaded: After the passage of days indicated, if the enrollment contract has not been uploaded, the order will be deleted.
- Login enabled: Checking this box on the form page will also display the login form for already registered users
- Form width: is used to define the form at the layout level
- Security at login:
- None
- Simple Captcha
- reCAPTCHA
At this point, after flagging at least one of the 4 options, you will be able to select form color and preview:
- Form colors:
- Use the system's default colors
- Use custom colors
- Preview the form: click the Edit to edit the fields and layout of the form.
Using the edit icon, the various fields can be edited:
![]()
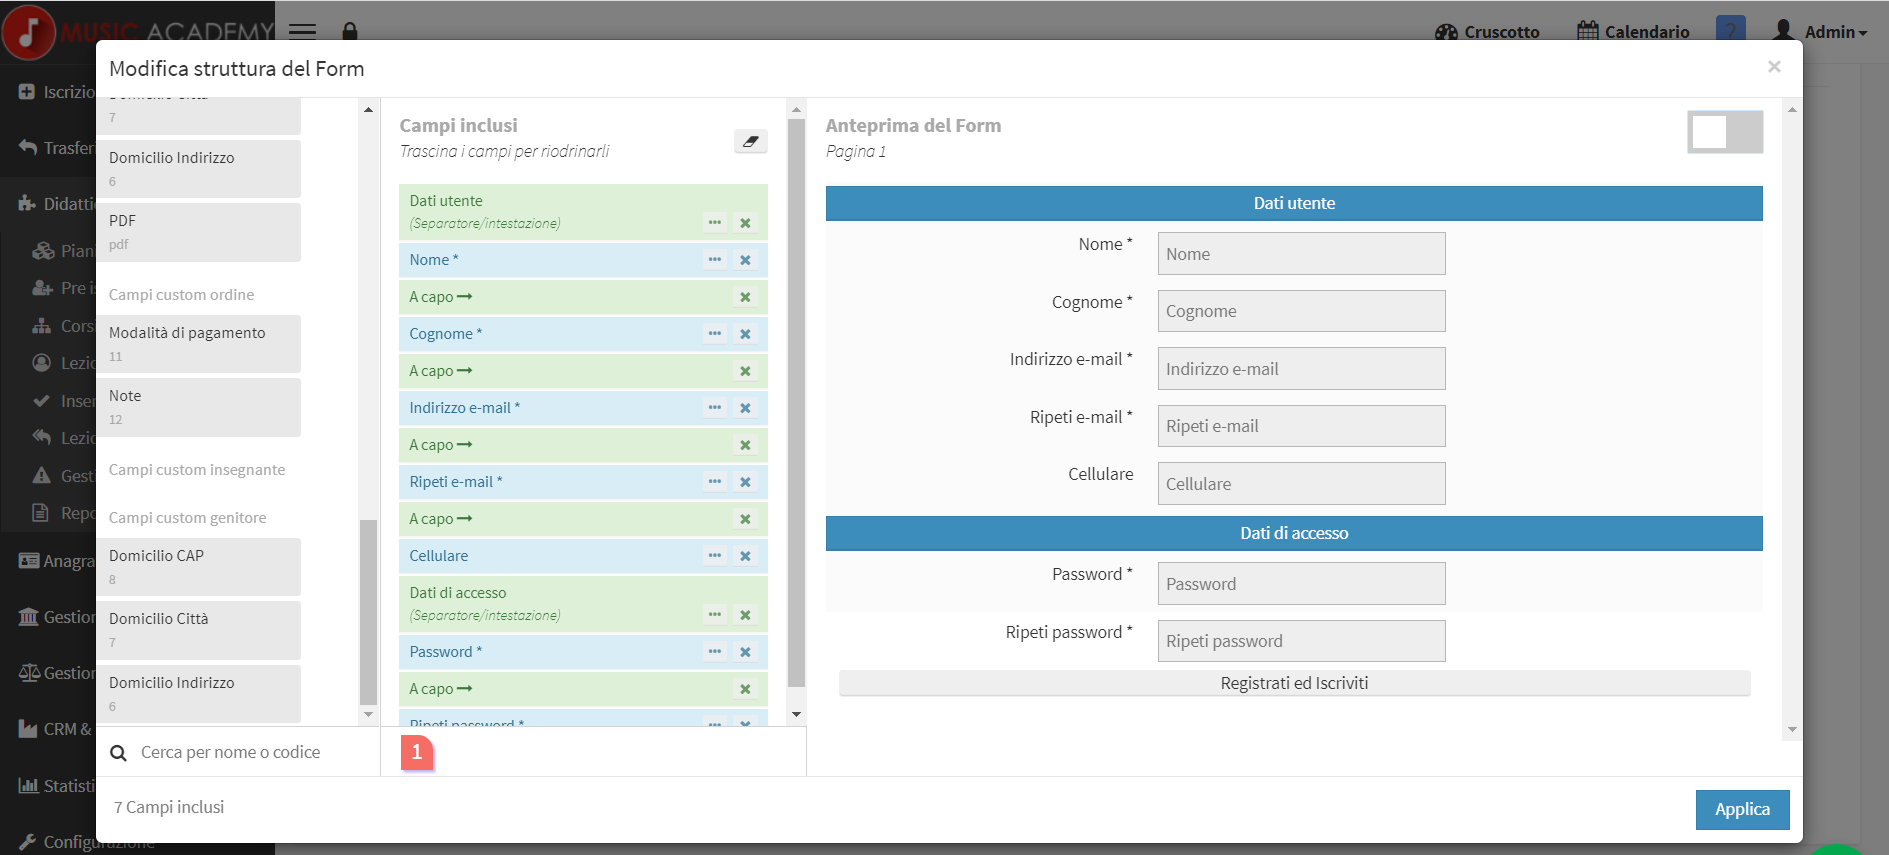
Modifying the structure of the Form will allow you to go and edit the parameters entered by default or add others.
The system allows you to choose which parameters to make mandatory to be filled in and which not, to do this you need to click on the 3 dots and go to define the field as required or not.
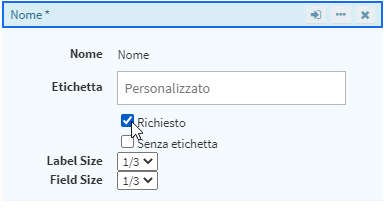
- Label: Allows a new name to be given to a field. Please note: The functions of the field so renamed will not change in any way.
- Displacement: The order of form values can be varied by dragging a parameter to a different location.

From the selection table on the left side of the screen, however, it will be possible to add additional fields that can be filled in according to personal need. All fields selectable in this way can be made mandatory, as with the other pre-existing values in the basic template.
So we will find a first list showing the structure fields, followed by the standard fields and custom fields.
Structure fields are divided into:
- Carriage return: after entering a field, to make sure that the next one appears in the row below and not next to it, it is very important to go and separate the information using this command.
- Separators: Separators divide the various sections into several coherent subsections. For example, the password, in the standard template, is separated from the rest. As with the other parameters, this too can be renamed by label.
- Custom Fields: From management you can generate custom fields to use in the form, click here for a guide to creating them
- New page: The Form can be structured into multiple pages as needed. For example, you will be able to separate master data from purely course-related data.
- Label: This label does not replace the name of one of the parameters, but it can be used to go in and enter visual information useful in filling out the form.
Standard fields are all those parameters inherent to the user's master data and useful for the registration of a new master data o enrollment to a course.
To be considered with regard to the field guardian, very important if students are minors.
- Guardian: Should the Form be filled out by minor students, the addition of the field "registration as guardian/parent of a student" will be very important. It is recommended that the guardian field be set to the first place.
![]()
Also the field Country of Residence has significant importance in that if entered mandatorily, it allows the system to automatically check whether the fields entered in Tax Code, Zip Code and Province are correct and really exist.
- Country of Residence: If entered mandatorily, check that the Tax Code entered is of the correct format and that the ZIP CODE and the Province of residence entered are actually exist:

Click the button Add Form to save the operation. At this point, all that remains is for you to dispense the Form to the end customer, allowing them to fill it out.
-----------------------------------------------------------------------------------------
From the customer's perspective, the Online Form will look like this:
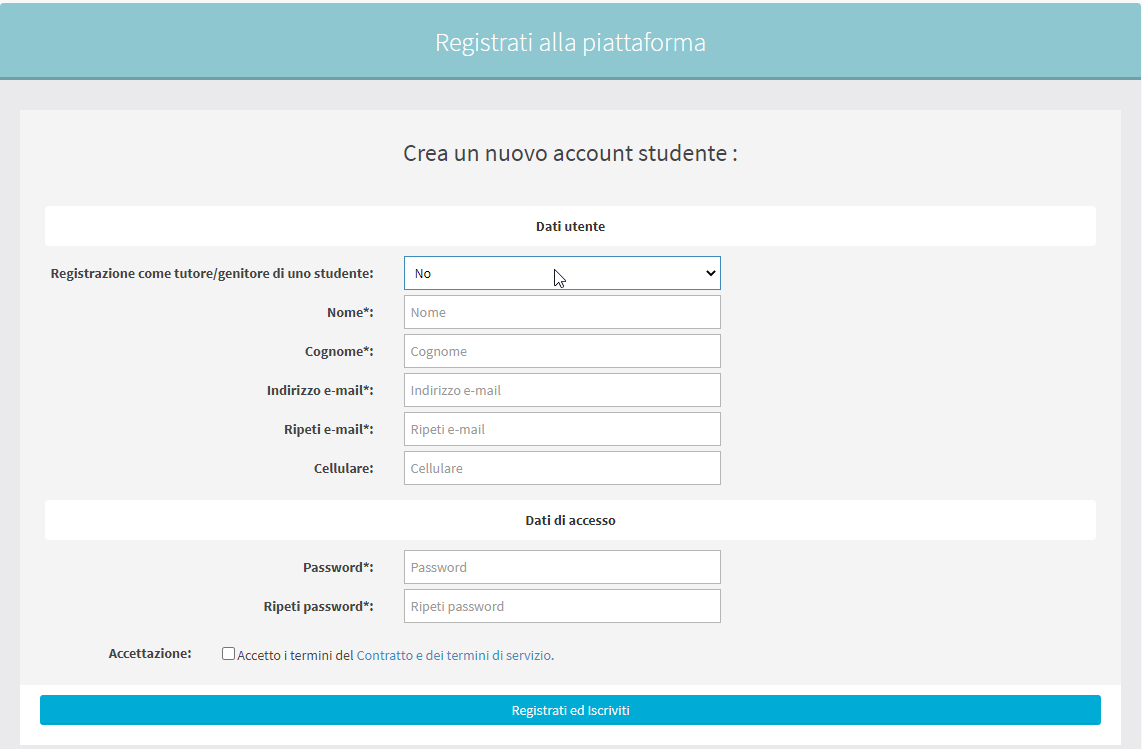
Going to validate the presence of a tutor will open an additional selection mask where you go to enter the student's data:

As a result, the guardian's data will be listed on the main screen of the form.
Regarding the registration of data already in the system, it will not be able to be done through Online Form. The system takes into account the email used for that given master data, and with a password retrieval it will be possible to log in and make the registration.
Prior to actual registration, the system requires you to accept the terms of agreement. These can be configured by accessing Administration → Terms of Service and going to fill in the field related to online registrations.
Continue with this guide to create custom fields so you can enter them into the Online Form.