Management of study plan examinations through end-of-course assessment
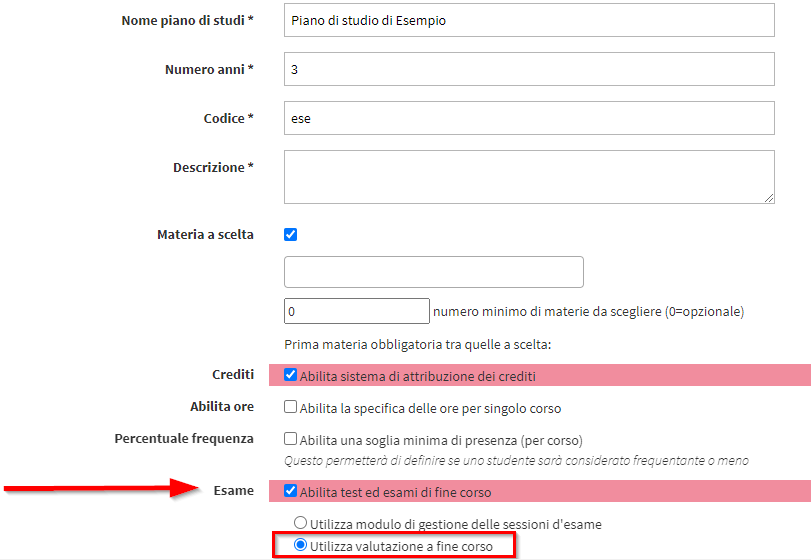
Navigate to Configuration → Study Plans and from the study plan editing tab, enter the checkmark "Exam" to enable end-of-course tests and exams.
Then enable the "Assessment at the end of the course" and save the operation by clicking the green "Edit .".
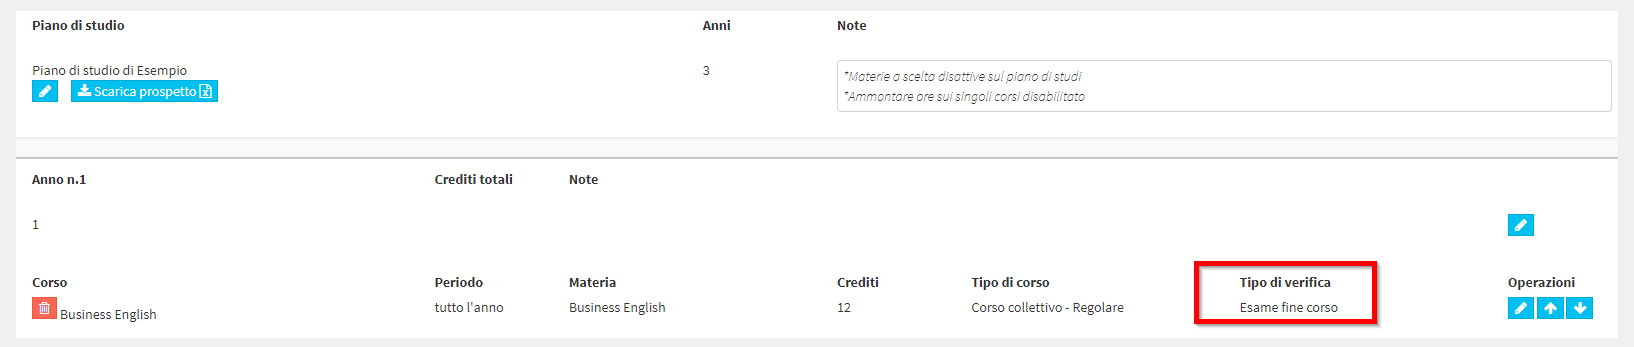
Now enter the management of study plan annuities via the second button on the specific plan row.

From the next screen, from the row of each course/matter, to the column "Type of verification" choose one of the following options:
- End of Course Examination: through this option, it will be possible to use the assessment given to each student in each individual collective that makes up the study plan, and it will be possible in addition to calendar the date on which the exam will be held
- Evaluation during the course: through this option, it will be possible to use the assessment given to each student in each individual collective that makes up the syllabus (this option does not include exam scheduling)
- Attendance Eligibility: through this option, credit for this course/subject will be tied only to the student's attendance without taking an exam
Therefore, choose the first option in case you want to manage both student assessment and test scheduling.
After starting the study plan from the section Didactics → Study Plans and the individual courses that comprise it, from the section Didactics → Collective Courses enter editing a collective course and, via the field "Type of Grading", choose the type of grading to be used in the course in question.

After choosing the type and saving the changes, the system will add the new tab dedicated to assessments.

N.B. For more information regarding the activation and use of the feature related to grades click here.
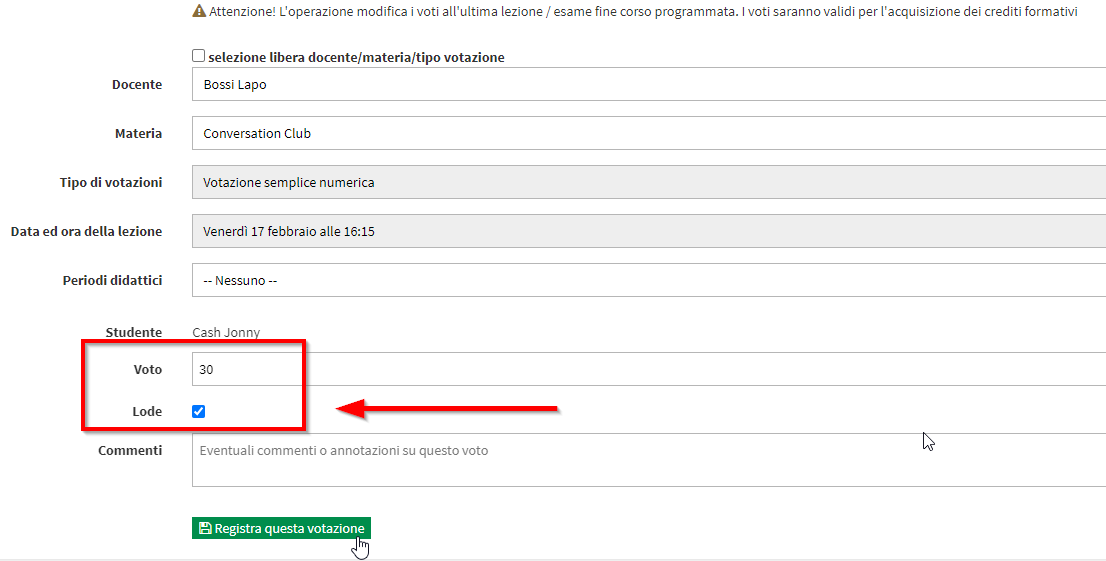
It is recommended that you use the Simple Numerical assessment type, which will allow you to specify a range of grades (e.g., 18 to 30) and also enable the assignment of honors.
Now, when accessing the class schedule of the course/module, a new button "Add end-of-course exam" dedicated to scheduling the date on which the exam will take place.

Clicking the button will open a new screen with a weekly calendar where you will be able to enter the exam, also being able to choose the location, classroom and teacher.
The functionality will be identical to that for adding an extra class to the course, so just left-click on an empty spot in the calendar and drag the mouse down while holding down the button.
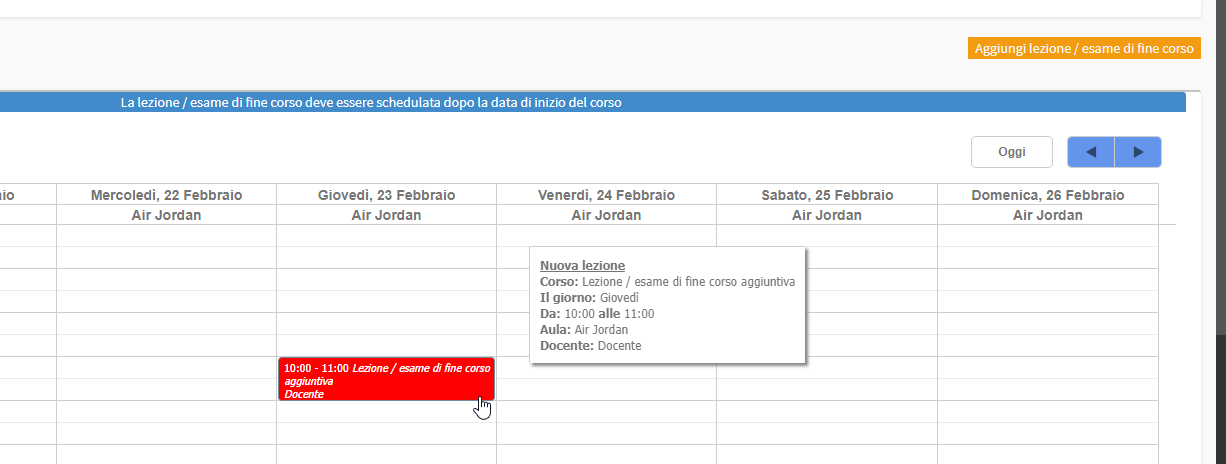
Click the "Add lesson/end-of-course exam" to finish the operation.
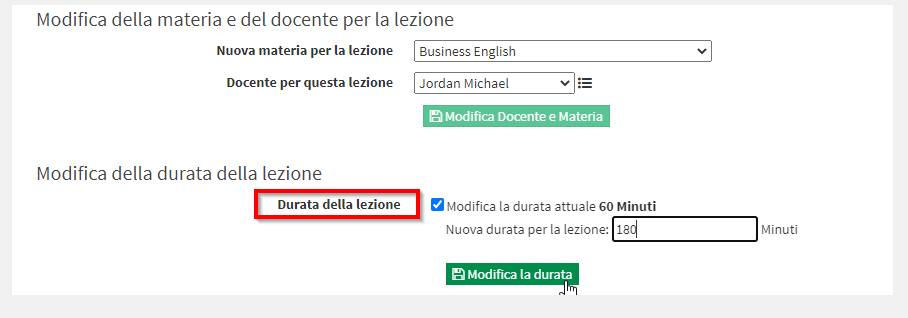
By default the system will allow you to create the appointment for the exam of the same length as the lectures, since it is a regular course, but you will be able to change it after scheduling it by clicking the edit button on the line of it and then choosing a new length.
The added date dedicated to the exam will be marked with the academic cap symbol.

At this point, after scheduling the appointment for the exam, access the "Assessments", there will be a new orange button dedicated to grading the exam (next to the two green buttons for entering normal grades and thus unrelated to exams).

From the next screen, fill in the required fields to assign the students' exam grade.
Also from the tab "Grades" of the course, it will be possible to view the grades assigned.

By accessing the specific course/module, the student will be able to view the assessment he or she has been assigned, either via mobile App
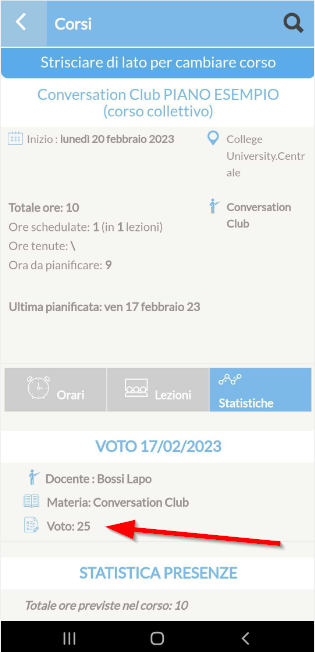
either via Web Account
