Distance learning: integration of ScuolaSemplice with Zoom
This mini-guide on managing distance learning (FAD) classes, is divided into the following paragraphs:
- How host licenses work on Zoom
- Interconnection
- Configuration in ScuolaSemplice
- The operation of the secretariat
- Inspection-type account setup for external course promotion bodies
- Teacher side
- Student side (and/or responsible guardian)
- Linking to online meeting via App of ScuolaSemplice
- Linking to the online meeting via Web Account
1. How host licenses work on Zoom
In order to deliver online classes through the interconnection of ScuolaSemplice with Zoom, you will first need to independently set up an account on the Zoom platform and acquire host licenses by navigating to this address http://bit.ly/2IzvIRg
The Zoom account will then necessarily have to be a Pro account; a basic account will NOT be sufficient to be able to interconnect the two software.
Each host can be identified as a virtual classroom, in which lessons can be scheduled throughout the day h24 throughout the month, one after the other in a staggered manner and therefore NOT simultaneously. Therefore, the school will need to purchase an amount of "host" licenses that is equal to the maximum number of simultaneous classes that can take place via online meetings. This implies that where possible it will be desirable to be able to somehow optimize class schedules so as to increase the occupancy rate of each host (virtual classroom) and thus contain the number of hosts needed.
A Zoom user must be associated with each host license, to be created within the main Zoom user, using different email than the one used to create the main Zoom account (except if only one host is purchased, in which case the email address of the main account will be used and which will then suffice).
Click here to access Zoom's brief guide on how to create users to associate with hosts.
WARNING: Under no circumstances should you register for Zoom multiple times! Only one main Zoom account may be linked to ScuolaSemplice .
2. Interconnection of ScuolaSemplice with Zoom
After you have then purchased one or more host Pro licenses from the Zoom website, you will be able to interconnect with ScuolaSemplice by navigating to the Configuration → Integrations menu and clicking on the Zoom integration section.
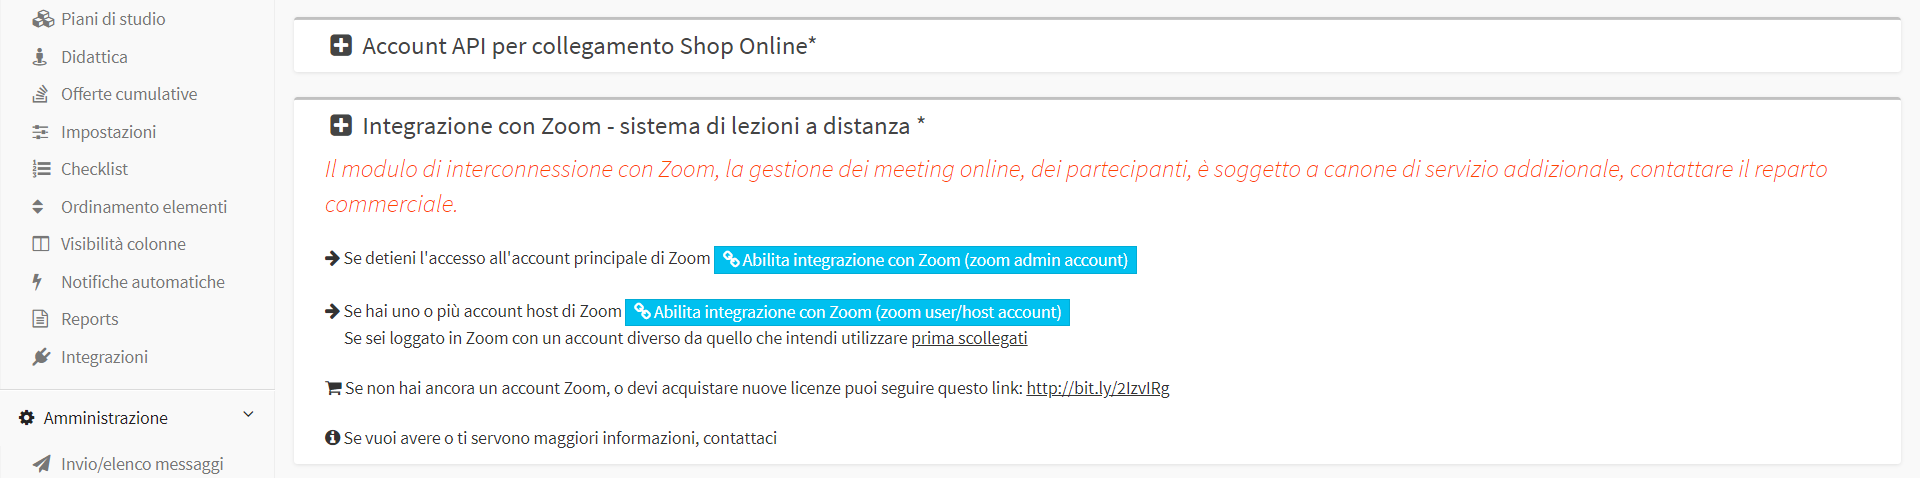
At this point, the system presents two actionable avenues:
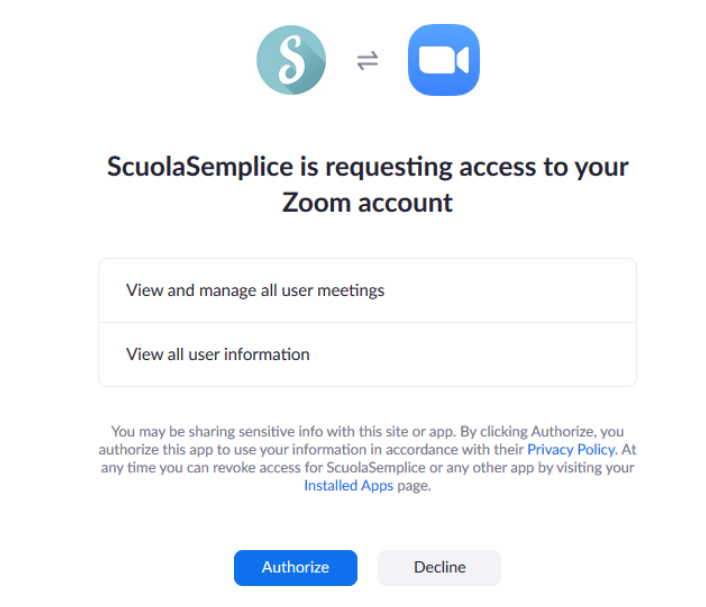
1. Clicking in the "Enable integration with Zoom (zoom admin account)" if you hold access to the main Zoom account, the system will redirect you to the Zoom site, where you can log in with your account and must then grant the permissions required by ScuolaSemplice in order to schedule meetings on your behalf.
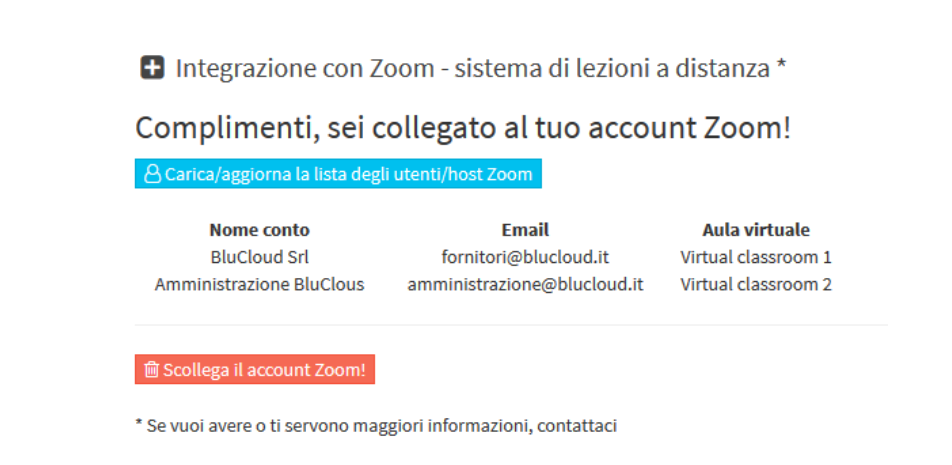
Back within the system ScuolaSemplice, you will be prompted to indicate in which location the system should go to create the virtual classrooms, where the distance learning meetings will then be scheduled. The system will then detect the active hosts in Zoom and for each of them create a virtual classroom, ready for use. The configuration is then complete.
IMPORTANT: If you have purchased 2 or more host licenses, you will need to associate each one with a Zoom user with its own email address. Click here to access Zoom's brief guide on how to create users to associate with hosts.
Underno circumstances should you register with Zoom multiple times! Only one main Zoom account may be linked to ScuolaSemplice .
2. Clicking in the "Enable Zoom integration (zoom user/host account)", in case you have one or more Zoom host account(s), the system will redirect you to the Zoom site, where you can enter the credentials of the Zoom host account that you intend to interconnect with ScuolaSemplice (so NOT the credentials of the main Zoom account, but rather the credentials of the user created for the host license you acquired).
N.B. Before clicking the enable button, make sure that you have not remained logged in to other Zoom accounts by clicking "first disconnected".

Back inside the system ScuolaSemplice, you will be able to view the host account that has just been interconnected.
To disconnect the individual interconnected host, you will simply click the red "Disconnect host zoom" on the line of the same.
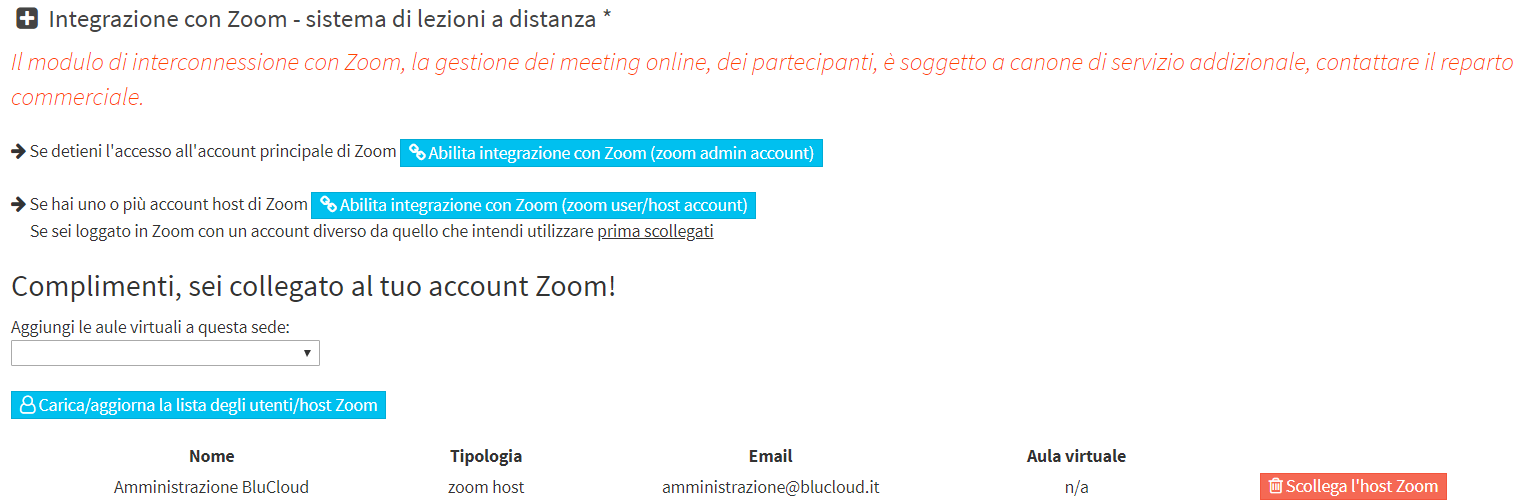
By connecting multiple host accounts, an arbitrary number of virtual classrooms can be managed by performing the same procedure for each individual host account that you want to interconnect.
N.B. Before clicking the enable button, in case you want to connect a second host account, make sure that you have not remained logged in to other Zoom accounts by clicking "first disconnected".
Once the host accounts are interconnected, the scheduling and execution of classes/meetings is then done in the same manner already operative for interconnection via a Zoom administrative account.
The only major difference brought about by the use of individual Zoom host accounts is that this does not allow access to Zoom meeting attendance report information, as it does not have access rights to that information.
IMPORTANT: It will be possible at the same time to interconnect ScuolaSemplice either to a main Zoom account, thereby connecting the various host licenses acquired with that account, or to one or more host accounts from other main Zoom accounts.
3. Configuration on ScuolaSemplice
Also from the section on interconnecting ScuolaSemplice with Zoom, then navigating to the Configuration → Integrations menu and clicking on the Zoom integration section, there are then some configuration parameters that can be used to define how meetings and access to them will be handled.
- Users can only log into meetings if they are logged into Zoom: this is a very stringent parameter and dictates that any student accessing the meeting, must have their own Zoom account and be logged in. It certainly represents the safest way to make sure that whoever logs into the meeting is the student, allowing the Zoom user id to be obtained in the online meeting attendance report.
- Enable the registration form on Zoom before accessing the meeting: before accessing the meeting the user will need to enter their details, Name and Email which will be recorded in the participant list. This does not generate an account and does not require a login, it is a self-registration to the event.If neither of the previous two options are enabled, the user will be able to access the meeting simply through the link received.
- The lecturer will join the meetings as a host: this states that the faculty member will access the meetings as the host, alternatively the faculty member will be provided with the same access link that is provided to students.
If this option is enabled, the teacher will receive a different link to Zoom by email than the one the students receive, i.e., the link to get the online meeting started.
The lecturer, in the role of host of the online meeting, will have a few more directs than the other participants, such as ending the meeting for everyone, appointing a co-host, dividing the participants into subgroups, etc etc.
It is recommended that you document directly on the Zoom site regarding the meeting host's features and rights.- Students will wait in the waiting room before being admitted to the meeting: by checking this option, the faculty member joining the meeting as a host will have to give permission to the students to participate in the online meeting, who will wait in the waiting room
- Students can enter the meeting before the host: by checking this option, students can connect to the online meeting even before the host teacher, without having to wait for permission
Click here to read the article on customizing the Zoom configuration in individual client companies and individual funding funds associated with courses, in case you need to differentiate from general configurations.
The next configuration parameters concern the automatic closing of Zoom online meetings, and it will be possible to
choose whether:
- Do not terminate meetings automatically after class end time: Checking this option disables the forced termination of meetings, leaving the termination to the operations of the lecturer/host or secretary
- End meetings after class time only if there are other classes after, before the next class about n minutes earlier: by checking this option, the online meeting will not be automatically terminated in case there are no lessons afterwards, however, setting how many minutes before the next lesson to be held with the same host should be terminated
- End the meeting automatically after the end of the lesson after: by checking this option, you enable forced termination of the online meeting at the actual end of the lesson
- It still ends the meeting automatically after the end of the class after about n minutes: this option is only present in case the second choice is checked. by valorizing this checkbox, you can set how many minutes after the end of the lesson, the meeting should still be closed automatically (so even in case there are no upcoming lessons with the same host)
Note: Meetings will be automatically generated by the system on Zoom 30 to 40 minutes before the start of the lesson, and students and the teacher will be emailed the link to access them.
The next configuration parameters concern the columns you want included in the Online Class Participant Report retrieved from Zoom.
The information introduced allows for the generation of a report that enables accreditation with the entity or entities that fund or recognize the courses being taught.
It will then be possible to choose whether:
- Include the unique identifier of the Zoom meeting.
- Include the student's unique identifier in Zoom (if available): this data element is only obtainable if the option to force users to log in to their (free) Zoom account has been chosen in order to access the online meeting
- Include the teaching unit conducted (if available)
- Include the lecturer's commentary on the lesson (if available)
Finally, it will be possible to configure how far apart each online lesson should be:
- For virtual lectures scheduled by teachers force a distance from other lectures of at least n Minutes: if the following option is enabled, it will be possible to configure the minutes of distance that should elapse between one virtual lesson and another, in the case where it is the teacher who schedules the meetings independently
4. The operation of the secretariat
Planning a regular course in a virtual classroom
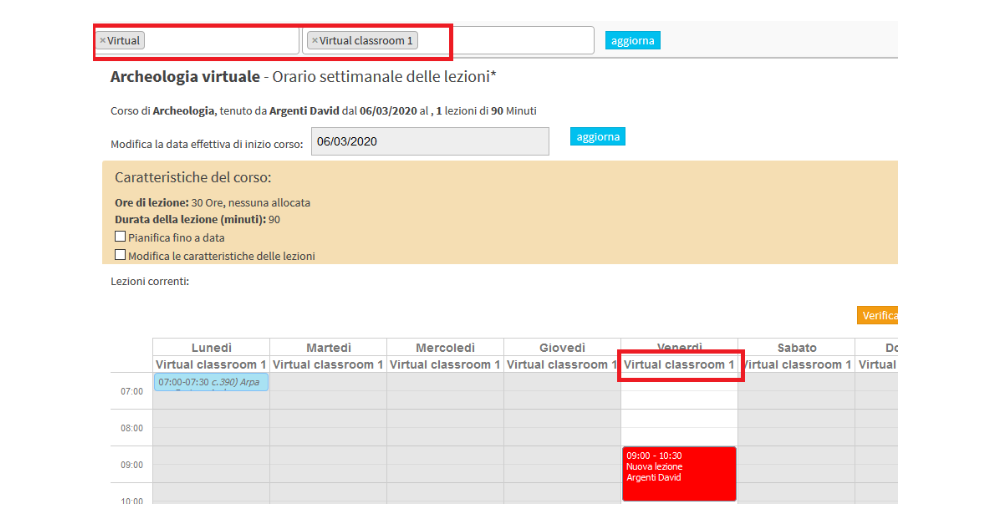
To schedule a course in a Zoom virtual classroom with ScuolaSemplice, it will be sufficient to assign the virtual/online location to the course, then schedule the lessons in one of the virtual classrooms generated by the system during setup.
In planning a regular course, once the venue containing virtual classrooms has been assigned to the course, it will be sufficient to schedule the lessons in one of the available virtual classrooms, such as "Virtual classroom 1."
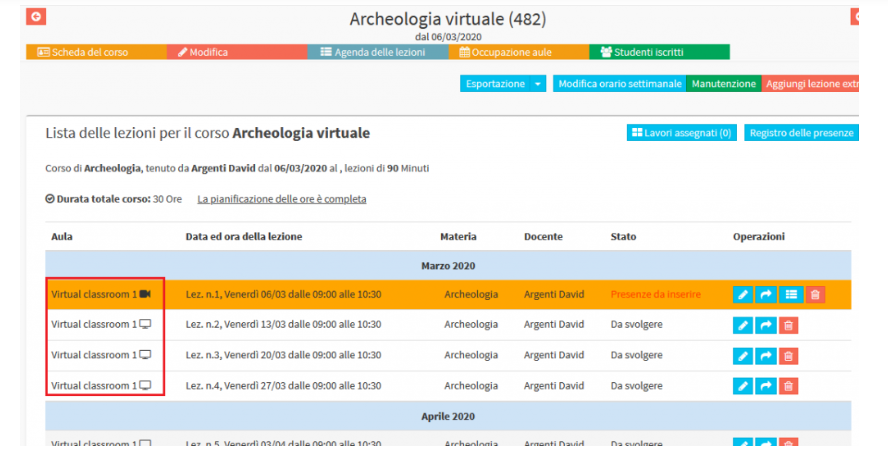
Once the course is scheduled, the secretary's job is done, as ScuolaSemplice will automatically take care of scheduling meetings in Zoom. Meetings that are already scheduled are identified with the camera icon, while the TV icon indicates classes for which meetings will be scheduled 35 to 40 minutes before the actual start of class.
In the event, however, that you need to move already scheduled classes from physical to virtual classrooms, simply use the normal classroom change procedure.
Click here to read the article on changing the classroom of an individual lecture.
Click here to read the article related to changing the classroom of an entire regularly scheduled course.
What the secretary needs to know regarding online meetings
The operation of the secretariat is quite simple, the lectures to be held as Zoom meetings, must be scheduled in one of the virtual classrooms, the rest will be handled by the system. So basically for the scheduling of lectures, there will be no difference from the regular lectures held on-site.
It is important, however, that the secretary knows the timing and manner of meeting management done by the system and the communications sent and faculty and students.
- When a lesson is scheduled in a virtual classroom (or is moved to a virtual classroom), the meeting is NOT scheduled immediately.
- As the lecture approaches, 35/40 minutes before the lecture, the system will automatically generate the meeting in Zoom and send an email to Students, any connected tutors/supervisors, and the Lecturer with the invitation link. Even in the case where the Lecturer is the host of the meeting, the discourse will not vary, but it will still be the system that will think about creating the meeting in an automated way.
IMPORTANT: Make sure you have entered the email address in the various master records. - If a class is cancelled, deleted, or placed in a state to be retrieved, any related meeting is deleted and previously notified participants receive notification that the meeting is cancelled
- If a lecture is moved from a virtual classroom to a physical classroom, any linked meeting is deleted and previously notified participants receive notification that the meeting is cancelled
- If a lesson for which a virtual meeting has been scheduled is postponed sufficiently to fall beyond the time when the meeting would be scheduled, then the possibly connected meeting is eliminated and the participants previously notified receive notification that the meeting has been cancelled. A new meeting will be scheduled at the due time.
The actions that can be performed from the general course calendar
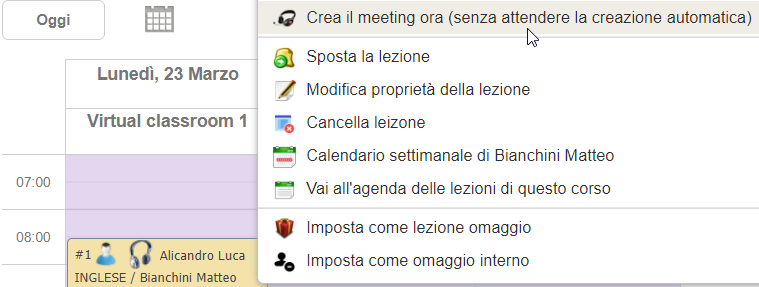
- Create the meeting manually without waiting for system automation: in case you need to create the meeting before the system automatically creates it 35/40 minutes before the start of the lesson (or in case you put a lesson on the calendar a few minutes before it actually starts, and then the system does not make time to create the online meeting in an automated way before it starts), you will be able to do it manually from the general calendar by right-clicking on the lesson box and following on "Create the meeting now (without waiting for automatic creation)".
 However, in this way, if the meeting creation is done prior the 35/40 min from the meeting, the system will NOT will automatically send emails with the link to participants, but you will have to do it manually in the way explained in the next point.
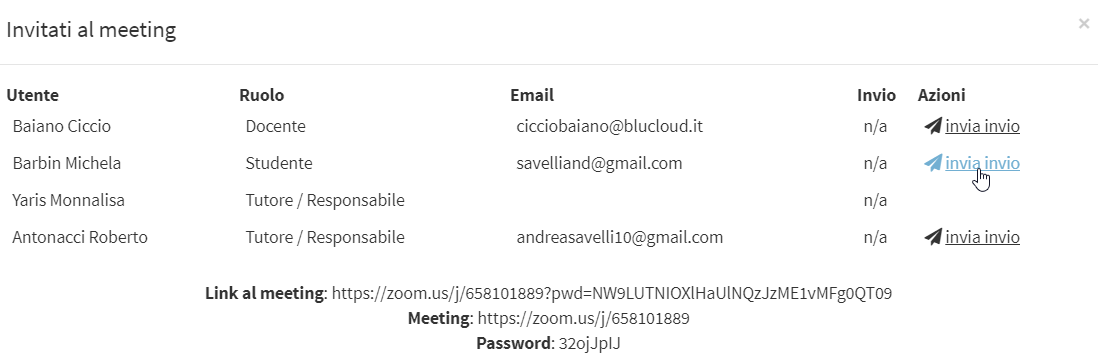
 - Send/Receive the email with the link to the online meeting.: in case you have created a meeting manually preceding the automated action of the system (which takes place 35/40 min before the start of the lesson), in the way explained in the previous point, you will be able to send the email with the link to the meeting to the individual participants by right-clicking again on the lesson box and following on "Check the status of email invitations"; then, from the next window, you should click on "Send" on the line of each meeting participant.
In case you need to resend the email with the link to the online meeting to one or more participants, again from where explained just above, just click on "Repeat sending" on the line of the individual participant. - Connect to the meeting for support or inspection tasks: When the meeting is in progress, from the general calendar by right-clicking on the lesson, you will be able to connect directly to the online lesson so that you can perform any inspection or support tasks.
You will be able to choose from the following options:
- Connect to the meeting via web: this option is only present if from the Zoom integration section of the system, you have not checked the checkbox that forces users to log in with their (free) Zoom account in order to connect to the lesson
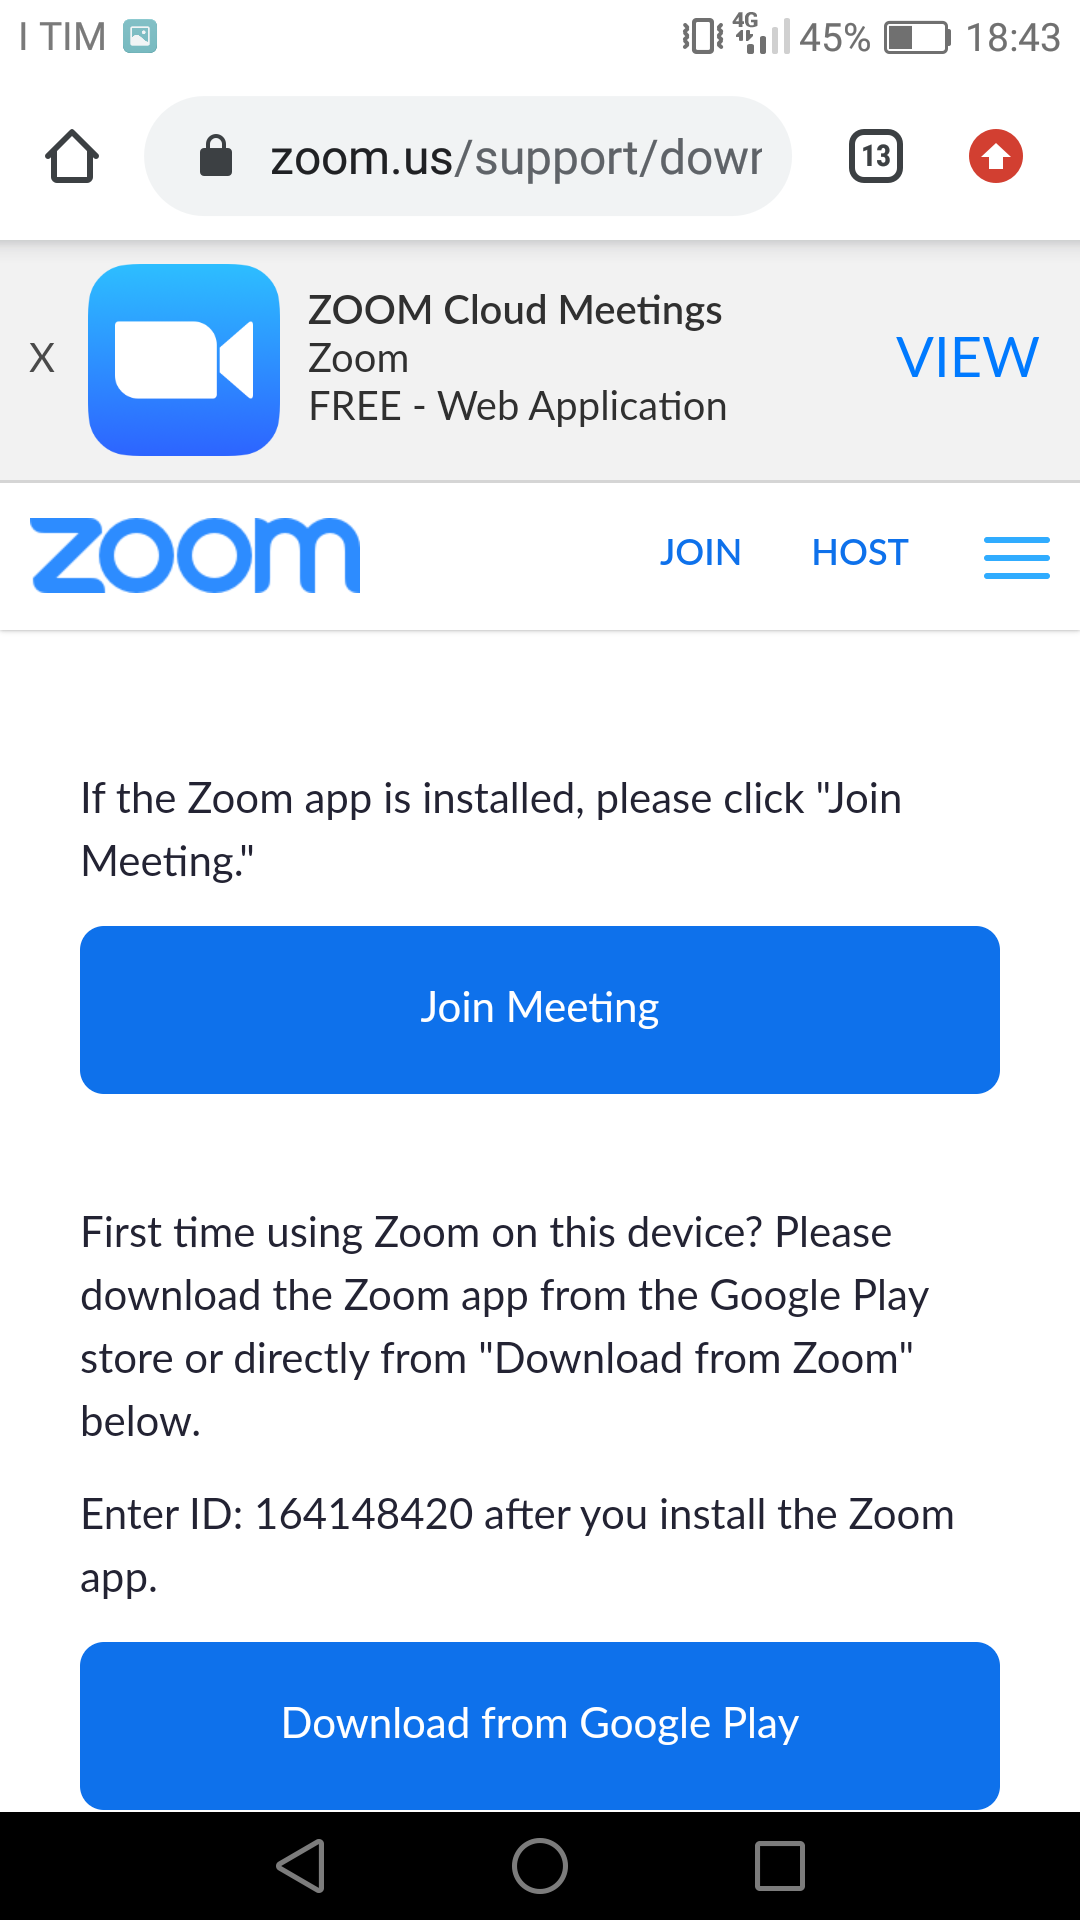
- Connect to the meeting via Zoom client: Instead, this option is always present and you will then need to download the Zoom client in order to access the lesson
You will also be able to access the online lecture link from the course's lecture agenda, after the meeting has been generated, by clicking the camera icon on the lecture line. - End the meeting manually as soon as the lesson ends: immediately after the lesson ends, from the general calendar by right-clicking on the lesson and following on "End Meeting", you will have the option to end the Zoom meeting immediately, anticipating the closing of the meeting, which will still be done by the system a few minutes after the conclusion. This can be useful if there is an immediate need to have the students in the meeting connected to follow.
- Consult the meeting's attendance record: This function allows you to retrieve the detailed information of meeting participants, such as call sign, email, time of connection and abandonment, total connection duration.
Then about an hour after the lesson has ended (these are technical times provided by Zoom), from the general calendar by right-clicking on the lesson and following on "View the meeting's attendance record", it will be possible to obtain the report with this information about the students.
The online meeting attendance report will be exportable via Excel file from the course class agenda by clicking the little arrow next to the blue button at the top "Export" and following by choosing the option "Export meeting logs online".
To take advantage of this function, you will first need to navigate to the menu Configuration → Integrations and click in the Zoom integration section. Then click on the "Update Zoom permissions" to be redirected to the Zoom website, and enter the credentials of your MAIN account (NOT the credentials of users created for the acquired host licenses!) to authorize retrieval of information about online meeting participants.
Second, in order to retrieve the Zoom online meeting attendance report, again from the Zoom integration section, you will also need to enable one of the following two options:- Users can only connect to meetings if they are logged into Zoom
- Enable the registration form on Zoom before entering the meeting
The greatest certainty about the identity of the user is when the option is activated whereby the student must be logged into Zoom with their account in order to access the Meeting
5. Inspection-type account configuration for external course promotion bodies
For courses financed by some fund, or accredited by public institutions such as regions, especially if the course is conducted through Distance Learning, the inspection body requires the possibility of monitoring activities.
Click here to read the Wiki article on the configuration of the oversight body for funded courses.
6. Teaching side
- The lecturer receives 35/40 minutes before the class the email with the link to access or start the meeting
- If the configuration requires the teacher to connect as the host then the teacher will receive a special and unique link, otherwise he/she will receive the join link to the meeting, exactly the same one sent to the students
- BluCloud Does not provide support for end users to access Zoom services
7. Student side (and/or tutor/supervisor)
- The student and/or the tutor connected to them, receives 35/40 minutes before the lesson the email with the link to access the meeting. The email is also sent to the tutors if present
- Enjoyment can be from either a PC or mobile device.
- BluCloud Does not provide support for end users to access Zoom services
<h3id=”8″>8. Collegamento al meeting online tramite App di ScuolaSemplice
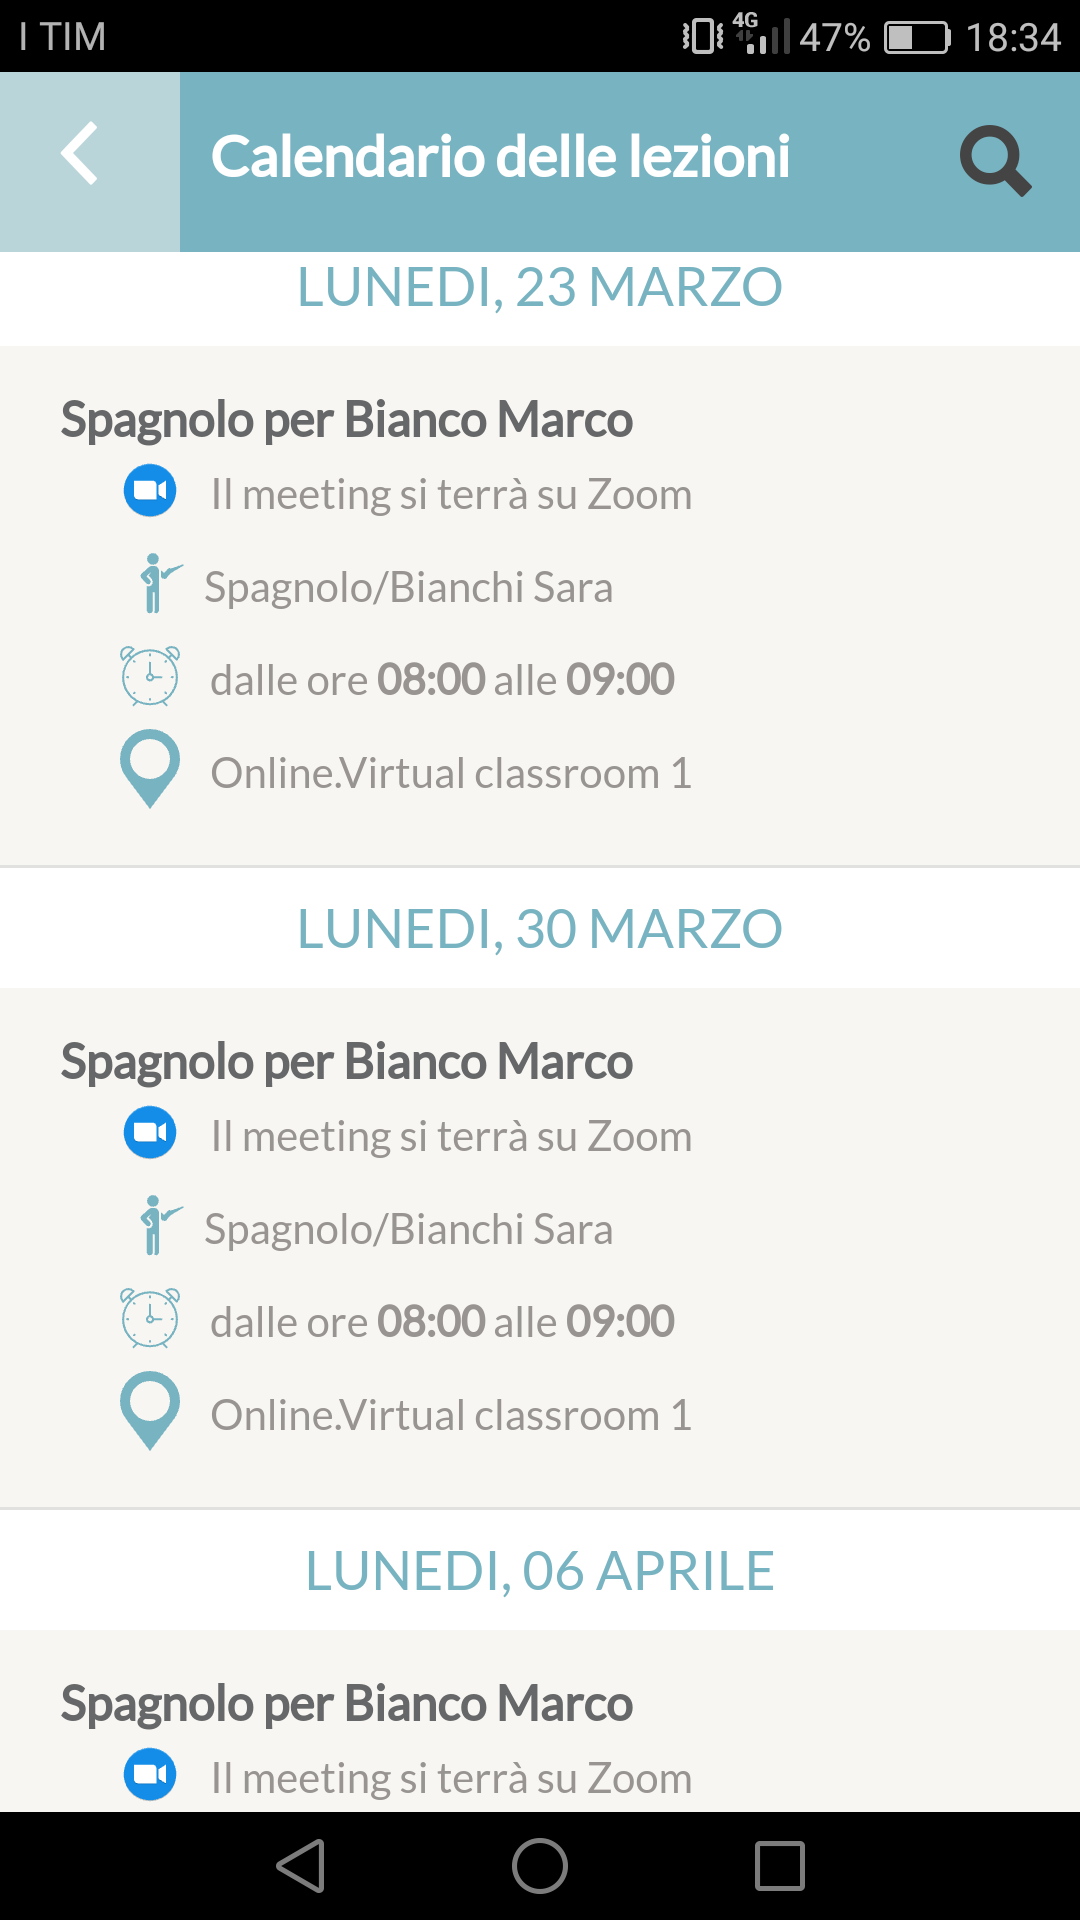
Both teachers, students and any connected tutors/supervisors, via their school-linked ScuolaSemplice App, will be able to access the online meeting once it is created.
All lessons scheduled in the virtual classrooms, will be marked "![]() The meeting will be held on Zoom," viewable then from the "Lessons" e "Courses" of App.
The meeting will be held on Zoom," viewable then from the "Lessons" e "Courses" of App.
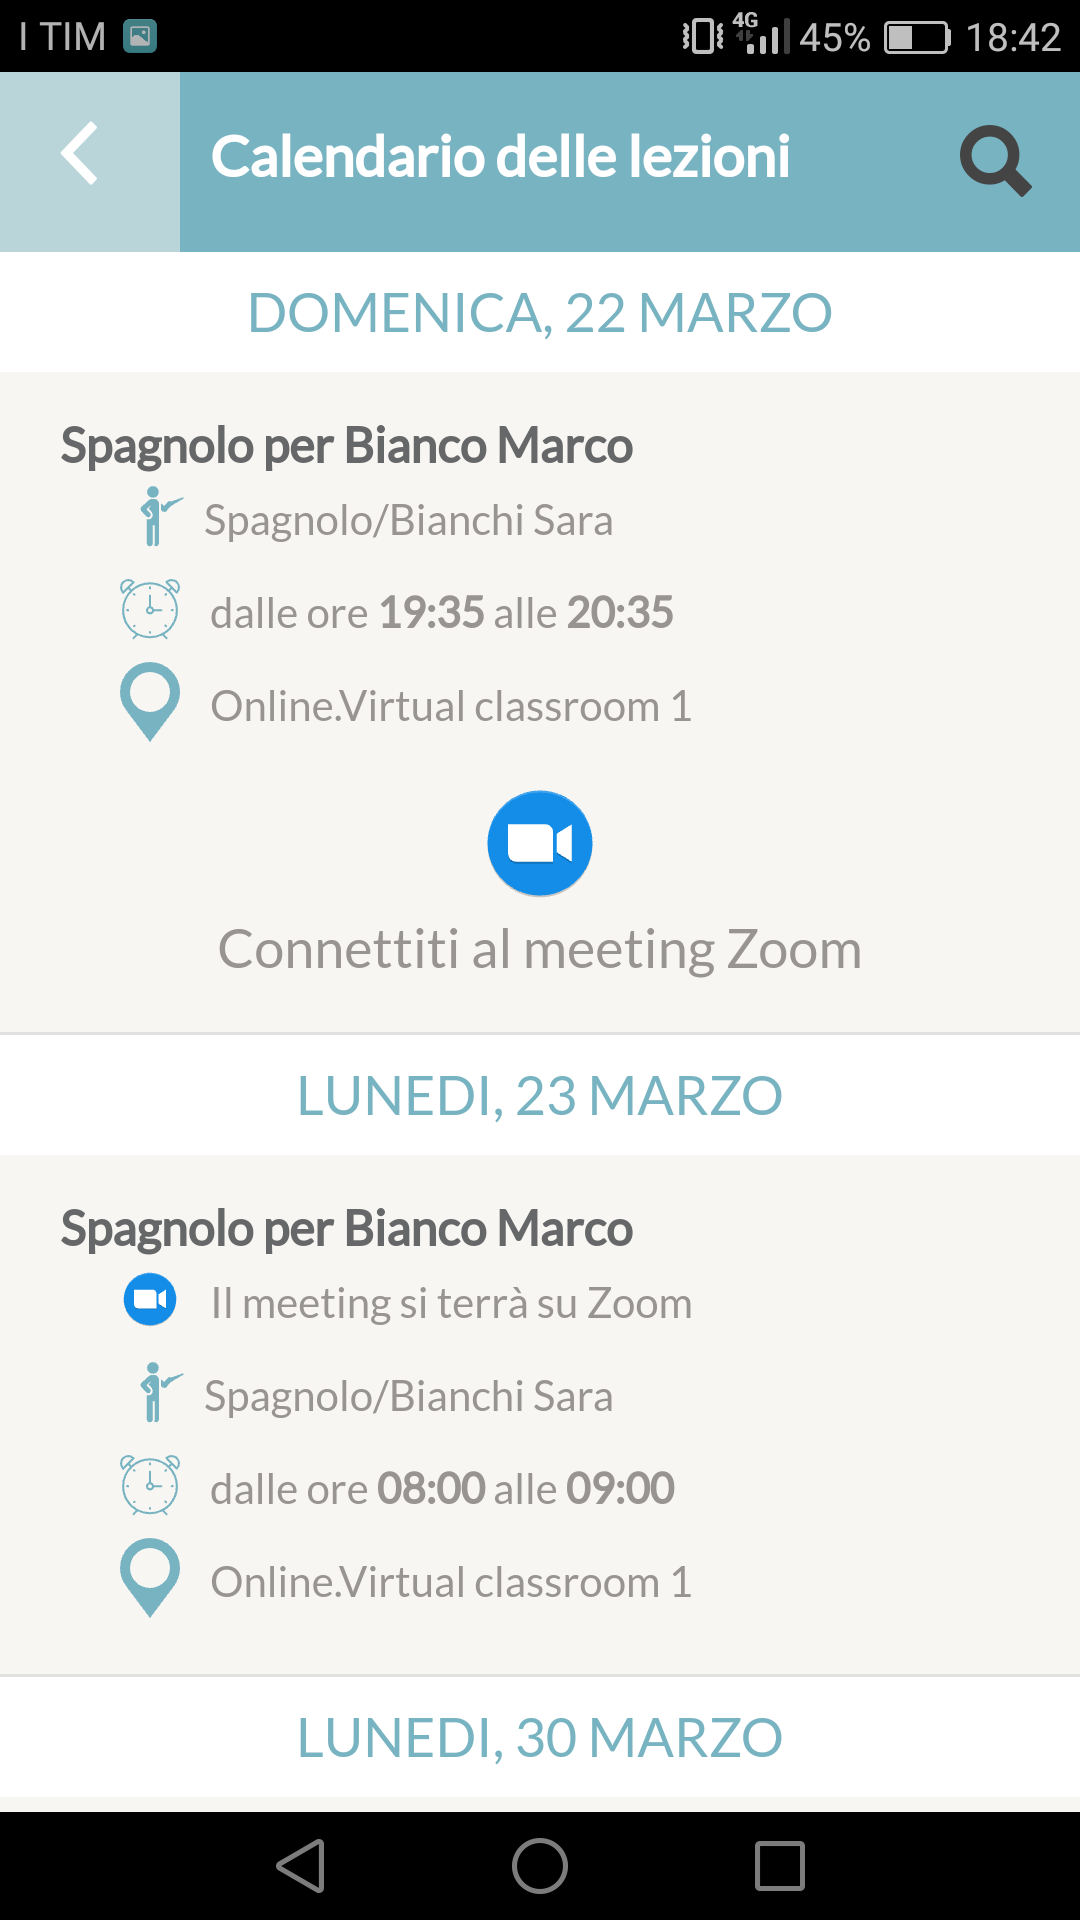
When the meeting appears to be created, then 35 to 40 minutes before the actual start of the lesson, or at the time when the secretary has forced the start manually, the lesson to be followed online will be marked "![]() Connect to Zoom meeting," and by pressing on the icon, you will be redirected to the lecture held on Zoom.
Connect to Zoom meeting," and by pressing on the icon, you will be redirected to the lecture held on Zoom.

9. Linking to the online meeting via Web Account
Both the teacher and the student, as well as the tutor/manager if present, in case they have been provided with a Web Account by the school in order to access their courses, will be able to log in to the meeting directly from their account.
Click here to access the Wiki article on setting up a student Web account.
Click here to access the Wiki article on configuring the Web account for guardian/manager.
Click here to access the Wiki article on configuring the Web account for Teacher.
Link to the meeting via class agenda
Similarly for both students and faculty, after logging in with their credentials, navigate to the menu item "My courses". From the next screen, click the icon ![]() on the specific course row to access the class schedule for that course.
on the specific course row to access the class schedule for that course.
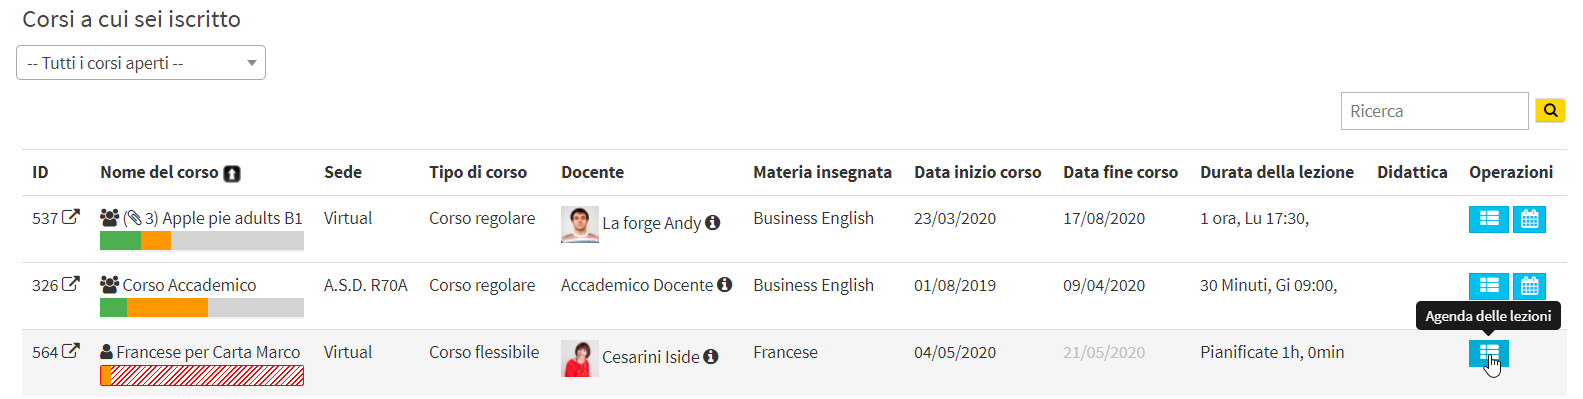
From the next screen, click the camera symbol on the row of online classes you want to connect to and choose from:
- Connect to the meeting via web: this option is only present if from the Zoom integration section of the system, you have not checked the checkbox that forces users to log in with their (free) Zoom account in order to connect to the lecture
- Connect to the meeting via Zoom client: Instead, this option is always present and you will then need to download the Zoom client in order to access the lecture