6 - Creating a collective course
→ Download this guide in PDF format![]()
This article explains how to create a standard collective course; by standard we mean a course associated with a single subject and with a regular weekly schedule.
For other types of collective courses (e.g.: didactic, module-based, remedial classes, etc...) please refer to the specific guides or technical support.
To create a new group course, navigate to Didactics → Group Courses and click the button Add course.
As indicated here, creating a collective course does not require creating the course type first. However, if you want to use this option, you can select the course type by clicking on the button Create From Template, next to the Add Course button.
Then enter:
- Course name *: the name that identifies the course
- Name of the venue: the venue where the course is held, if any
- Educational year: select the educational year of the course
- Description: explanatory description of the course
- Open enrollment: if selected, users will be able to register independently via web form and up to and possibly up to the date indicated in the field open enrollments until the day, if present
- Subject taught *: select the subject matter of the course
- Course lecturer (multiple lecturers) *: select the course lecturer; the dropdown will populate according to the subject just selected
- Gross teaching salary*: the hourly wage assigned to the teacher; you can choose from:
- set manually: in this case enter the amount in the field displayed below Gross teacher salary (€/hour)*
- uses the teacher's default pay class.: is assigned the amount indicated in the teacher's master data for the default pay class
- uses teacher salary: the amount indicated in the teacher's master data is assigned
- no remuneration: no remuneration is assigned to the lecturer for the course
- alternatively the dropdown also displays the hourly rates set in Administration → Economic Settings, if any
- Lesson duration (minutes)*: the lesson duration expressed in minutes, e.g. 60
- Minimum number of enrolled students: the minimum number of enrolled students with which the course can start (though not binding, it is useful to get feedback about the status of enrollment in the course)
- Maximum number of enrolled students: the maximum number of enrolled students with which the course can start (though not binding, it is useful to get feedback about the status of course enrollments)
- Weekly classes: the frequency of weekly classes, such as one a week or one every fortnight
- Type of enrollment fee.: the type of fee associated with the course. See the same section in the course type chapter for a description of each individual item, by clicking here
- Course Duration.: the total duration of the course, choose from:
- Set manually or until the end of the academic year: in this you can enter the Course start date and the Course End Date (if the End Date is not filled in, the system will automatically take the general date of the end of the academic year)
- Predetermined number of lessons: in this case, enter the number of lessons in the field Number of lessons
- Predetermined number of hours: in this case, enter the number of hours in the field Class hours
- Notes: any notes and comments regarding the course
Then click on the Add Course to save the data.
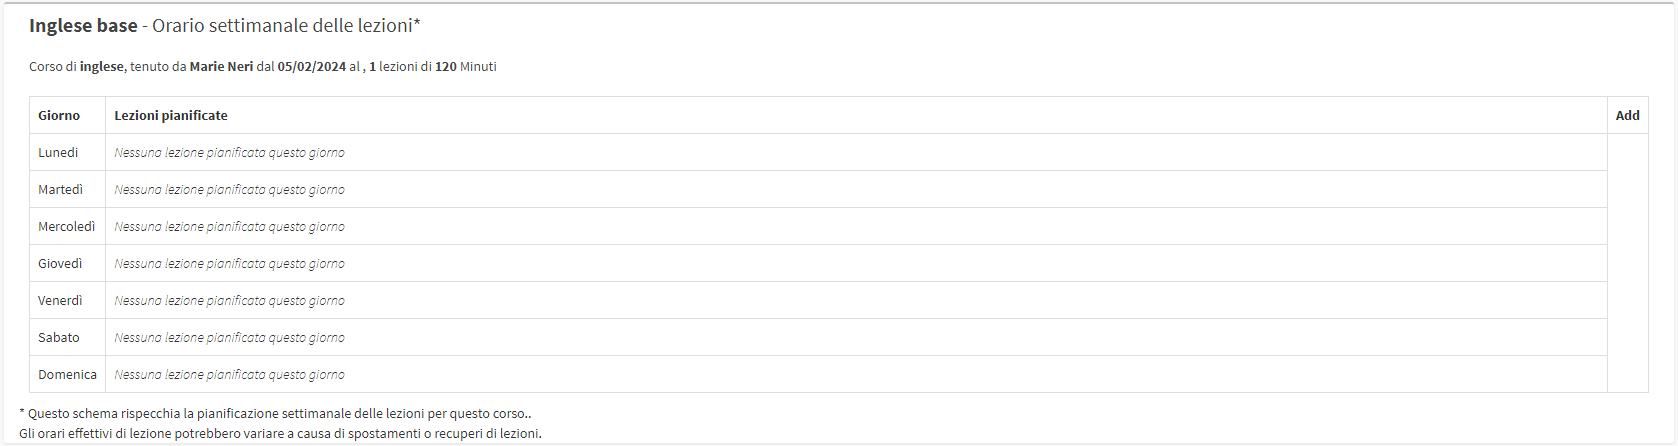
As soon as the course is created, the system shows the weekly schedule table; the schedule will be empty because it has not yet been calendared.
Returning to the list of collective courses instead, we see the new course with three red rectangles highlighting the incomplete course setup: the one on the left and the one below the course name indicate that the course's class schedule has not yet been planned; the one on the right indicates that no students have yet been enrolled in the course.
N.B. The right rectangle will remain red until the previously indicated minimum number of entrants is reached, and will turn red again when the maximum number is exceeded.
