Creazione di un Form Online
Per creare una nuova Form Online navigare su Configurazione → Form Online, dalla prossima schermata, cliccare il pulsante in alto a destra Aggiungi.
Quindi compilare i seguenti campi:
- Nome* : il nome del form
- Descrizione: eventuale descrizione del form
Le form potranno essere utilizzate sia per effettuare iscrizioni a corsi collettivi e per vendere beni o servizi, sia per raccogliere o integrare i dati degli utenti a scopo puramente anagrafico senza includere iscrizioni.
Di seguito specificare le modalità di impiego del form con la possibilità di spuntare le seguenti opzioni:
- Usa per iscrizione ai corsi: spuntando questa casella sarà possibile utilizzare il form come modulo di iscrizione ad uno specifico corso. Se spuntato, sarà possibile successivamente inserire il flag Predefinito per i corsi per rendere il form predefinito dal sistema, in assenza di scelte specifiche nelle impostazioni dei corsi.
Tramite questa opzione quindi, sarà possibile abilitare la form di iscrizione dalla scheda di modifica del singolo corso collettivo, inserendo il flag Gli studenti possono iscriversi autonomamente al corso alla voce Iscrizioni aperte, specificando poi la data di chiusura delle iscrizioni e la form da utilizzare.
Dopo aver salvato, dalla scheda del corso sarà possibile reperire il link che il sistema ha generato per l’iscrizione al corso ed inviarlo agli utenti per la compilazione.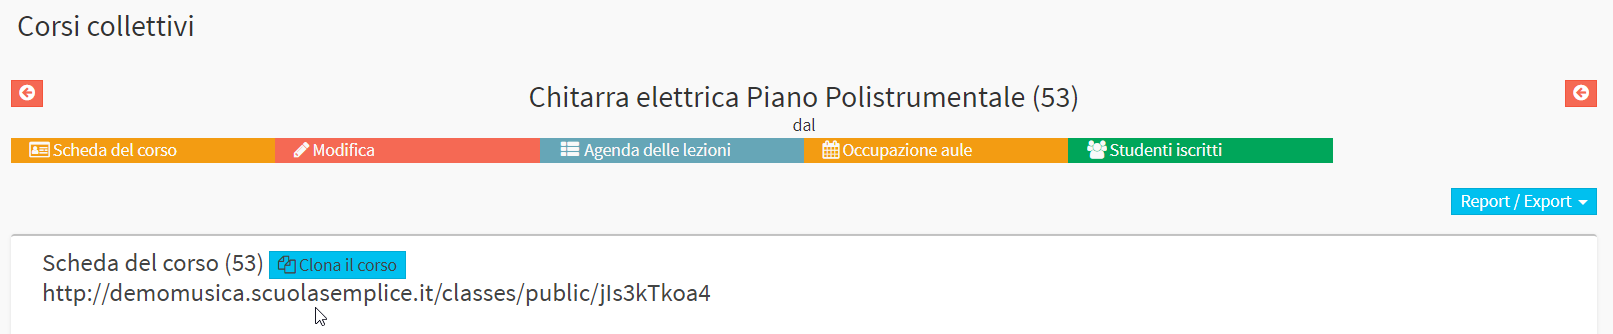
- Usa per beni, servizi e classi: spuntando questa casella potrai utilizzare il form come modulo di iscrizione ad un bene o servizio specifico. Tramite il menù a tendina sottostante sarà possibile scegliere tra corsi e servizi disponibili a sistema.
Dopo aver selezionato un elemento, cliccare il tasto per aggiungerlo e di seguito il tasto
  per separarlo rispetto a quello successivo.
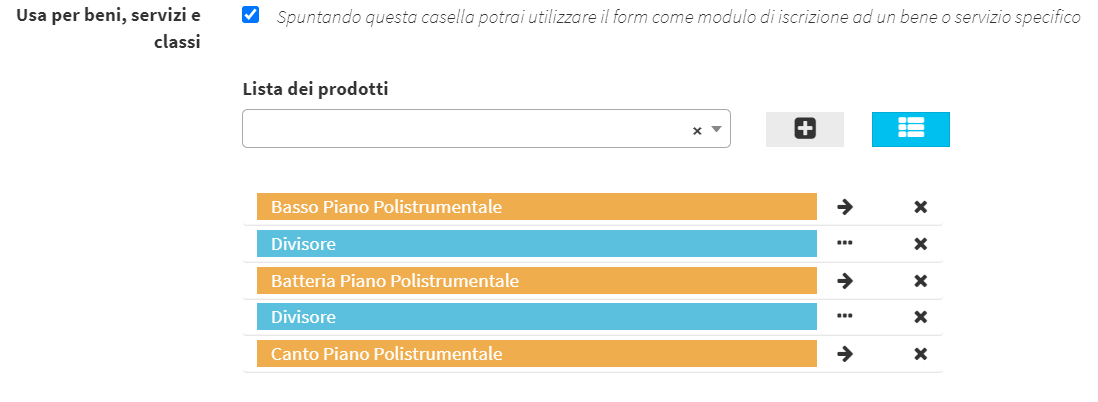
Di seguito dopo aver completato la restante parte della configurazione che verrà tratta poco sotto in questa guida, dalla riga del form creato sarà possibile reperire il link creato dal sistema tramite la terza icona.

Verrà specificato il numero di elementi associati al form, ossia le classi, beni e servizi che sono stati selezionati e che quindi potranno scegliere gli utenti in sede di compilazione della form.
- Usa per completamento anagrafiche: spuntando questa casella potrai utilizzare il form con studenti già iscritti per il completamento e integrazione dei dati
Nota bene, se in fase di scelta dei flag si è deciso di spuntare uno tra i primi due, ossia iscrizione ai corsi o usa per beni, servizi e classi, il sistema ti permetterà di andare a definire ulteriori parametri specifici:
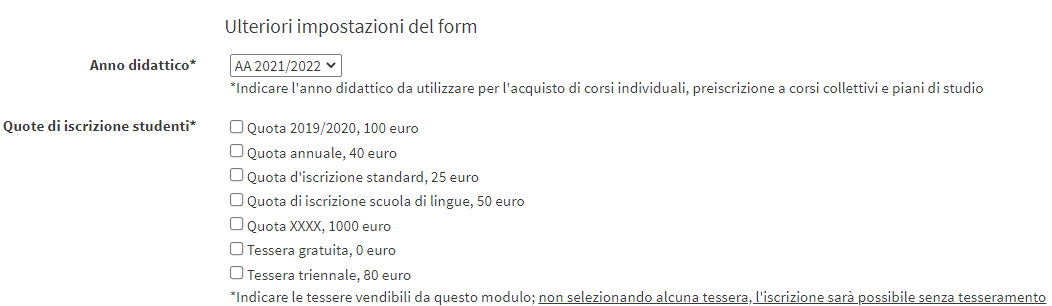
- Anno didattico: specifica l’anno didattico da associare alla Form Online
- Quote di iscrizione studenti: (se prevista) quota di iscrizione precedentemente creata in Amministrazione -> Impostazioni Economiche
- Raccolta delle preferenze utente: Nell’iscrizione a corsi individuali e preiscrizioni per corsi collettivi, disabilita il box che permette di raccogliere le preferenze (non vincolanti) degli studenti in merito ad orario, giornate e docente
- Omissione del costo di acquisto: utile nel caso in cui gli studenti sono fossero a conoscenza del costo del corso e si rendesse necessaria la necessità di nascondere il suddetto costo dalla form
- Maggiore età: abilitando questo flag, l’iscrizione sarà possibile UNICAMENTE per studenti maggiorenni
- Unificazione degli ordini: abilitando questo flag, se l’utente effettua molteplici iscrizioni, sarà possibile unificare tutti gli ordini effettuati dallo stesso utente in uno unico
- Informazioni da mostrare nella vendita di un corso: tramite questa sezione, sarà possibile far apparire solo alcune delle informazioni inerenti al corso nella prima schermata della form.
Tali informazioni possono essere quelle di base del corso, come la durata, la data di inizio ecc oppure anche i campi personalizzati (sempre inerenti al corso) che sono stati creati precedentemente
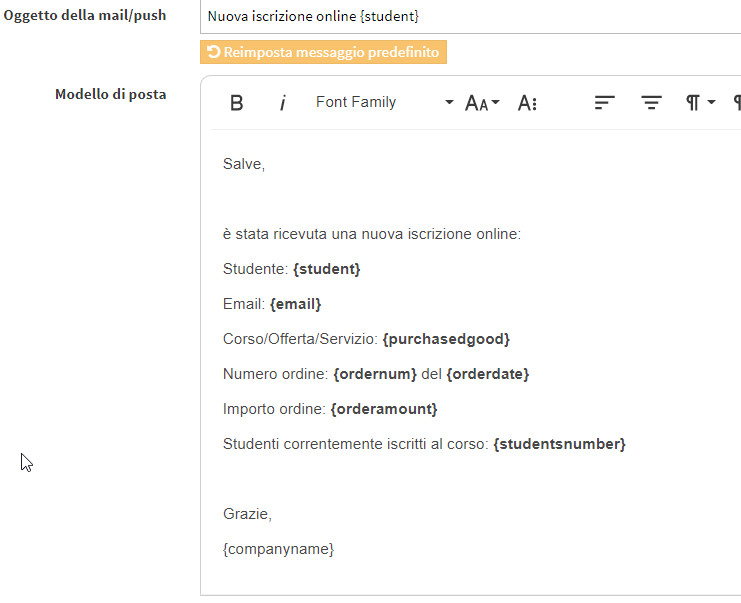
- Invio notifica ad indirizzi specifici: nel campo testuale sarà possibile indicare uno o più indirizzi email (separati dal punto e virgola ; ) ai quali far giungere una comunicazione ogni volta che avviene un’iscrizione legata a quella data Form Online. (di seguito il formato della mail in questione)
- Modello di contratto predefinito: in caso siano stati caricati a sistema più contratti di iscrizione, scegliere tramite il menù a tendina il contratto da utilizzare
- Ricarica contratto firmato: Spuntando questa casella, l’iscrizione tramite questo form prevedrà la compilazione e successivo ricaricamento di un documento di contratto (clicca qui per la Guida completa).
- Ricarica contratto solo in pdf: Spuntando questa casella, l’iscrizione tramite questo form accetterà il ricaricamento di un documento nel solo formato PDF
- L’iscrizione avviene solo quando l’utente ricarica il contratto firmato: Il contratto rimarrà in stato bozza sino a che l’utente non caricherà il contratto firmato e solo ad allora avverrà l’iscrizione
- Elimina le iscrizioni per cui dopo giorni non sia stata caricato il contratto firmato: Dopo il passare dei giorni indicato, se non è stato caricato il contratto di iscrizione, l’ordine verrà eliminato.
- Login abilitato: Spuntando questa casella nella pagina del form sarà visibile anche il form di login per utenti già registrati
- Larghezza del form: serve a definire il form a livello di impaginazione
- Sicurezza al login:
- Nessuno
- Captcha semplice
- reCAPTCHA
A questo punto, dopo aver flaggato almeno una delle 4 opzioni, sarà possibile selezionare colore del form ed anteprima:
- Colori del form:
- Usa i colori di default del sistema
- Usa colori personalizzati
- Anteprima del form: cliccare il pulsante Modifica per modificare i campi ed il layout del form.
Tramite l’icona di modifica si potranno editare i vari campi:
![]()
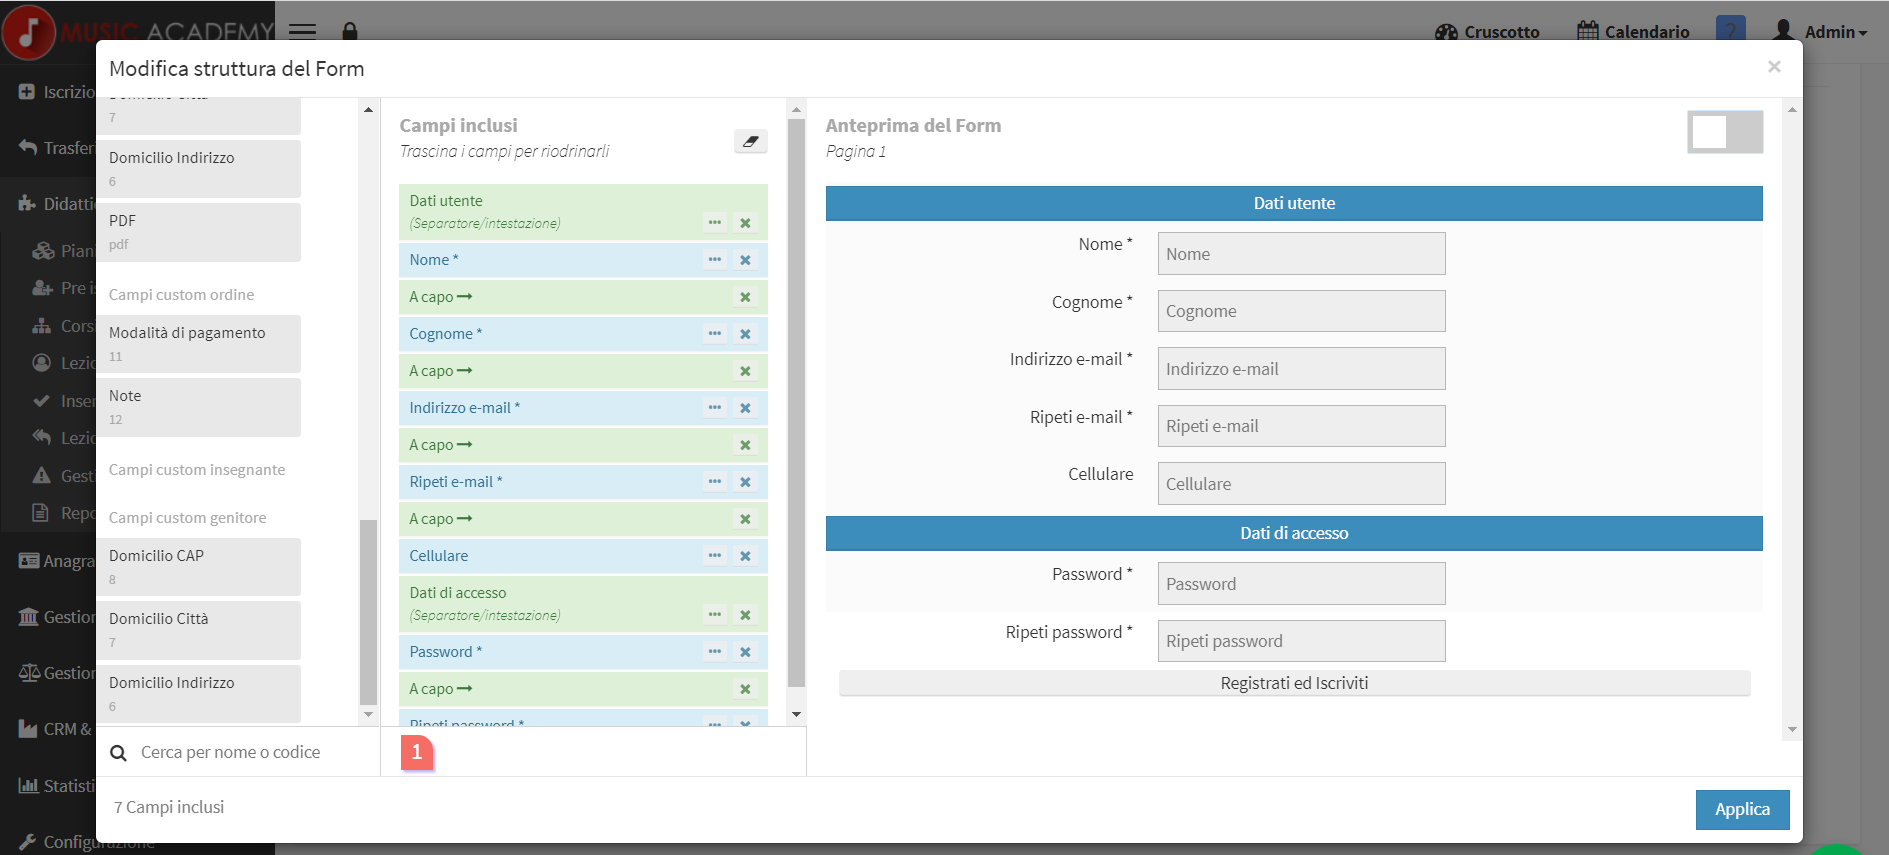
Modificando la struttura del Form si potranno andare ad editare i parametri inseriti di default o aggiungerne altri.
Il sistema permette di scegliere quali parametri rendere obbligatori da compilare e quali no, per farlo è necessario cliccare sui 3 puntini ed andare a definire il campo come richiesto o meno.
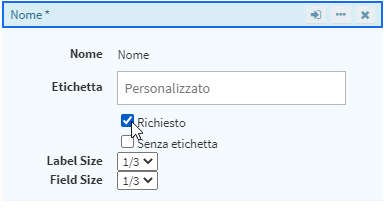
- Etichetta: permette di dare un nuovo nome ad un campo. Nota bene: Le funzioni del campo così rinominato non varieranno in alcun modo.
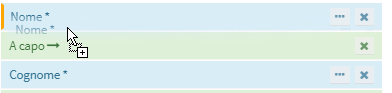
- Spostamento: l’ordine dei valori del form può essere variato trascinando un parametro in un punto differente.
Dalla tabella di selezione posta sul lato sinistro dello schermo, invece, sarà possibile aggiungere ulteriori campi compilabili secondo l’esigenza personale. Tutti i campi selezionabili in questo modo possono essere resi obbligatori, come per quanto riguarda gli altri valori preesistenti nel modello base.
Troveremo dunque un primo elenco che mostra i campi di struttura, seguito dai campi standard e campi custom.
I campi di struttura si dividono in:
- A capo: dopo aver inserito un campo, per fare in modo che quello successivo risulti nella riga sotto e non accanto, è molto importante andare a separare le informazioni utilizzando questo comando.
- Separatori: I separatori suddividono le varie sezioni in più sottosezioni coerenti. Ad esempio la password, nel modello standard, viene separata dal resto. Come per gli altri parametri, anche questo è rinominabile tramite etichetta.
- Campi personalizzati: Da gestionale è possibile generare dei campi custom da utilizzare nel form, cliccare qui per una guida alla creazione
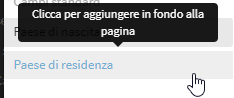
- Nuova pagina: il Form può essere strutturato in più pagine in base alla necessità. Per esempio potrete separare i dati anagrafici da quelli prettamente legati ai corsi.
- Etichetta: Quest’etichetta non sostituisce il nome di uno dei parametri, ma può essere utilizzata per andare ad inserire delle informazioni visive utili alla compilazione del form.
I campi standard sono tutti quei parametri inerenti all’anagrafica dell’utente ed utili alla registrazione di una nuova anagrafica o iscrizione ad un corso.
Da tenere in considerazione con riguardo il campo tutore, molto importante se gli studenti sono minorenni.
- Tutore: Qualora il Form dovesse essere compilato da studenti minorenni, risulterà molto importante l’aggiunta del campo “registrazione come tutore/genitore di uno studente”. Si consiglia di impostare il campo tutore al primo posto.
![]()
Anche il campo Paese di Residenza ha un’importanza rilevante in quanto se inserito obbligatoriamente, permette al sistema di controllare in automatico se i campi inseriti in Codice Fiscale, Cap e Provincia siano corretti e davvero esistenti.
- Paese di Residenza: Se inserito obbligatoriamente, controlla che il Codice Fiscale inserito sia del formato corretto e che il CAP e la Provincia di residenza inserite siano realmente esistenti:
Cliccare il pulsante Aggiungi Form per salvare l’operazione. A questo punto non vi resterà che erogare il Form al cliente finale permettendogli di compilarlo.
—————————————————————————————————————————————————————————————————————————————————————————
Dal punto di vista del cliente, il Form Online si presenterà in questo modo:
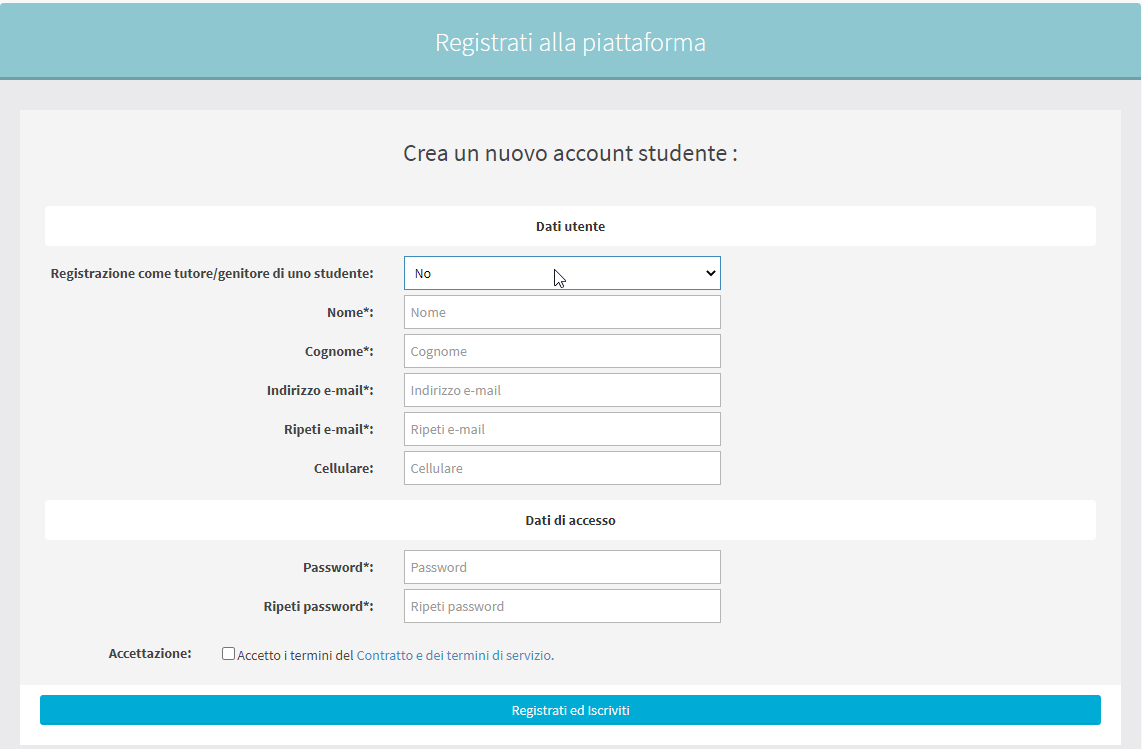
Andando a convalidare la presenza di un tutore, si aprirà una maschera di selezione aggiuntiva dove andare ad indicare i dati dello studente:
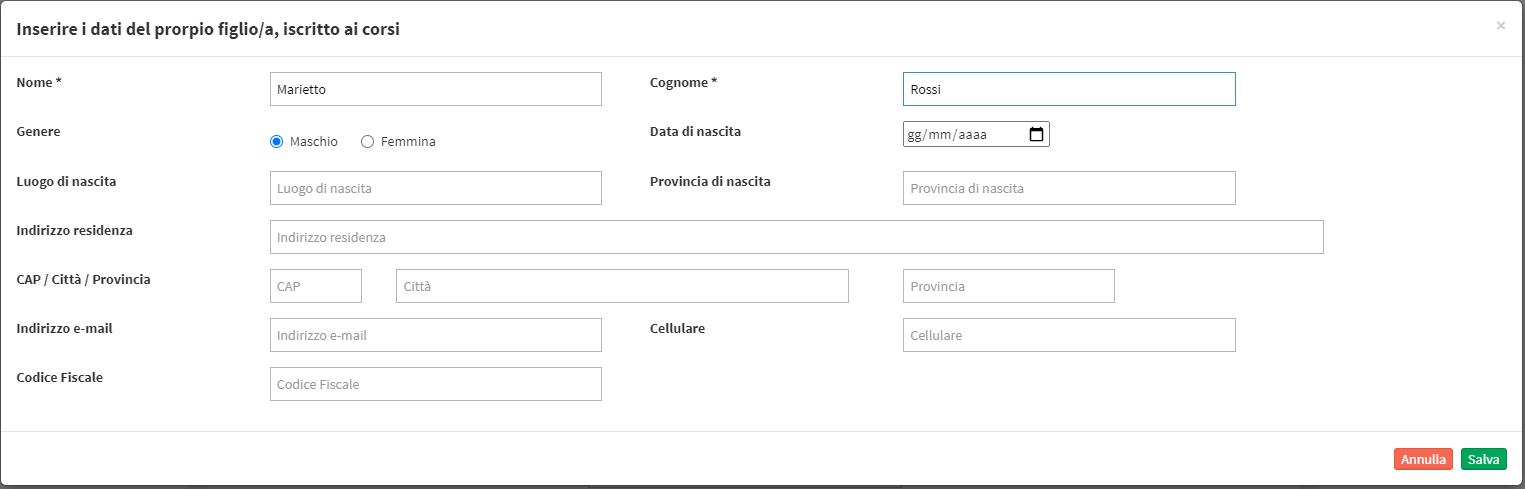
Di conseguenza i dati del tutore saranno elencati nella schermata principale del form.
Per quanto riguarda la registrazione di dati già presenti a sistema, essa non potrà avvenire tramite Form Online. Il sistema tiene conto della mail utilizzata per quella data anagrafica e con un recupero della password sarà possibile accedere ed effettuare la registrazione.
Prima dell’effettiva registrazione, il sistema richiede di accettare i termini di contratto. Questi possono essere configurati accedendo ad Amministrazione → Termini di servizio ed andando a compilare il campo relativo alle registrazioni online.