Master data forms
Master Data Form provides the ability to customize data entry for faculty, tutors and students.
The system presents by default several parameters that you may not need. To make sure they no longer appear on the screen, you can arrange the display by going to Configuration → Master Data Form. Anything you remove via this section will still be present within the database but no longer visible to you. This is, of course, a conveniently reversible process.
From this section you will have a way to create multiple display templates to choose from.
First select "Add" located in the upper right-hand corner of your management system. Whether you are editing a student, tutor or faculty member the parameters will be the same.
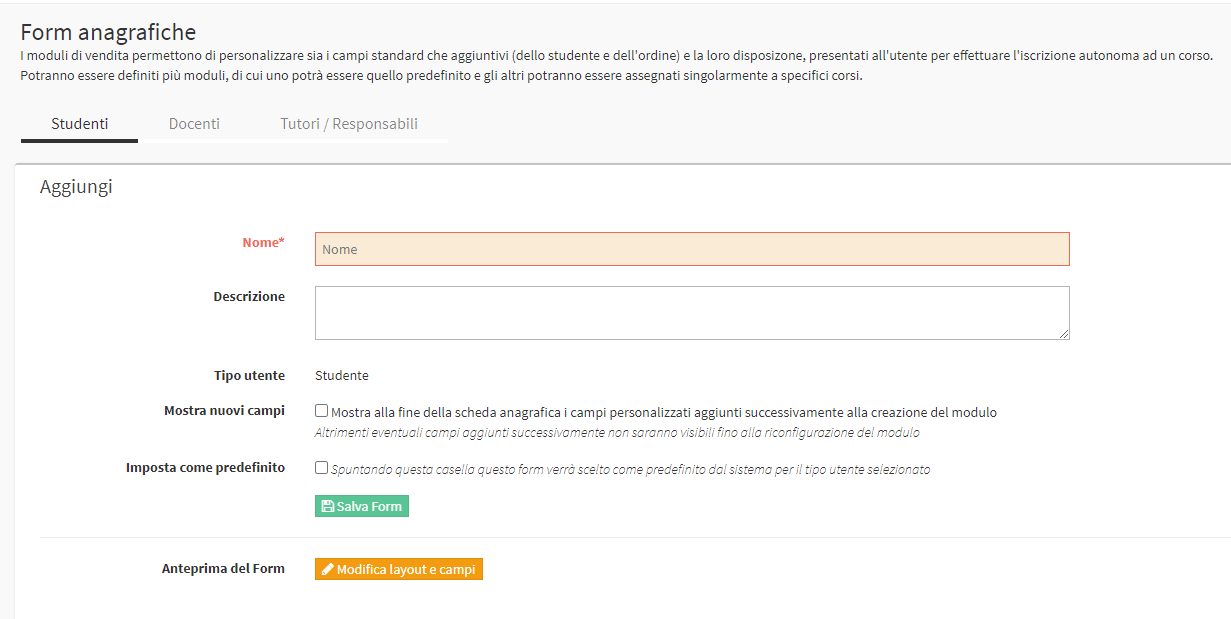
The system will ask you to specify a name (required) and will automatically select the type of user corresponding to one of the three categories you are about to edit.
To this form you will be able to assign a description or place a flag related to the custom fields created after defining the form itself. Without enabling this flag, in fact, it will not be possible for you to show the newly created field unless it is manually added to the layout.
IMPORTANT: To replace the old master records screen with the new one, the default flag should be selected; without the checkmark, the master records will not change at all.
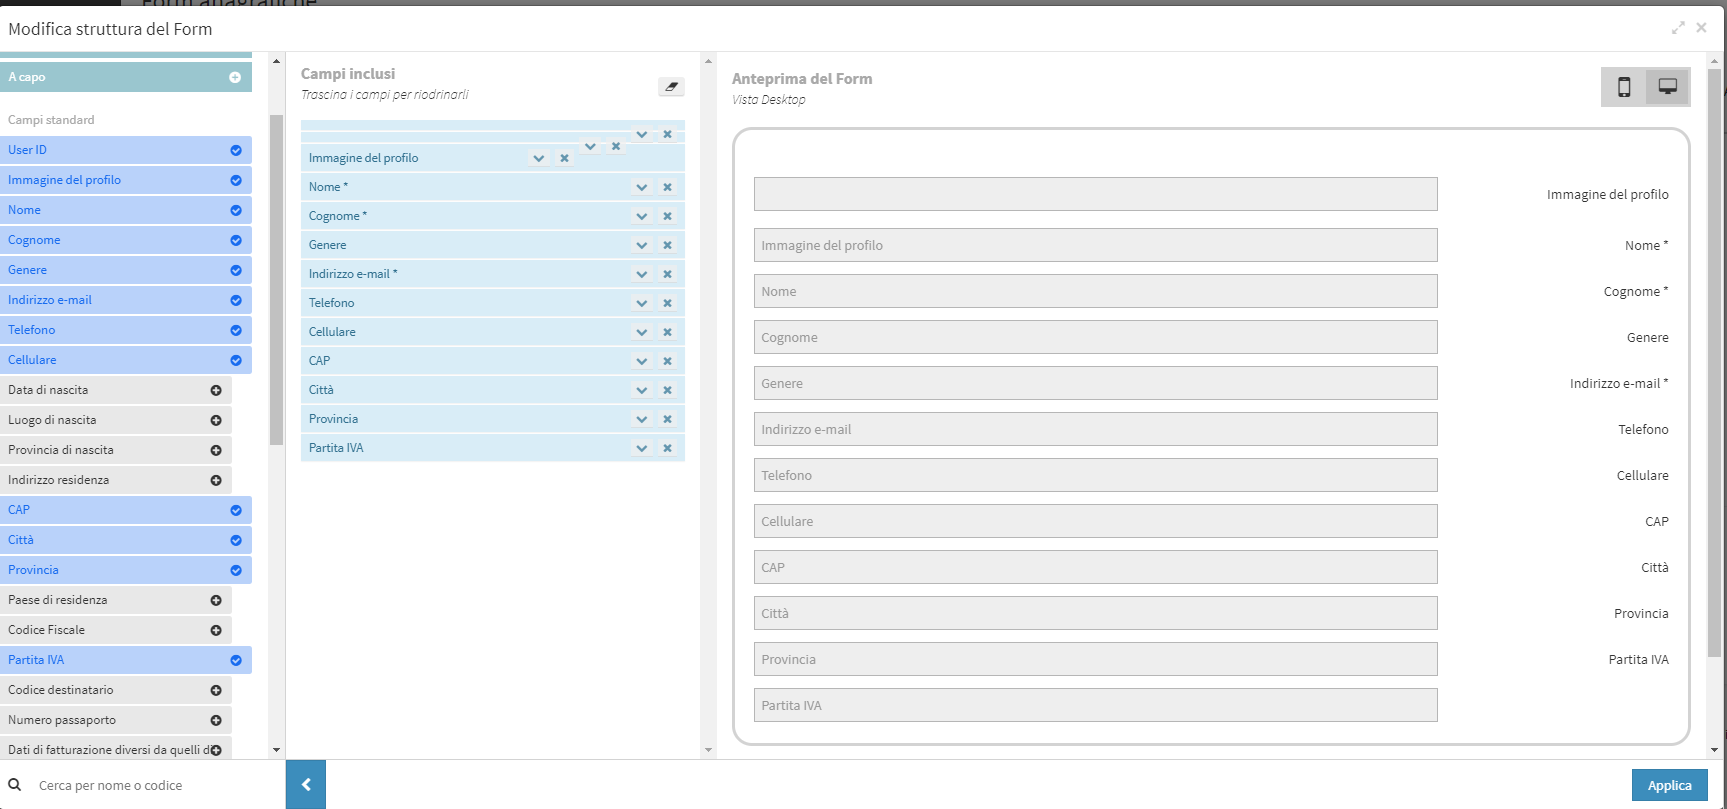
Preview the form: through this screen you will be able to modify the layout and customize your master data as best you can. In the left column you will find all the fields that can be entered. To prevent some values from appearing in the master data, simply omit them.