Associate cost with curriculum
There are two ways to handle the student's portion of payments related to enrollment in a study plan: through an entry outside the study plan or by tying the cost directly to the study plan.
1st mode: cost management directly from the study plan
From the Configuration → Study Plans section enter edit an already created plan (or create a new one) by clicking the first button on its row.
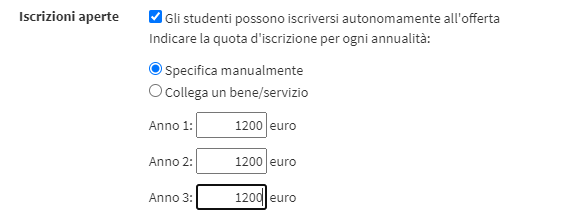
Then enter a check mark in the field "Open Enrollments" and choose one of the following options:
- Manual specificatione: by choosing this option, the system allows you to indicate the tuition cost for each individual year that makes up the plan of study (any ancillary costs will come externally to the plan)
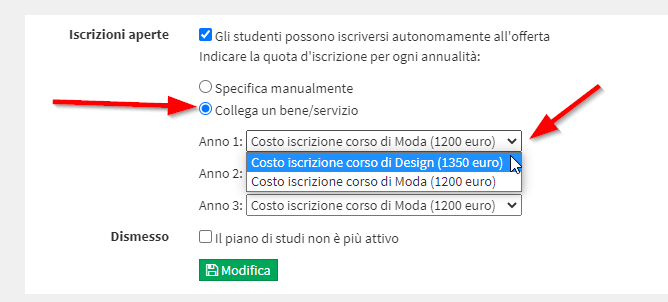
- Link a good/service: by choosing this option, for each annuality that makes up the study plan, it will be possible to link a previously created good/service as an enrollment cost (Recommended)
 Through this option you will be able to take advantage of the goods/services feature that allows you to associate one or more custom installment plans with them, so that they will be offered automatically during enrollment. Read below for instructions on creating cost by good and service.
If you decide to use the second option, you will first need to create the goods and services that will be used as the cost of enrollment in the curriculum.
Then navigate to Configuration → Goods and Services and click the button in the upper right-hand corner "Add item for sale". From the next screen enter the name (e.g., "Design course enrollment cost"), the cost (read here to access the guide on creating custom installment plans), the VAT rate applied if different from the default rate, and save the operation by clicking the "Add New Item".
Return to edit the asset you just created and enter the checkmark "Item not for sale", for the purpose of making it NOT directly saleable to the public but usable as a cost to be linked to a curriculum (or other services).

In this way, from the edit tab of a curriculum, after checking the "Link an asset/service" option, all those assets created with the non-saleability checkmark will be shown and can be used as a cost.
From the student's enrollment panel in this way, once the plan of study is chosen, automatically the cost that has been associated will be shown (which can always be changed manually in each individual enrollment, however).
2nd mode: cost management through an item outside the study plan
Through this mode, one or more goods/services assigned to the study plan enrollment cost will have to be created, but they will NOT be linked directly to the study plan but, when the student enrolls, will be added as an additional and therefore separate row from the study plan.
This mode makes it possible to be able to differentiate enrollment prices between study plans, without being "forced" to link only one of them (per year of the plan), and can be very useful, for example, in contexts where students pay different annual tuition based on their ISEE.
Then navigate to Configuration → Goods and Services and click the button at the top right "Add item for sale". From the next screen enter the name (e.g., "Design course enrollment cost - 1st ISEE bracket," "Design course enrollment cost - 2nd ISEE bracket," "Design course enrollment cost - 3rd ISEE bracket," etc etc), the cost (read here to access the guide on creating custom installment plans), the VAT rate applied if different from the default rate, and save the transaction by clicking the "Add new item".
After then configuring all the necessary costs, two steps will be required from the Student Enrollment panel to complete each student's enrollment, namely:
- After choosing the student to be enrolled, via the center blue button choose the option "Study plans" and then with the search field next to it choose the specific plan and then the annuity. Then click the button to put it in the shopping cart.

- via the central blue button choose the option "Goods and services" and from the search field next to it select the specific enrollment cost that you intend to charge to the student. Then click the button to put it in the shopping cart.
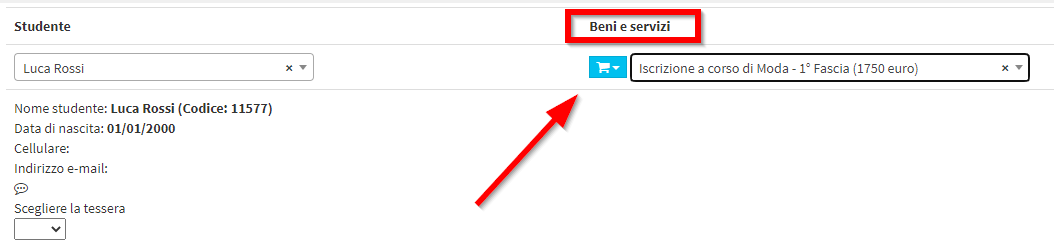
In this way the rows that make up the order will be two, one for entering the student inside the study plan, and one for imputing the annual tuition.
