Integration with Moodle
INTEGRATION WITH MOODLE VERIFIED UP TO VERSION 3.11.X
WITH THE INTEGRATION, USERS WILL NOT BE ABLE TO LOG IN DIRECTLY ON MOODLE (APP AND WEB) BUT WILL HAVE TO LOG IN ONLY VIA SCUOLASEMPLICE
1. Plugin download and activation User Key Authentication
The first step to proceed with configuring the Moodle parameters involves downloading and the consequent activation of the Plugin called "User Key Authentication."
Navigate to. Site Administration → Plugins → Install Plugins:
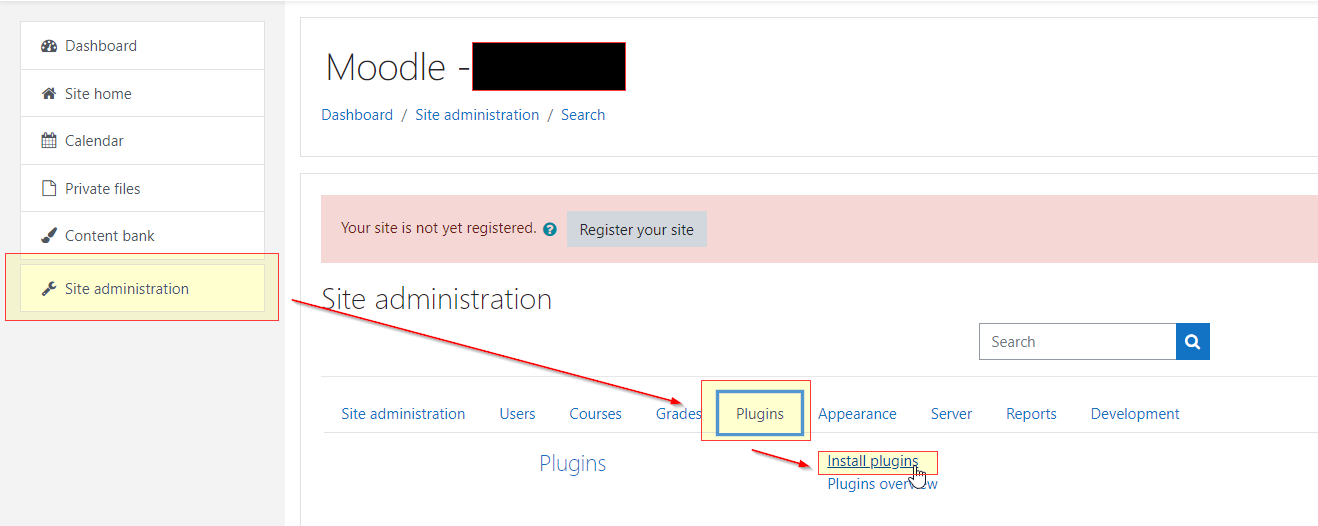
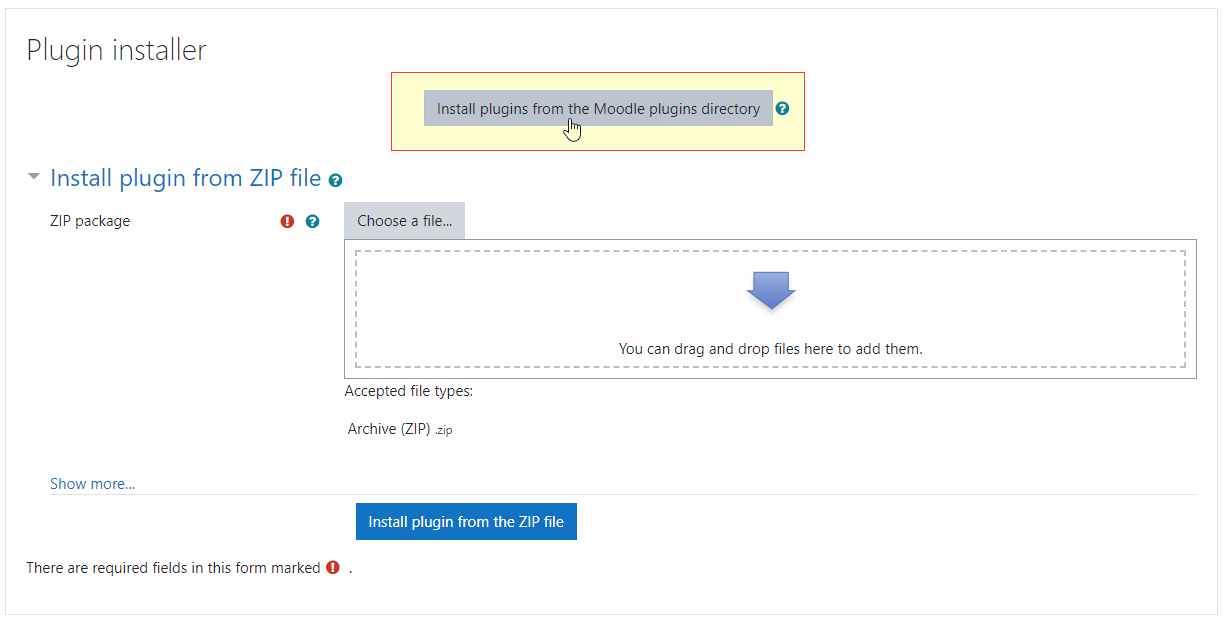
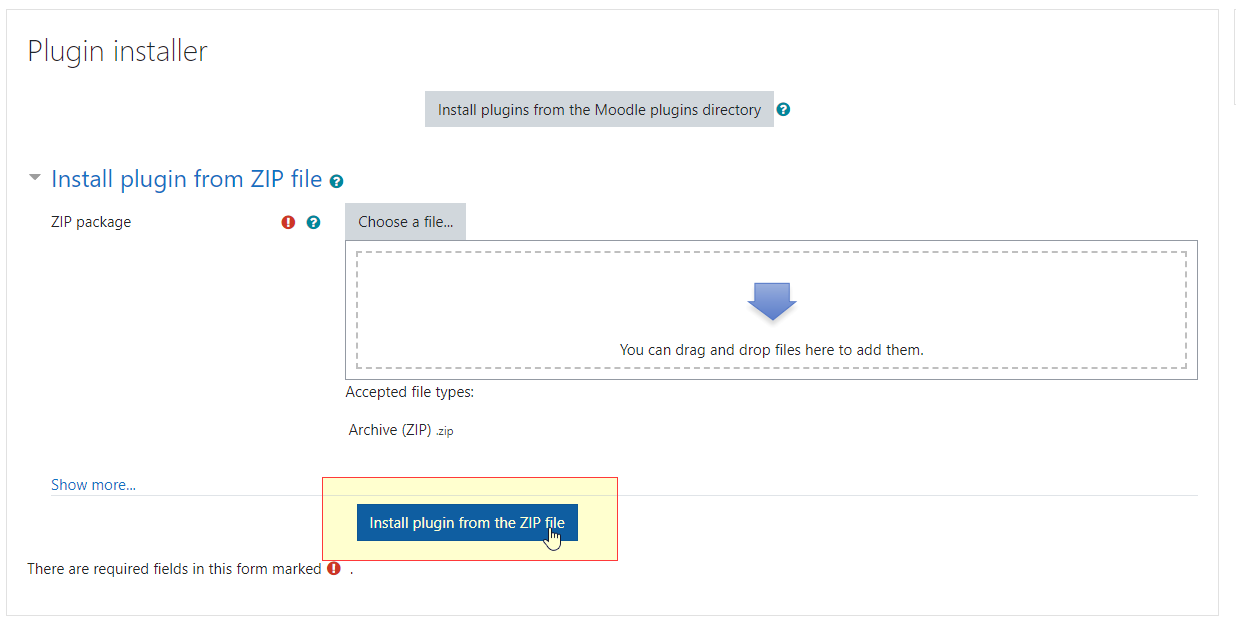
Within the "install plugins" section by clicking on the "Install plugins from the Moodle plugins directory" button we will be redirected to the Moodle Directory:
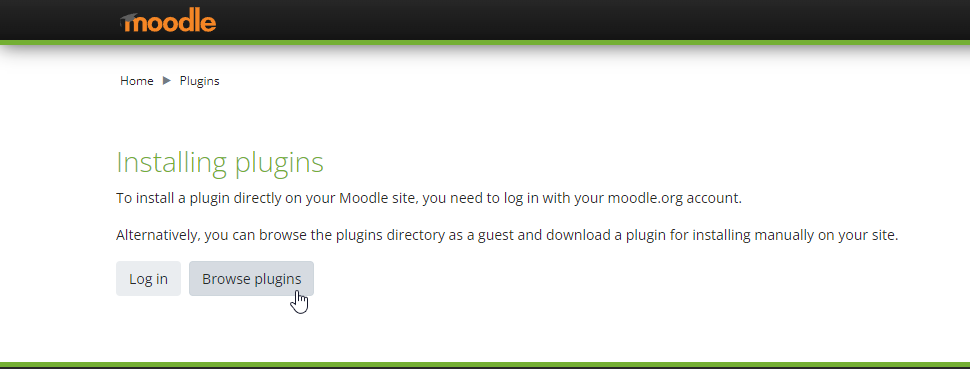
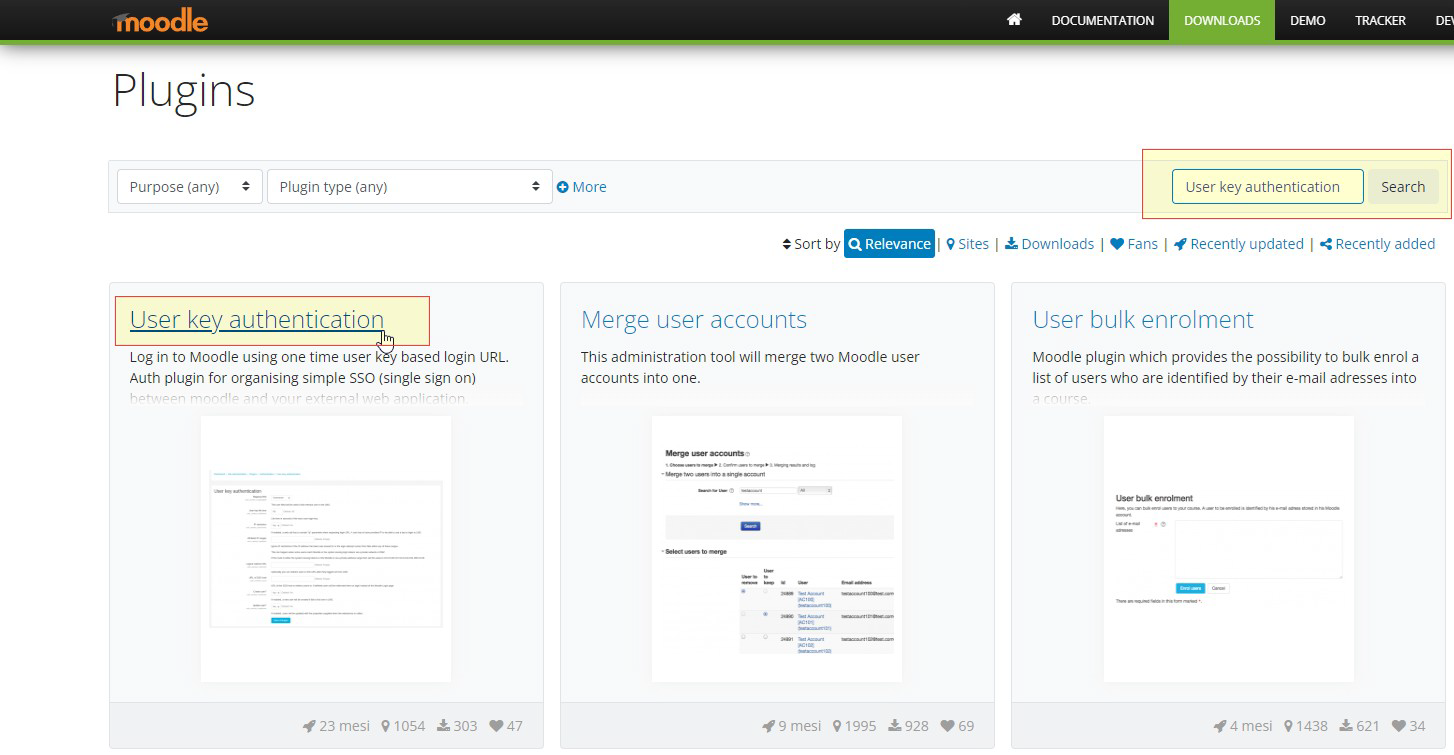
Here by clicking on Browse plugins we will have access to the list of plugins dedicated to Moodle and by entering "User Key Authentication" in the search field we will immediately find the Plugin that is right for us, we can then download and reload it in the appropriate screen of the Plugin Installer:
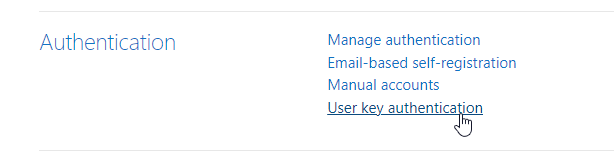
Now that the plugin has been installed, by navigating to Site Administration → Plugins → User Key Authentication we will go to configure the Plugin parameters:
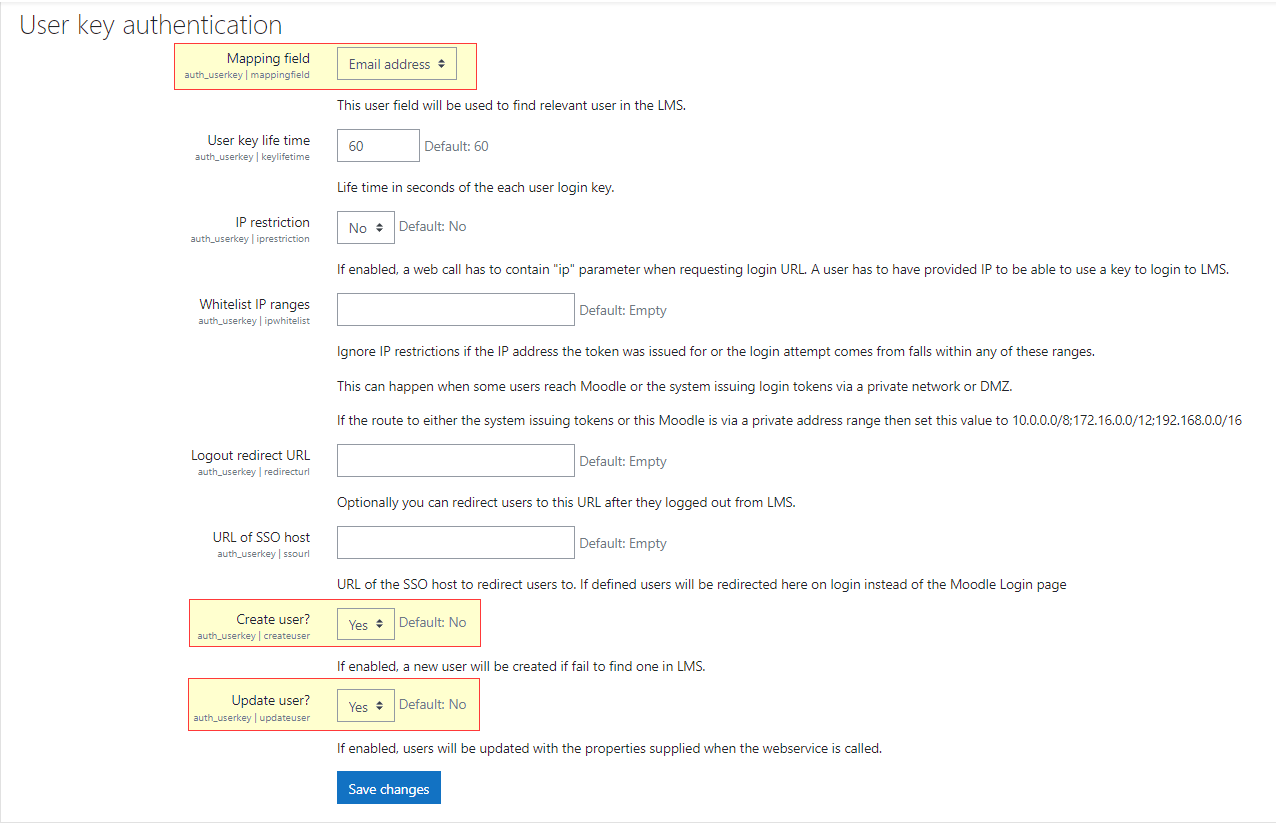
In this section we will need to configure only three parameters useful for integration with ScuolaSemplice:
1. Mapping Field = Email address
2. Create user = YES
3) Upedate user = YES
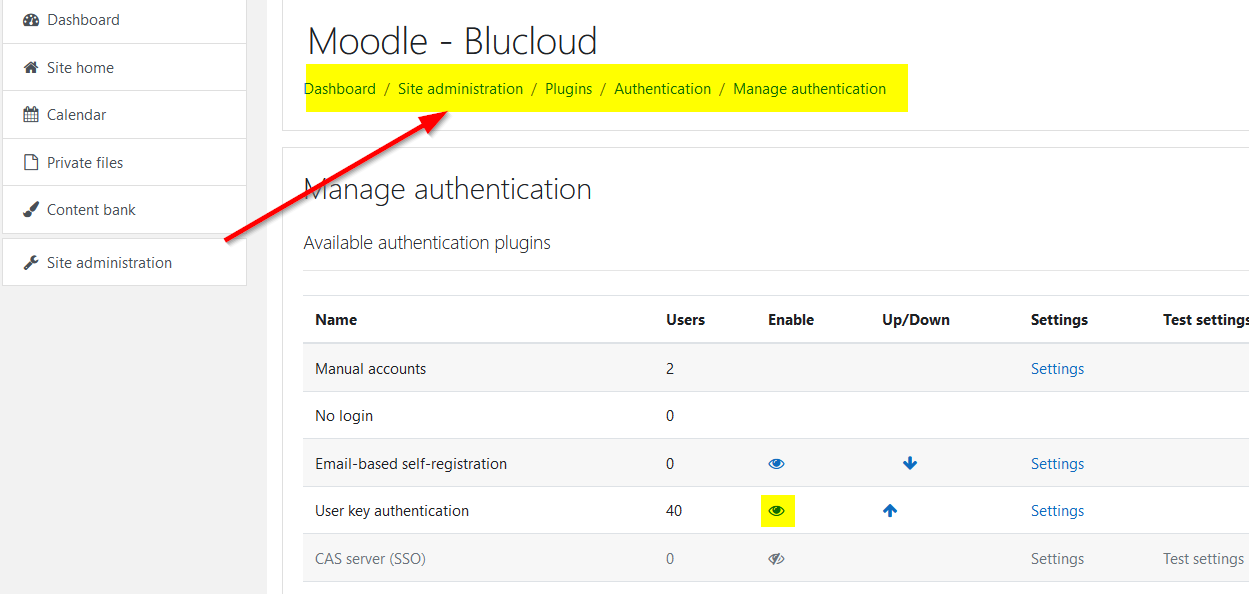
Once the plugin is installed verify that it is set in the "Enable" state by going into the permissions manager and checking that the eye icon is not crossed out in the "Enable" column:
2. Moodle configuration
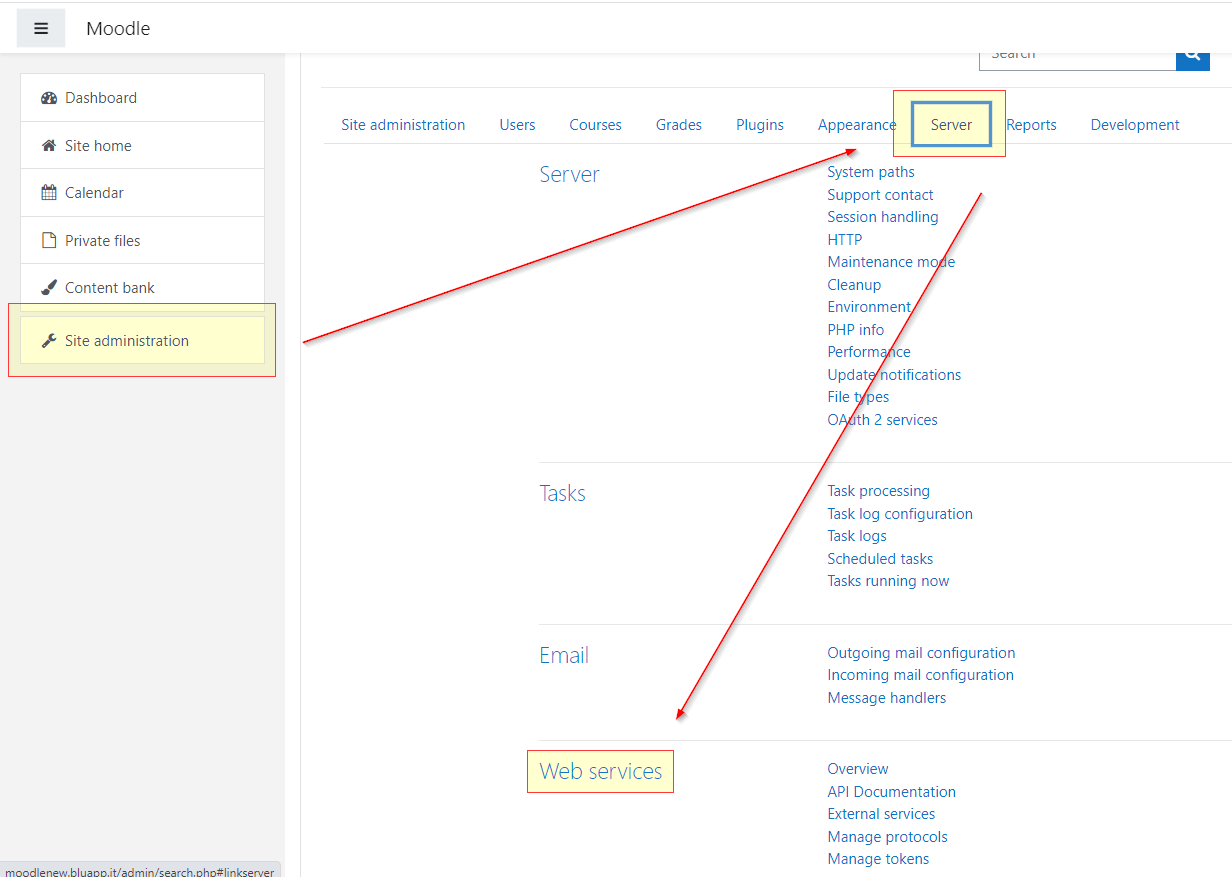
Now that we have done the configuration of the User Key Authentication Plugin, let's move on to the configuration of Moodle by navigating to Site administration→Server→Web Services:
We will have a list of points to follow in order to make the configuration of the various sections of Moodle:

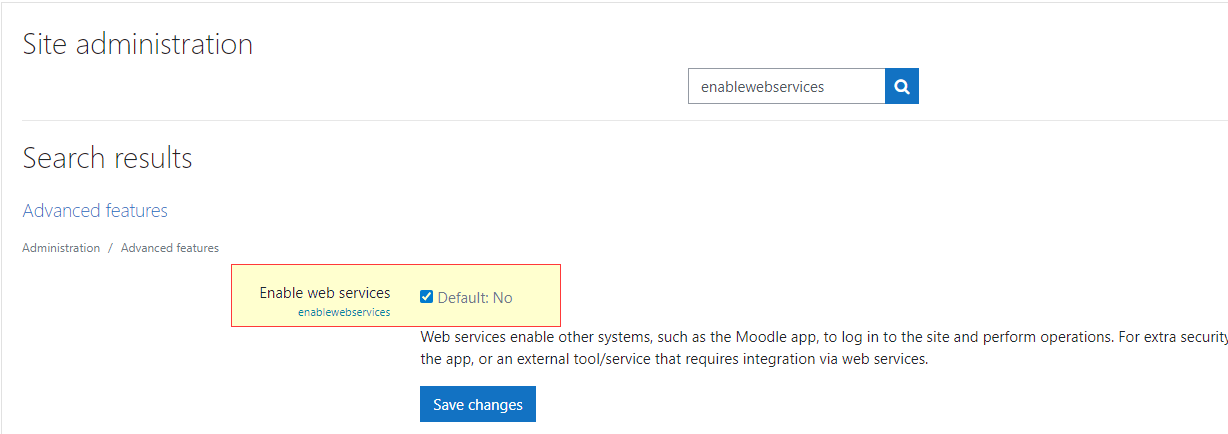
3. Enable Web Services
In this section you will simply need to tick the flag to enable Web services:
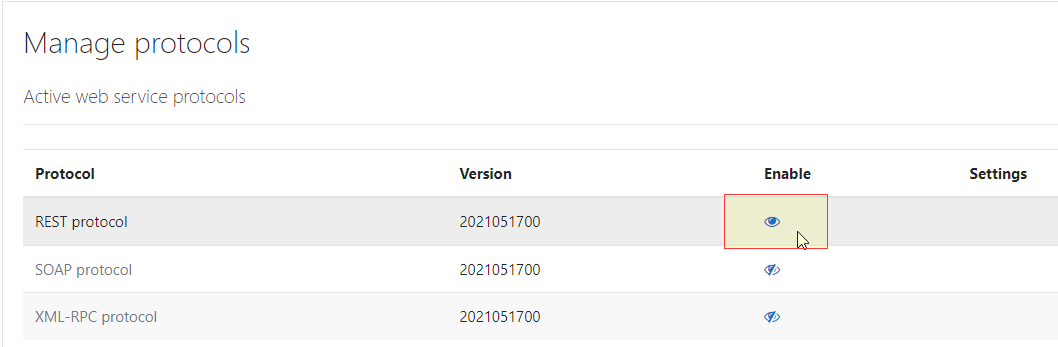
4. Enable Protocols
Enable (by clicking on the eye icon) the parameter REST Protocol:
5. Create a specific user
Now we will need to create a user associated with the Web service that will serve as our interconnection with ScuolaSemplice, only four of the listed parameters will be essential for its creation:
- Choose an authentication method = User Key authentication
- First name
- Surname
- Email address

6.Definition of roles
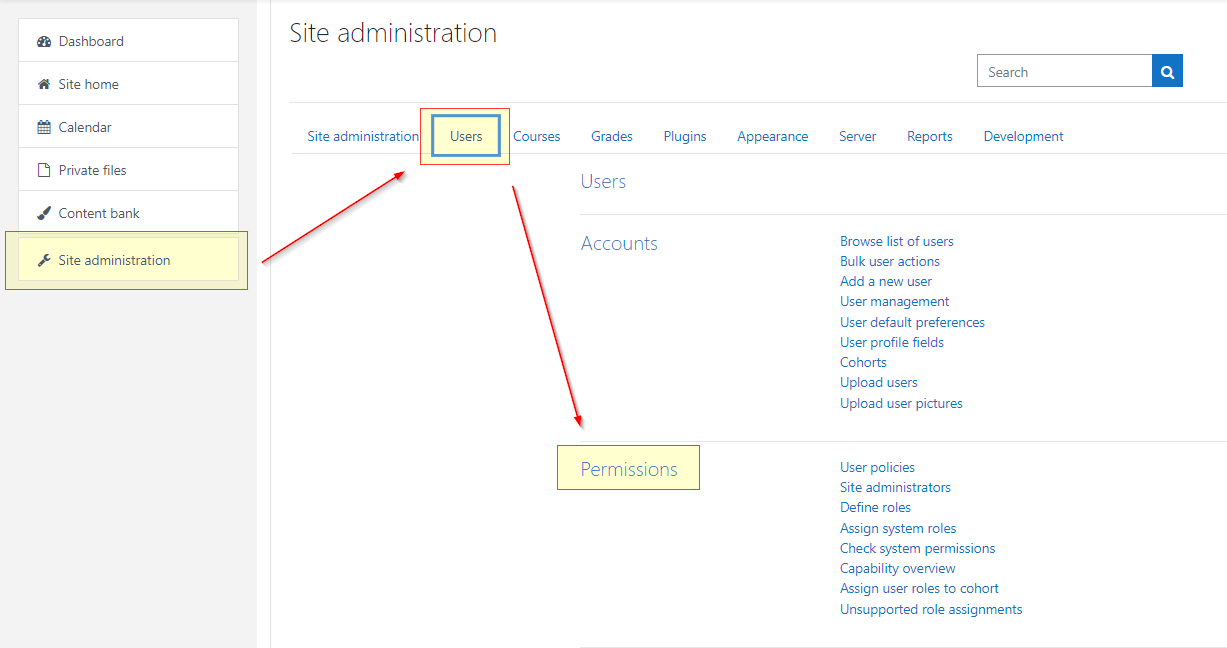
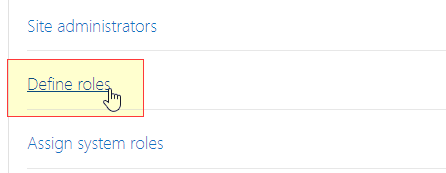
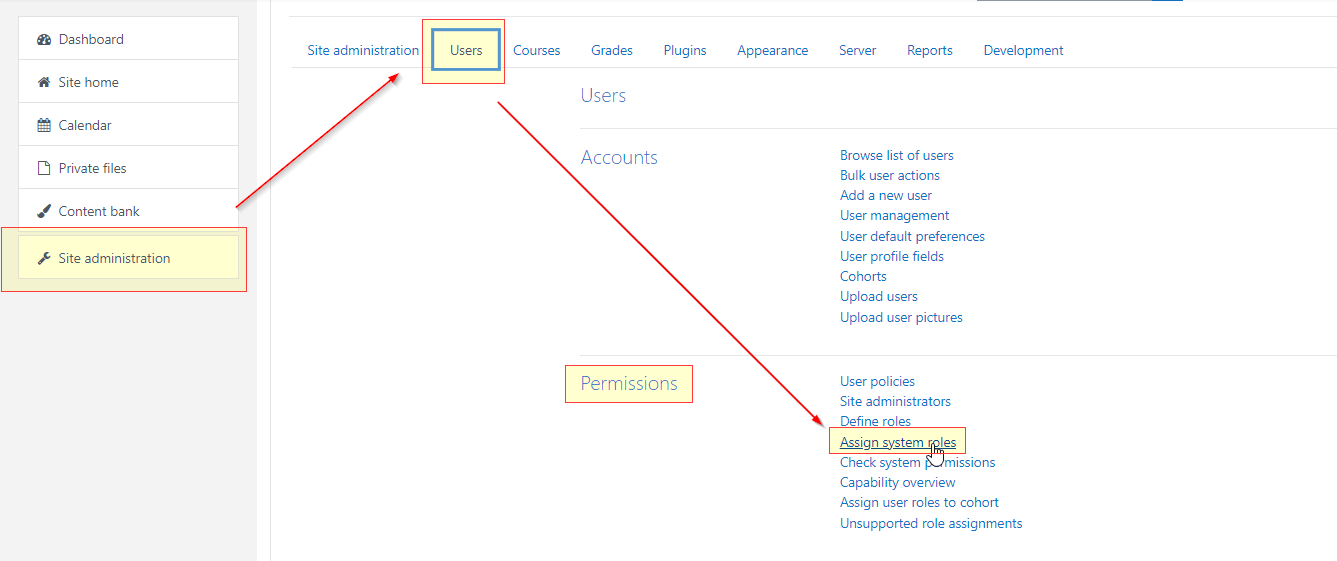
Now you will need to define a specific role to be assigned to the User you just created, to do this we will need to navigate to Site Administration → Users → Permissions → Define roles:
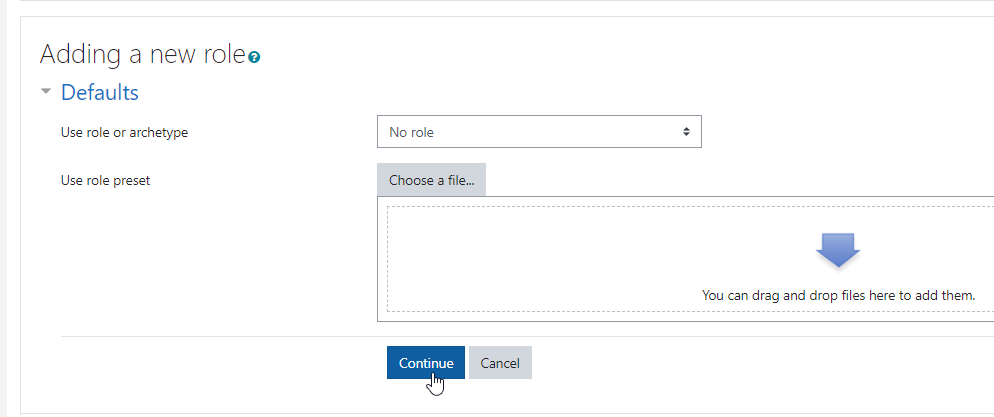
In this section, we will need to create a new role to be given then to our previously created user, to do this just click on the button Add a new role leaving the settings present by default and proceeding from the Continue:
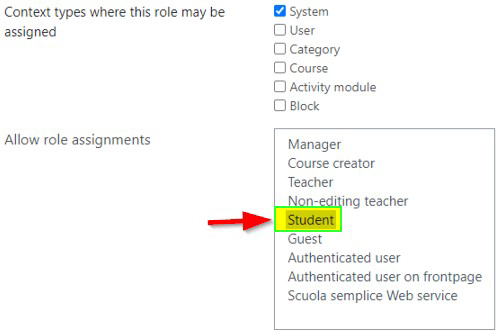
Here it will be essential to enhance the field "Context types w here this role may be assigned" and assign the value "System."
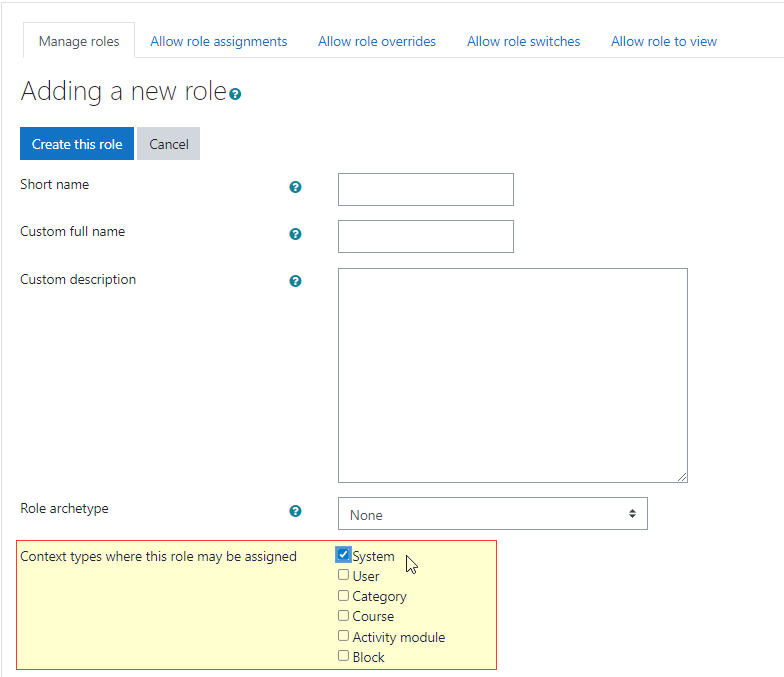
Verify that the following option is selected in order to assign permissions to users:
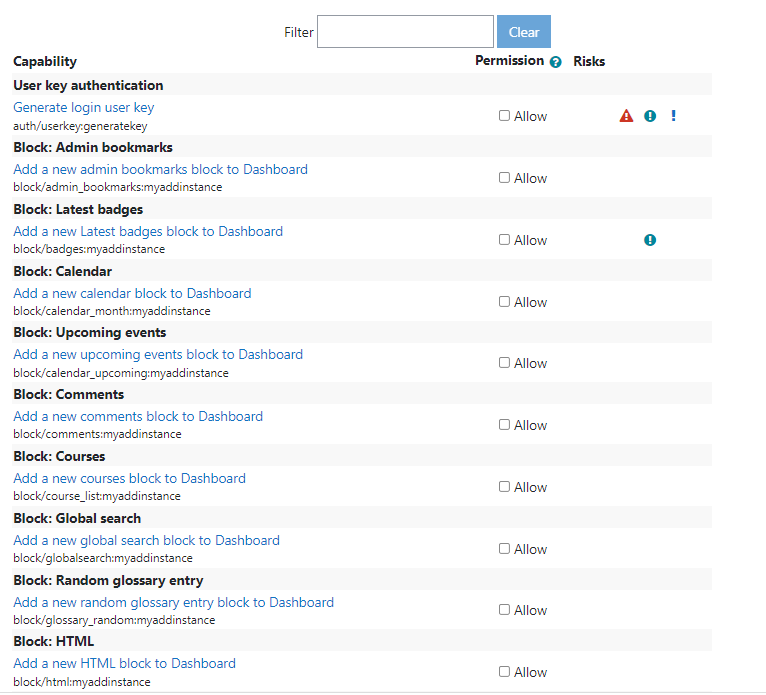
Going down next, we will have to go and enable all the "Capabilities" in the list by simply checking the "Allow" flag, below is a screen with the first ones not yet enabled:
7.Assigning Roles to the User
In order to assign the newly created role to the previously created user, we will need to navigate to Users→Permissions→Assign System Roles:
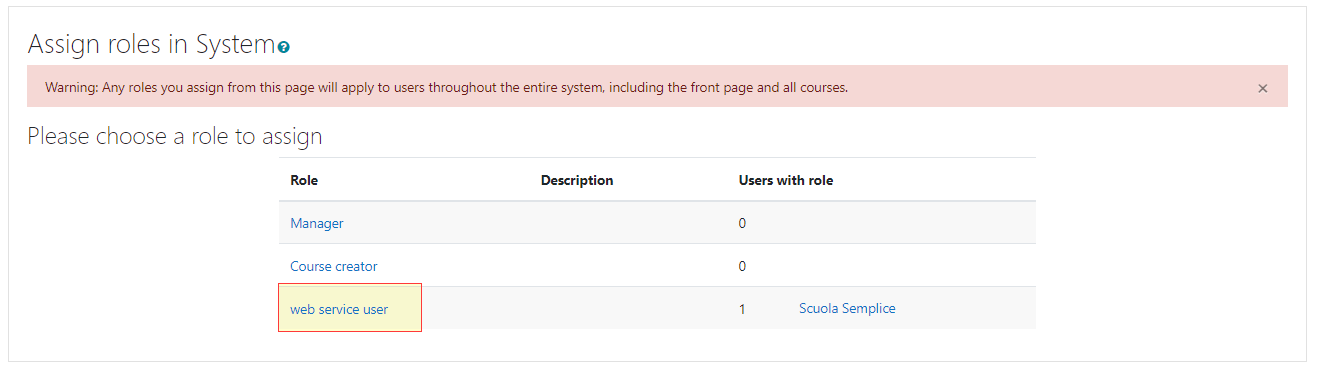
Here we will have to go and select the previously created role, and on the next screen we will be able to dock our User:
8.Select a Service
Continuing through the list of steps for Moodle configuration, we find the selection of Web service:

In this section we will need to go and create a Custom Service to which we will grant access permission only to our initially created User:
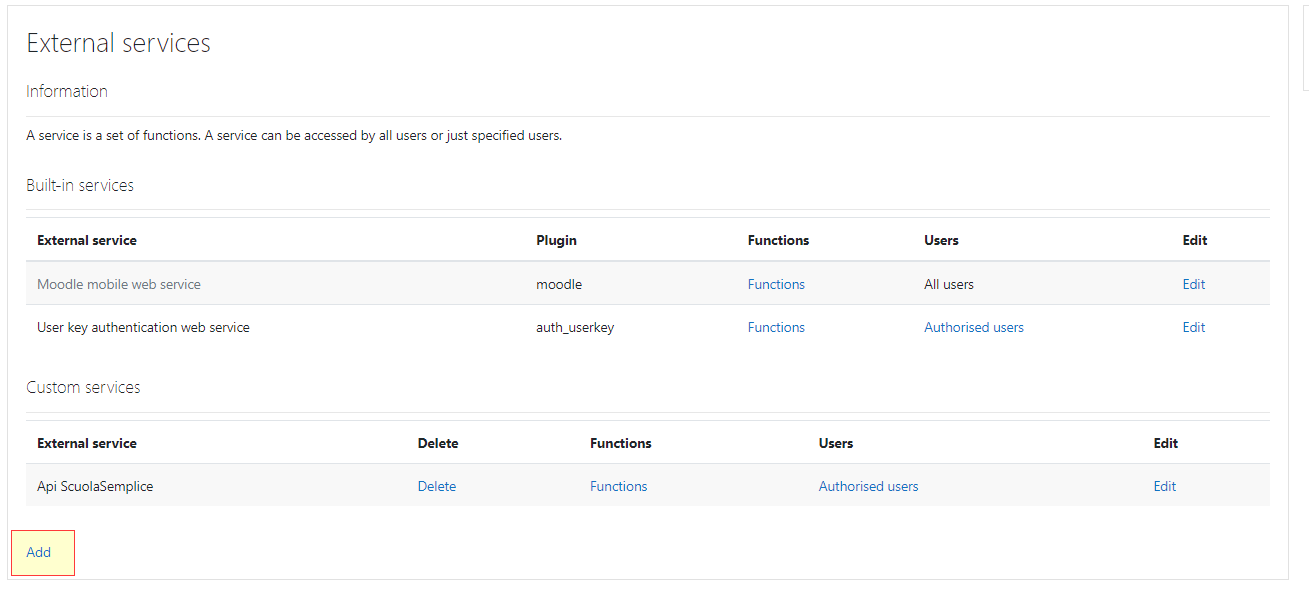
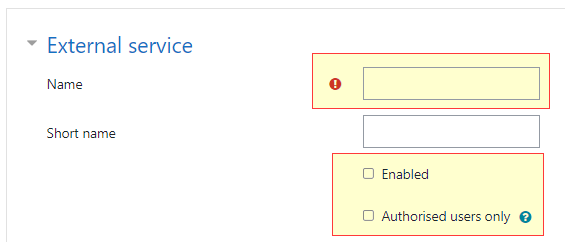
When creating the Custom Service (by clicking on the Add button highlighted in the screenshot above) we will simply indicate a Name and enable both of the exposed flags:
9.Select a Service
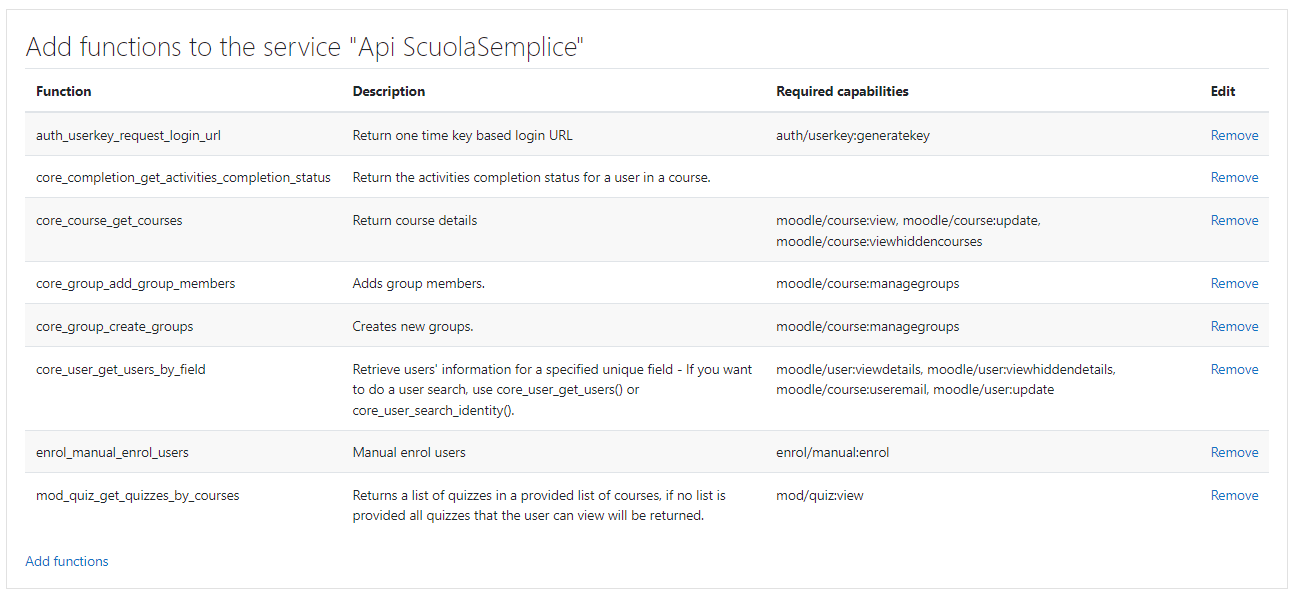
Just created our Custom Service by clicking on Functions:

You will need to add all the functions in the service (add the functions listed in the screenshot):
10.Create a Token for a User
So we have arrived at the last of the steps necessary for configuring Moodle to obtain the Secret Key to be entered in ScuolaSemplice in the integrations section, at this stage it will only be necessary to hook the User and the service created previously:

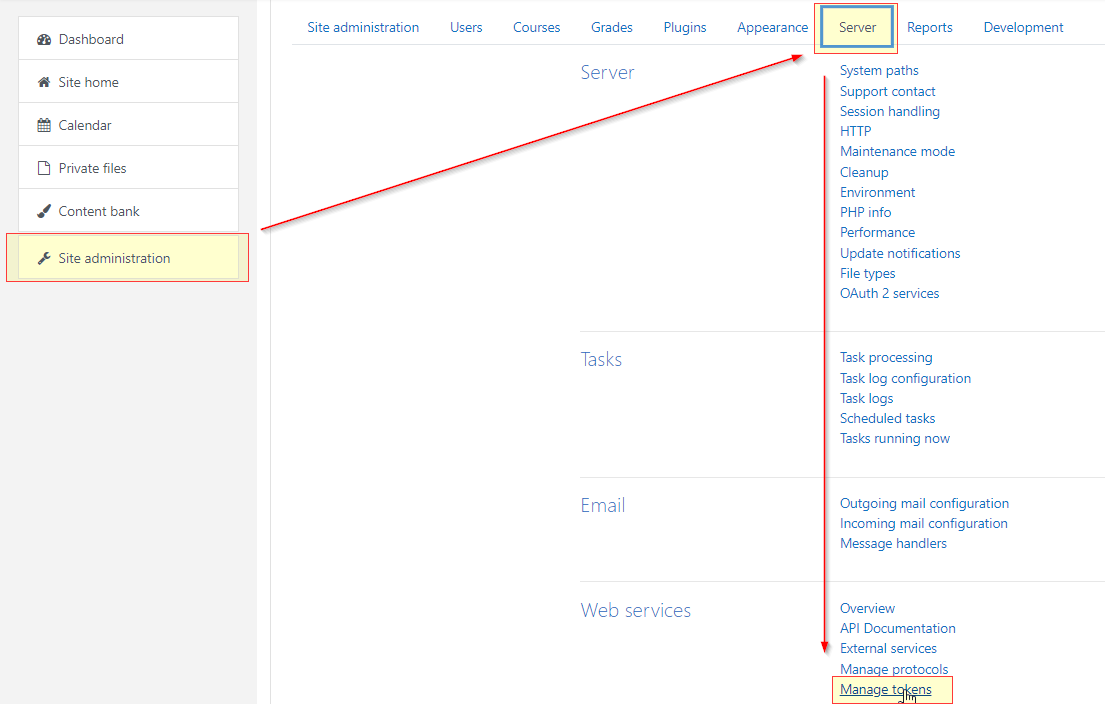
The Secret Key will then be viewable in Site Administration → Servers → Manage Token:

11. Checks for proper integration
In the section Configuration > Integrations > Moodle Integrations. go and enter the information retrieved from Moodle in the appropriate sections:
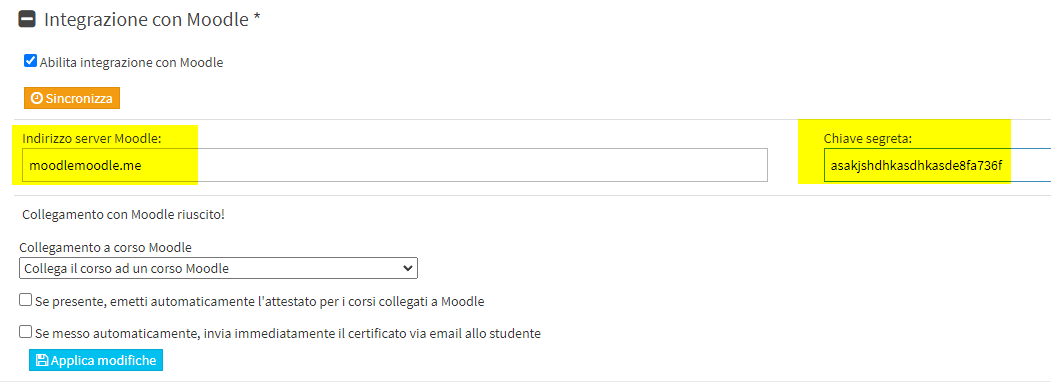
There are 2 possibilities for integrations with ScuolaSemplice :
1 - Link the course to a Moodle course.
In this case to each course ScuolaSemplice will be possible to link a single course ScuolaSemplice.
2 - Link each subject in the multi-matter course to a Moodle course
Within multi-matter course of ScuolaSemplice it will be possible to go and select for each subject the Moodle course to be linked.
Once the connection type has been selected click in the Synchronize.
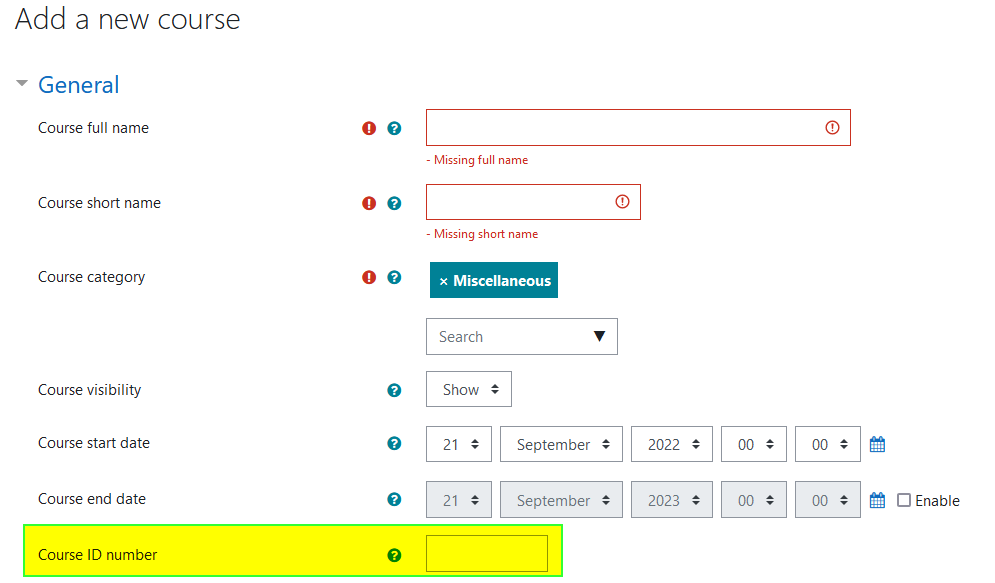
The operation will go to select all courses from Moodle that have the "Course ID number" field valued: